2F-85 & 2F-140 - Instruction Manual
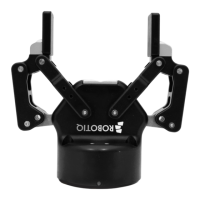
1. Check that gripper ID isdifferent from that of other grip-
pers that will be connected to the robot, and if
required, select a different ID from the "Change ID"
dropdown list.
Caution
Make sure that each gripper has an ID different from
other grippers. Otherwise, communication issues
will occur.
By default, Gripper ID isset to 1 in all grippers
internal memory. When you change gripper ID
through PolyScope, that change is committed to
gripper memory.
2. Click on Activate to activate the gripper.
3. Perform the same routine for all grippers, if applicable,
connecting only one at a time.
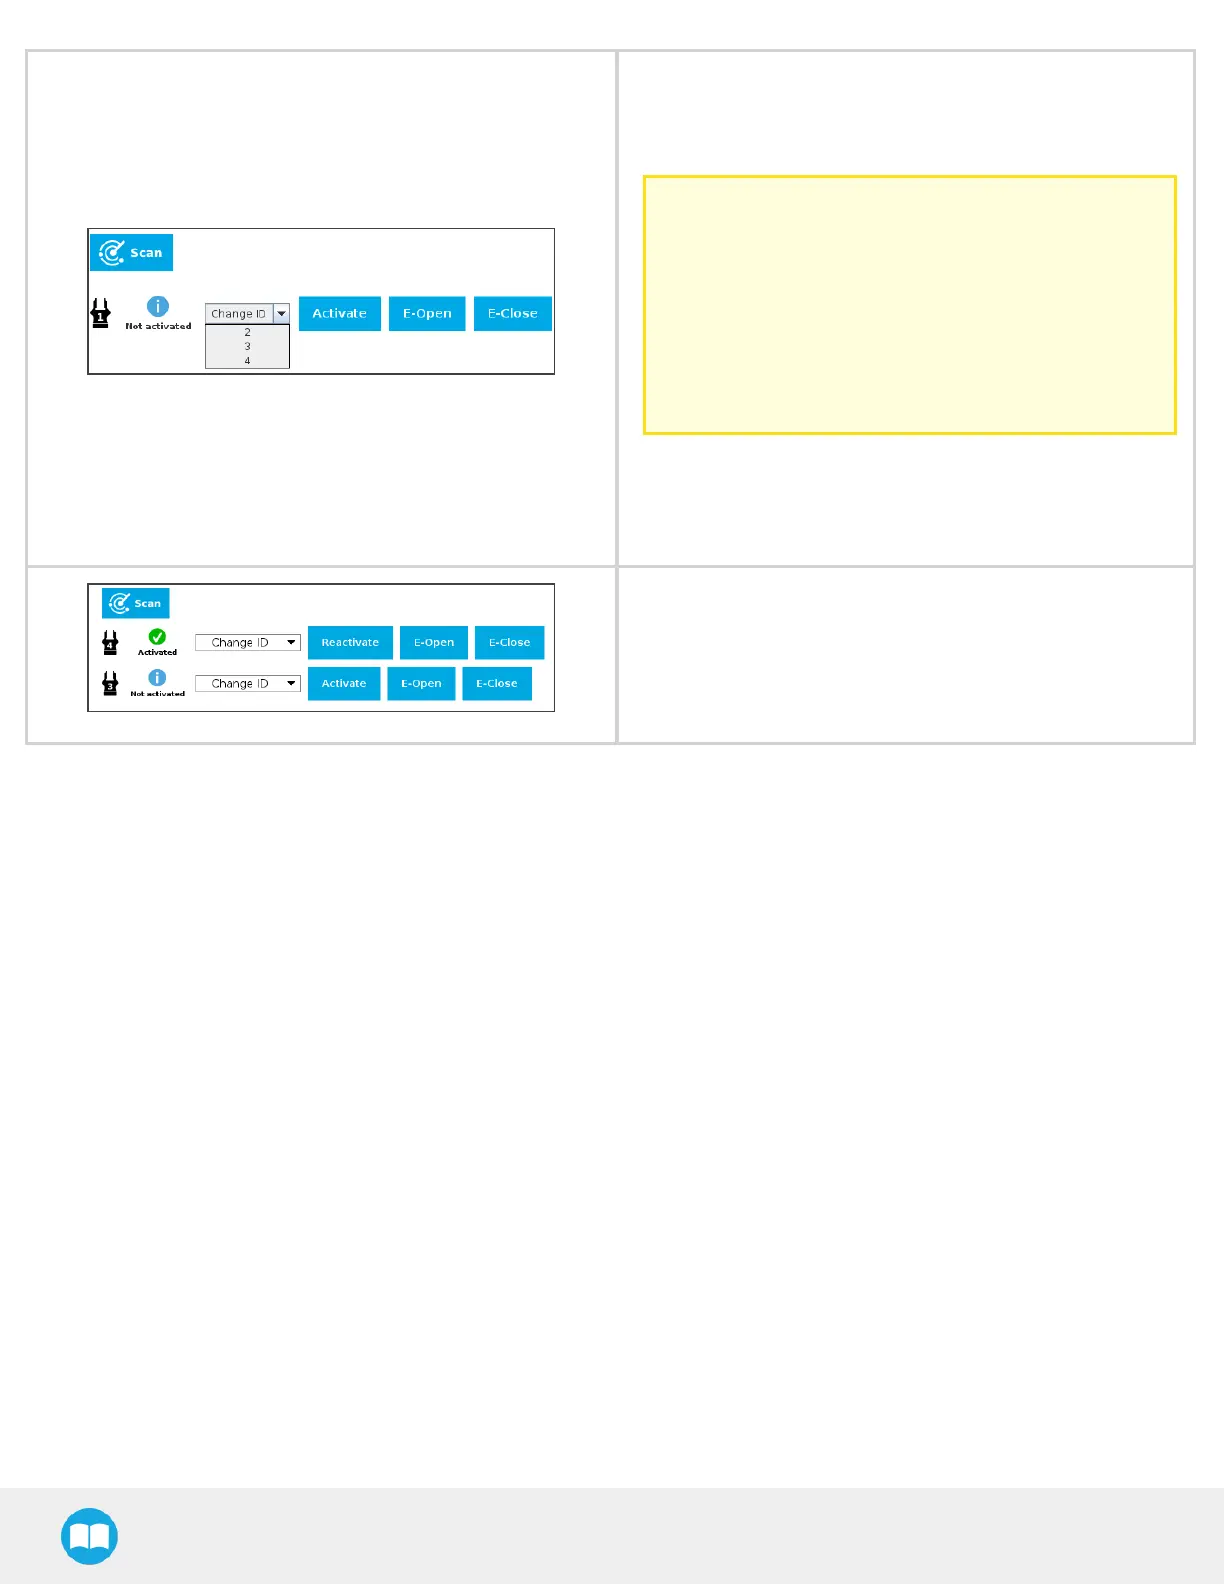
l
Once all gripper IDs have been set, connect them all to the
splitter.
l
Go back to the Dashboard tab and confirm that all grippers
are recognized and can be controlled. Tap E-Open and E-
Close to test each gripper.
44