Roche Diagnostics
E-34 Operator’s Manual · Version 3.1
13 ISE operation Cedex Bio System
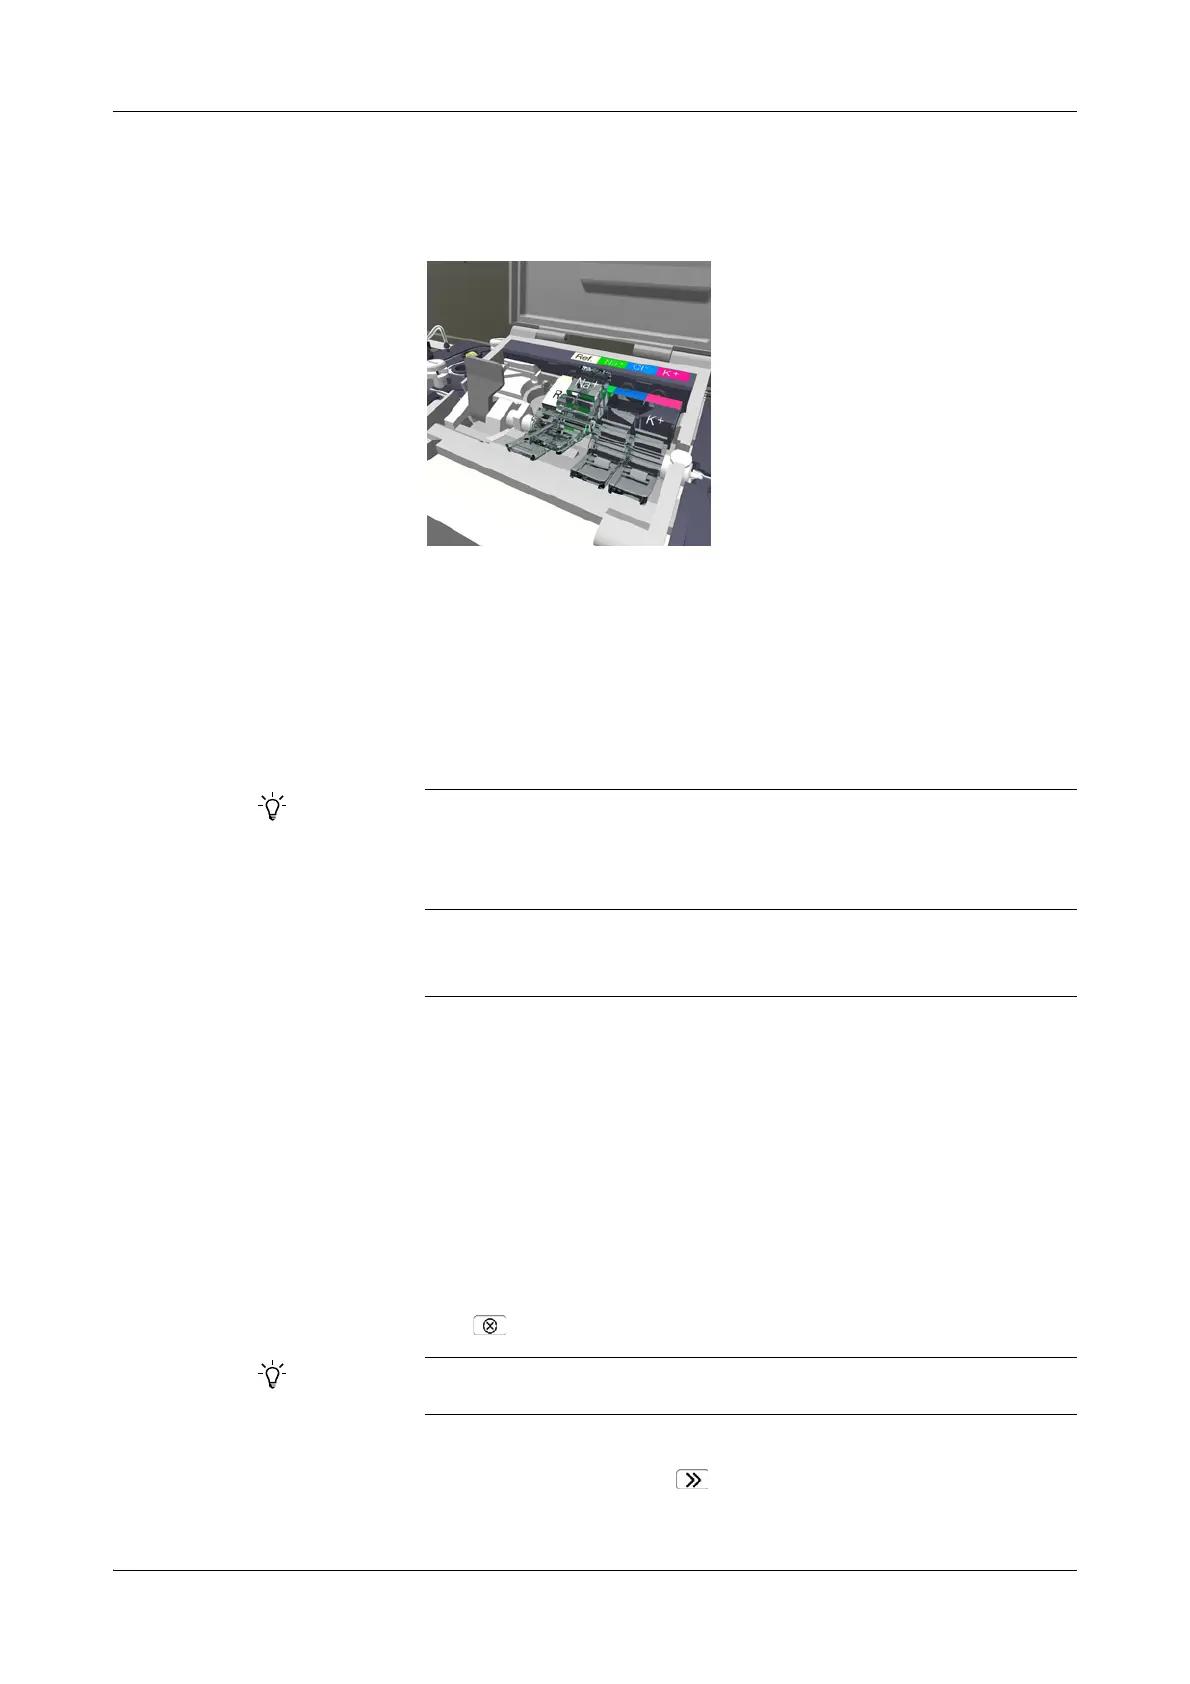
Replacing electrodes
8
Remove the electrode.
Lift it at the front to disengage, then remove it.
9
On the screen, press the electrode button to confirm that you have removed the
electrode.
You are asked to scan the barcode of the new electrode or to type its ID manually.
10
Scan the electrode barcode on the package insert or type the ID manually.
(If you want to install a dummy electrode scan its barcode.)
You are asked to insert the new electrode.
11
Insert the new electrode.
Push it back towards the contacts and press it down until it clicks into place.
12
Fasten the tension lever.
13
Close the electrode block lid.
14
On the screen, press the electrode button to confirm that you inserted the
electrode.
(If you inserted a dummy electrode, press the button of the electrode you replaced
with a dummy electrode.)
A screen is displayed that shows detailed information on the electrode.
15
Press .
16
Close the ISE cover.
17
On the ISE status screen, press to continue the process.
A placement list is displayed.
Fixed electrode positions
Always replace an electrode with the same type or with an ISE Dummy Electrode. (The
ISE Reference Electrode must always be replaced with another ISE Reference Elec-
trode. ISE Dummy Electrode is not allowed on this position.)
Keeping the barcode
Keep the electrode barcode in a safe place. You will need it again in the case of a data-
base import.
At this stage, if you want to replace another electrode, press its button and continue
with step 7.