23/05/2019Roundshot VR Drive Instruction Manual – Firmware Version 2.023 120
6. Tips & Tricks
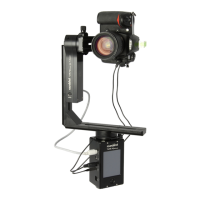
6.1 Hardware realignment of nodal rail with y-motor
Step 1: Turn off the VR Drive so it moves into the
parking position
Step 2: Use the allen key to open the screw holding
the y-motor in the L-bracket
Step 3: Shift the y-motor up so that the centre of the
y-motor rotation axis is accessible
Step 4: Detach the VR bracket from the VR Drive by
opening the quick adaptor
Step 5: Place the VR bracket with y-motor flat on an
elevated surface with the centre of the y-motor
rotation axis freely suspended
Step 6: Now open the screw inside the y-
motor rotation axis with the small allen
key (counter-clockwise)
Step 7: Move the nodal rail down so that
it is flat on the surface and parallel with
the y-motor
Step 8: Tighten the screw inside the y-motor rotation
axis again with the small allen key (clockwise)
The nodal rail is now again in the correct (parallel)
position.
Centre
of rotation
axis
A realignment of nodal rail with the y-motor may be necessary in the following cases:
• after a “transport error” when the nodal rail got blocked
• when the y-motor can no longer initialise when starting up
• when the nodal rail no longer aligns with the y-motor when the VR Drive is off
Another technique is to perform realignment of the nodal rail with the y-motor is to
use the y-align feature in the x/y menu. For further information please refer to
chapter 2.4 “Navigation – y-align”
Reassemble the VR Drive x and y motors by connecting the x-y motor cable and verify if the y-
motor initialises and if the nodal rail is moved to the correct starting position (normally at 0°).