23/05/2019Roundshot VR Drive Instruction Manual – Firmware Version 2.023 25
2.1.2 Attaching y-motor on bottom plate (continued)
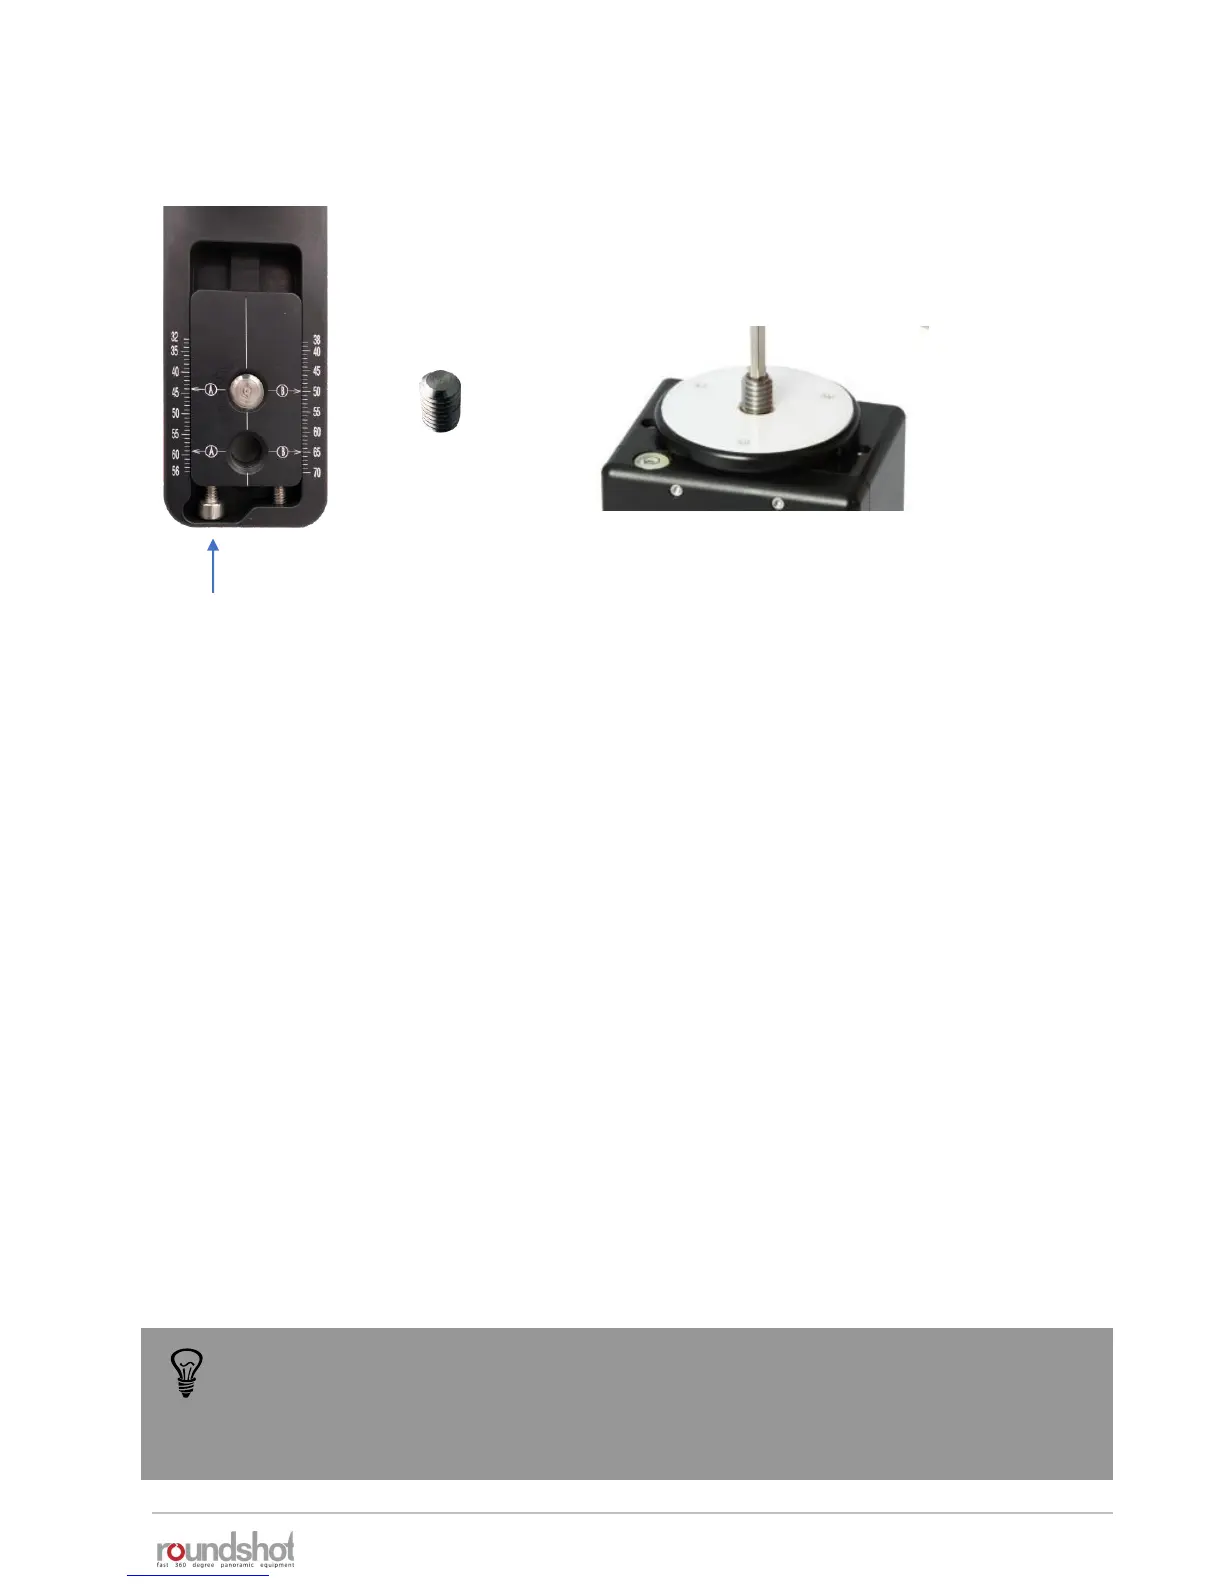
The bottom plate is attached onto the VR Drive x-motor
using the 3/8’’ screw which is attached beneath the quick
adaptor (5).
Center the camera by turning the adjustment screws and by positioning the viewfinder cross
exactly in the middle of the 3/8’’ screw (rotation axis.
When the two screws are attached in position “A” as shown in the above example, read the
value on the left the 3/8’’ screw and the “A” symbol.
If position “B” is used, read the value on the right of the 3/8’’ screw and the “B” symbol.
Enter this value in the VR Drive program – as “A value”.
adjustment screws
Using the bottom plate is ideal when always using the same camera. On the other
hand, the VR bracket (L-bracket) is more convenient when flexibility in the choice of
camera and/or the vertical position (for example for long lenses/gigapixels) is
important.