Working with SSL Certificates
Basic Certificate Installation
376 Ruckus Wireless, Inc.
NOTE: Do not disconnect ZoneDirector from its power source until this procedure
is complete.
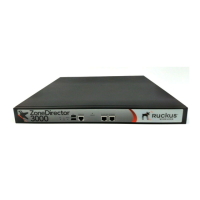
1 Locate the Reset pin hole on the front panel of ZoneDirector.
2 Insert a straightened paper clip in the hole and press for at least 5 seconds.
After the reset is complete, the Status LED blinks red, then blinks green, indicating
that the system is in factory default state.
After you complete the Setup Wizard, the Status LED will be steady green.
Working with SSL Certificates
SSL certificates enable device or user identification, as well as secure communica-
tions. ZoneDirector captive portal services and the web UI use an SSL certificate
when establishing HTTPS connections.
The default SSL certificate that is installed on the ZoneDirector is self-signed and
therefore not trusted by any web browser. This is the reason why the SSL security
warnings appear when establishing an HTTPS connection to the ZoneDirector.
To eliminate the security warnings, administrators may purchase a trusted SSL
certificate from a public Certificate Authority (CA) such as VeriSign and install it on
the ZoneDirector.
Basic Certificate Installation
The certificate installation process is as follows:
• Generate a Certificate Signing Request (CSR) with the required requester
information.
• Submit the CSR to a public CA for signing.
• Receive a signed certificate from the CA.
• Import the signed certificate into ZoneDirector.
Generating a Certificate Signing Request
If you do not have an existing SSL certificate, you will need to create a certificate
signing request (CSR) file and send it to a certificate authority (CA) to purchase an
SSL certificate. The ZoneDirector web interface provides a form that you can use
to create the CSR file. Fields with an asterisk (*) are required entries. Those without
an asterisk are optional.

 Loading...