4 Service Screen
4.5 I / O ports
AT-10 plus
Page 22
Art.-no.: 2.540043 Rev.: a
4.5 I / O ports
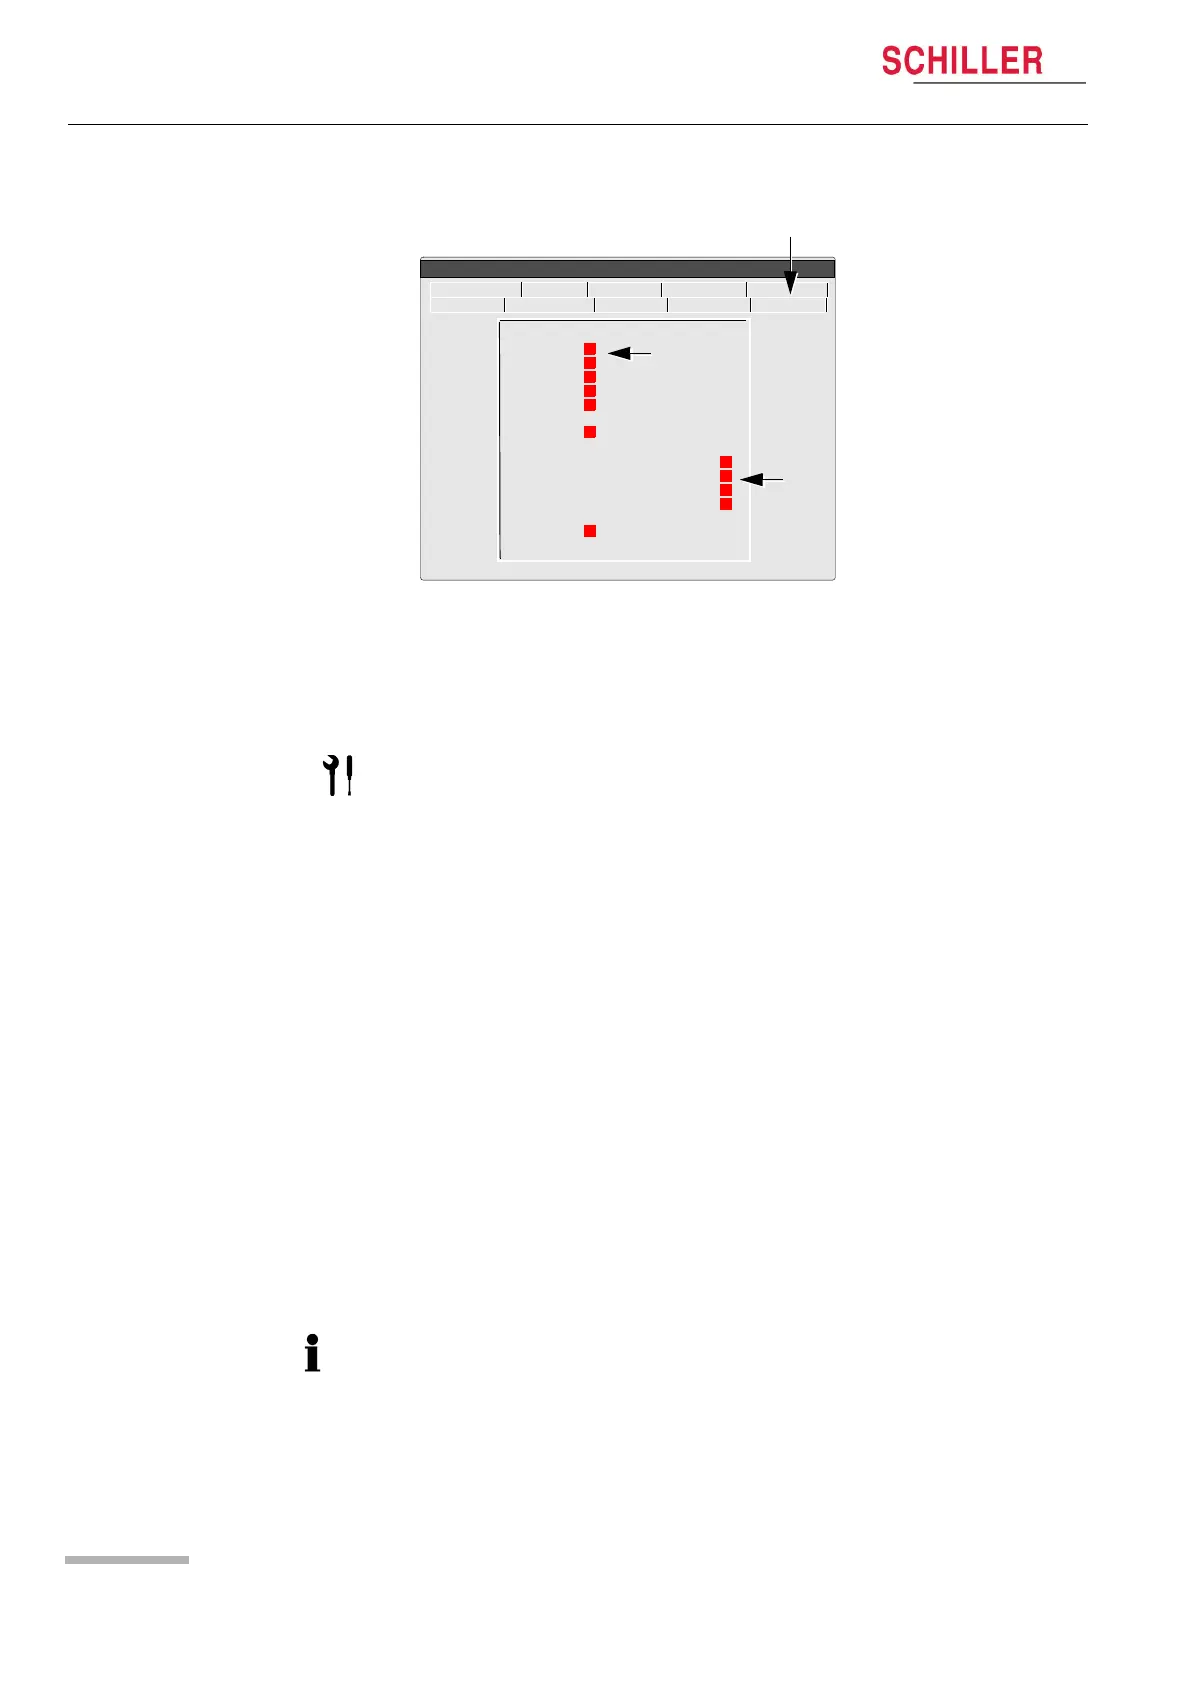
This screen enables the Input output ports to be tested / checked. Signals are send
from the AT-10plus and checked for correct reception. Both the RS-232 ports and the
analogue ports can be tested.
4.5.1 Checking the RS-232 ports
The following ports can be checked:
• Treadmill (back panel)
• Ergo (back panel)
• RS-232 (side panel)
Proceed as follows:
1. Position the RS-232 test plug (pin 2 (TX) and 3 (RX) shorted together) in the port
to be tested.
2. The red square (1) changes to green to indicate that the port is functioning.
** RS - 232 test **
TM :
Ergo :
Spiro :
SpO2 :
NIPB :
SCM :
** Ergo test out/in **
DC OUT 1 > -3 > DCIN 1 +
DC OUT 2 > 4 > DCIN 2 +
QRS OUT > 0 > RPMIN
LOADOUT > 0 > LOADIN
TMUP > FUSSIN
TMDOWN > -3 > FUSSIN
ECG NIBP Spiro HW-Config. I/O + ports
Service
Character Colour Test Battery
Software
1
2
The testing of the ports requires the following test equipment. Details of this test
equipment is given at the end of this book (see page 72).
• RS-232 test plug
• DC In / DC Out test cable assembly
• Test plug and switch (ERGO check)
The Spiro and NIBP RS ports are internal and cannot be checked with the test plug.