6-10
© 2014 SeaStar Solutions Optimus 360 Installation Supplement, Rev. B
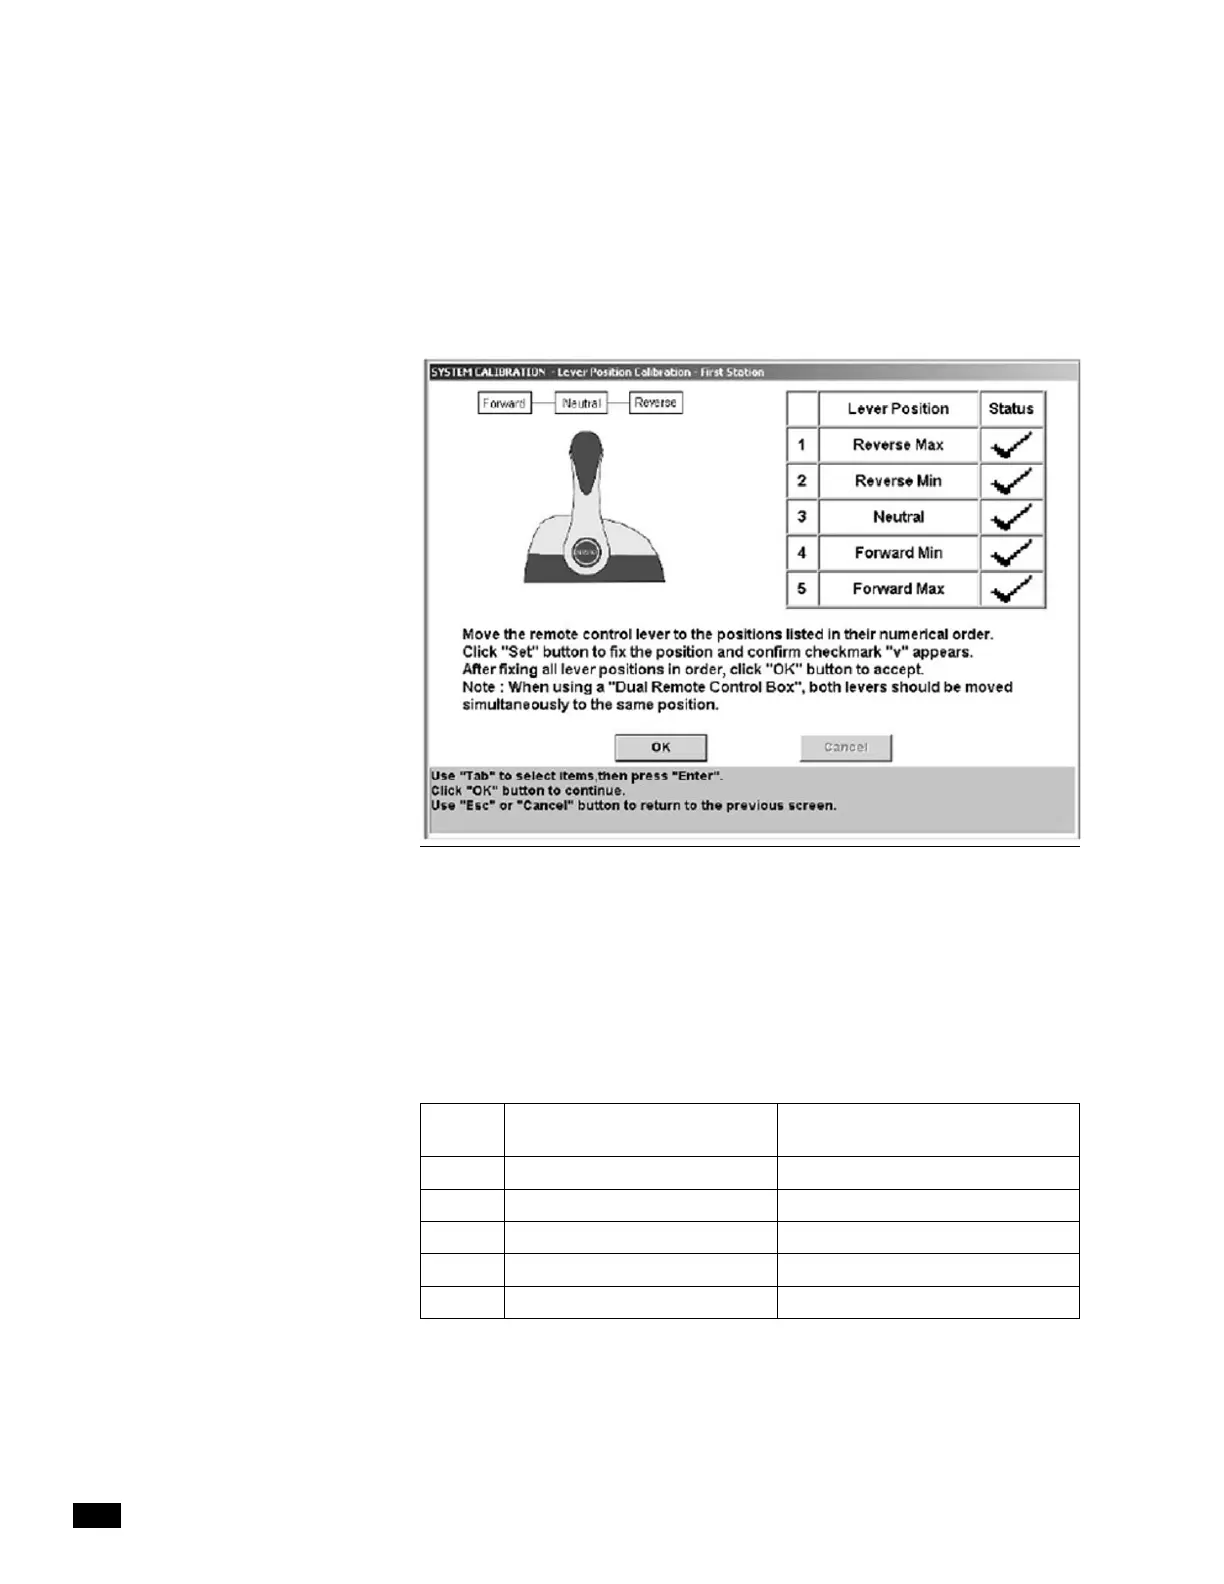
Figure 6-14. Save calibrated values.
6. When all lever positions have been set, and the screen shows
check marks next to all of them (see Figure 6-14), return the
control levers to the neutral position and click OK to save the
calibration.
7. You will be prompted to calibrate the second remote control. If the
boat has a second remote control, calibrate it now. If the boat has
only a single remote control you will use the joystick lever to perform
the calibration. Use table 6-1 to find the joystick position that
corresponds with each lever position shown in the calibration
wizard. Move the joystick all the way in each required direction,
then click Set.
8. After you have clicked OK to save the calibration you will see a
final dialog box indicating that the system calibration has been
completed. Click OK to return to the main menu.
Step Suzuki Lever
Position
Joystick Equivalent
Position
1 Reverse Max Reverse
2 Reverse Min Port
3 Neutral Center
4 Forward Min Starboard
5 Forward Max Forward
Table 6-1. Lever to joystick position cross-reference.
 Loading...

