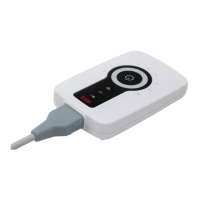
Instructions for Use
Resting & Stress ECG with seca ct330/331 and seca diagnostic 5.9
2.6.2 Sequences after switching on
Immediately after switching on (keep the on/off button pressed for at
least 1 s), all LEDs light up. The device starts and can be used.
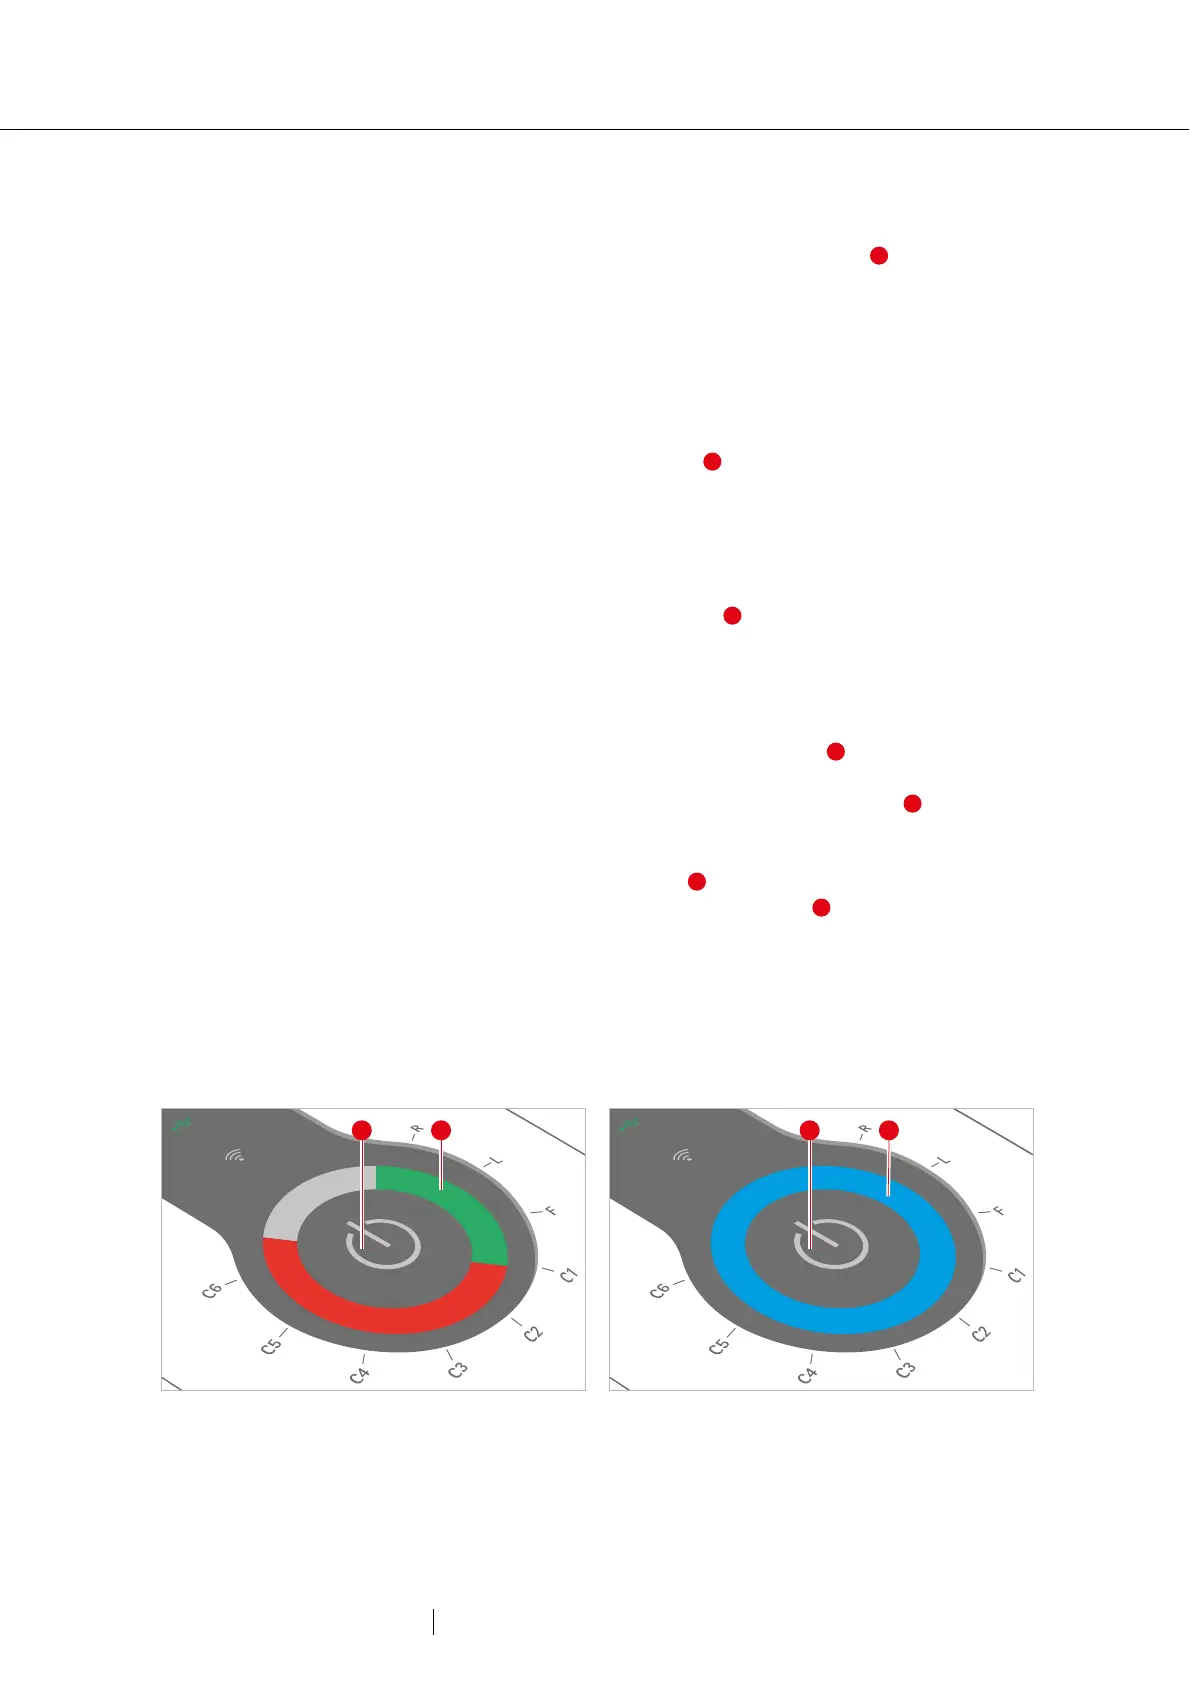
Electrode control
After switching on, the LED ring indicates the quality of the electrode
application. If the electrodes are not applied to the patient, all LEDs light
up red. If the electrodes are correctly attached to the patient, the
corresponding LEDs light up green . This check also works without a
connection to seca diagnostic.
Starting/stopping recording on the device
An ECG recording can be triggered not only via the software interface,
but also by pressing the on/off button on the device. For this, seca
diagnostic must be configured accordingly, a patient must be selected
and seca ct330/331 must be connected to seca diagnostic. The
following recording types are possible:
→ Automatic ECG by pressing the on/off button : For automatic
ECG, recording duration (at least 10 s) and procedures after
recording are preset. After pressing the On/Off button , the
recording starts. The LED ring lights up blue and shows the
progress of the recording. When the recording time has elapsed, the
entire LED ring lights up blue .
→ Manual ECG by pressing the On/Off button : In manual ECG, the
recording is performed in any length. The recording must be started
and stopped manually with the On/Off button. During the first 10
seconds, the blue LED ring behaves in the same way as for an
automatic ECG recording. From then on, the LED ring lights up
inverted and takes 10 s per further run. The recording can be
stopped by pressing the on/off button.
3: Electrode control after switching on
4: Recording progress