Instructions for Use
Resting & Stress ECG with seca
ct330/331 and seca diagnostic 5.9
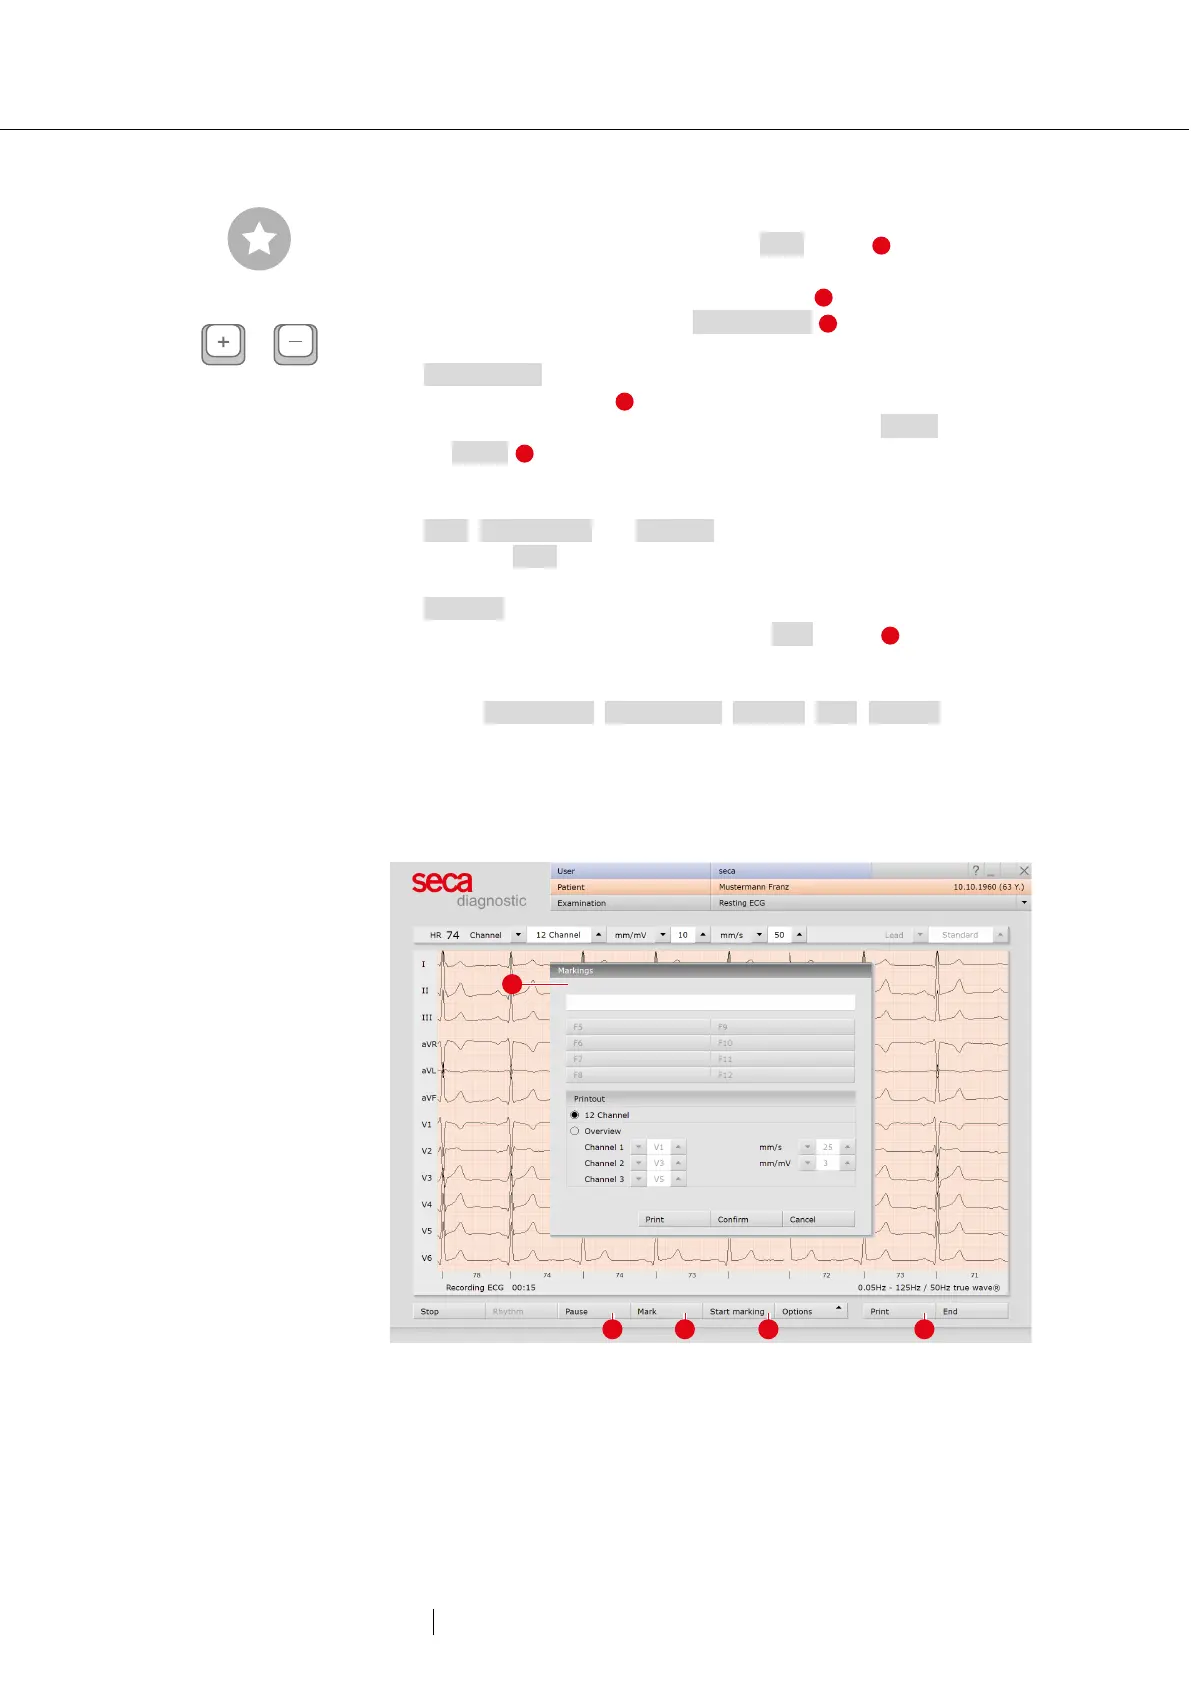
Editing options during the recording process
→ Mark ECG automatically: Clicking the Mark button automatically
marks the last six seconds of the recording. A dialogue box opens
for naming, printing and saving the marking .
→ Mark the ECG manually: With Start marking , you can determine
the length of the marker yourself. The marker runs until you click on
Stop marking. A dialogue for naming, printing and saving the
marked ECG section opens.
→ Viewing ECG, marking and measuring HR during a Pause: Clicking
on Pause stops the screen display. The recording continues and
is displayed on one channel. The scroll bar can be used to view the
current recording. The “Mouse function” area (top right) contains the
Mark, Measure HR and Measure tools. By dragging the red cursor in
the ECG (Mark mouse function), you can mark sections. A dialogue
box opens for naming, printing and saving the marking. Click on
Continue to return to the normal view.
→ Online ECG print (print ECG): With the Print button , a page of
ECG is printed out from the point of clicking. The printout contains
4.5 to 9 seconds of ECG depending on the display speed.
Under Examination, Resting ECG, Settings, Print, General you can
specify in the area “Online ECG print settings” whether the ECG
should be printed as it is displayed on the monitor or whether the
online print should be done according to the already specified print
settings for analysed ECG.
Fig. 18: Resting ECG recording, editing functions
Tip: Keyboard shortcut “Change
amplitude (mm/mV)”.