74
CONTROL PANEL
5
Refer to Steps 2 to 4 and work in reverse order to attach the replacement
△
button and reassemble the
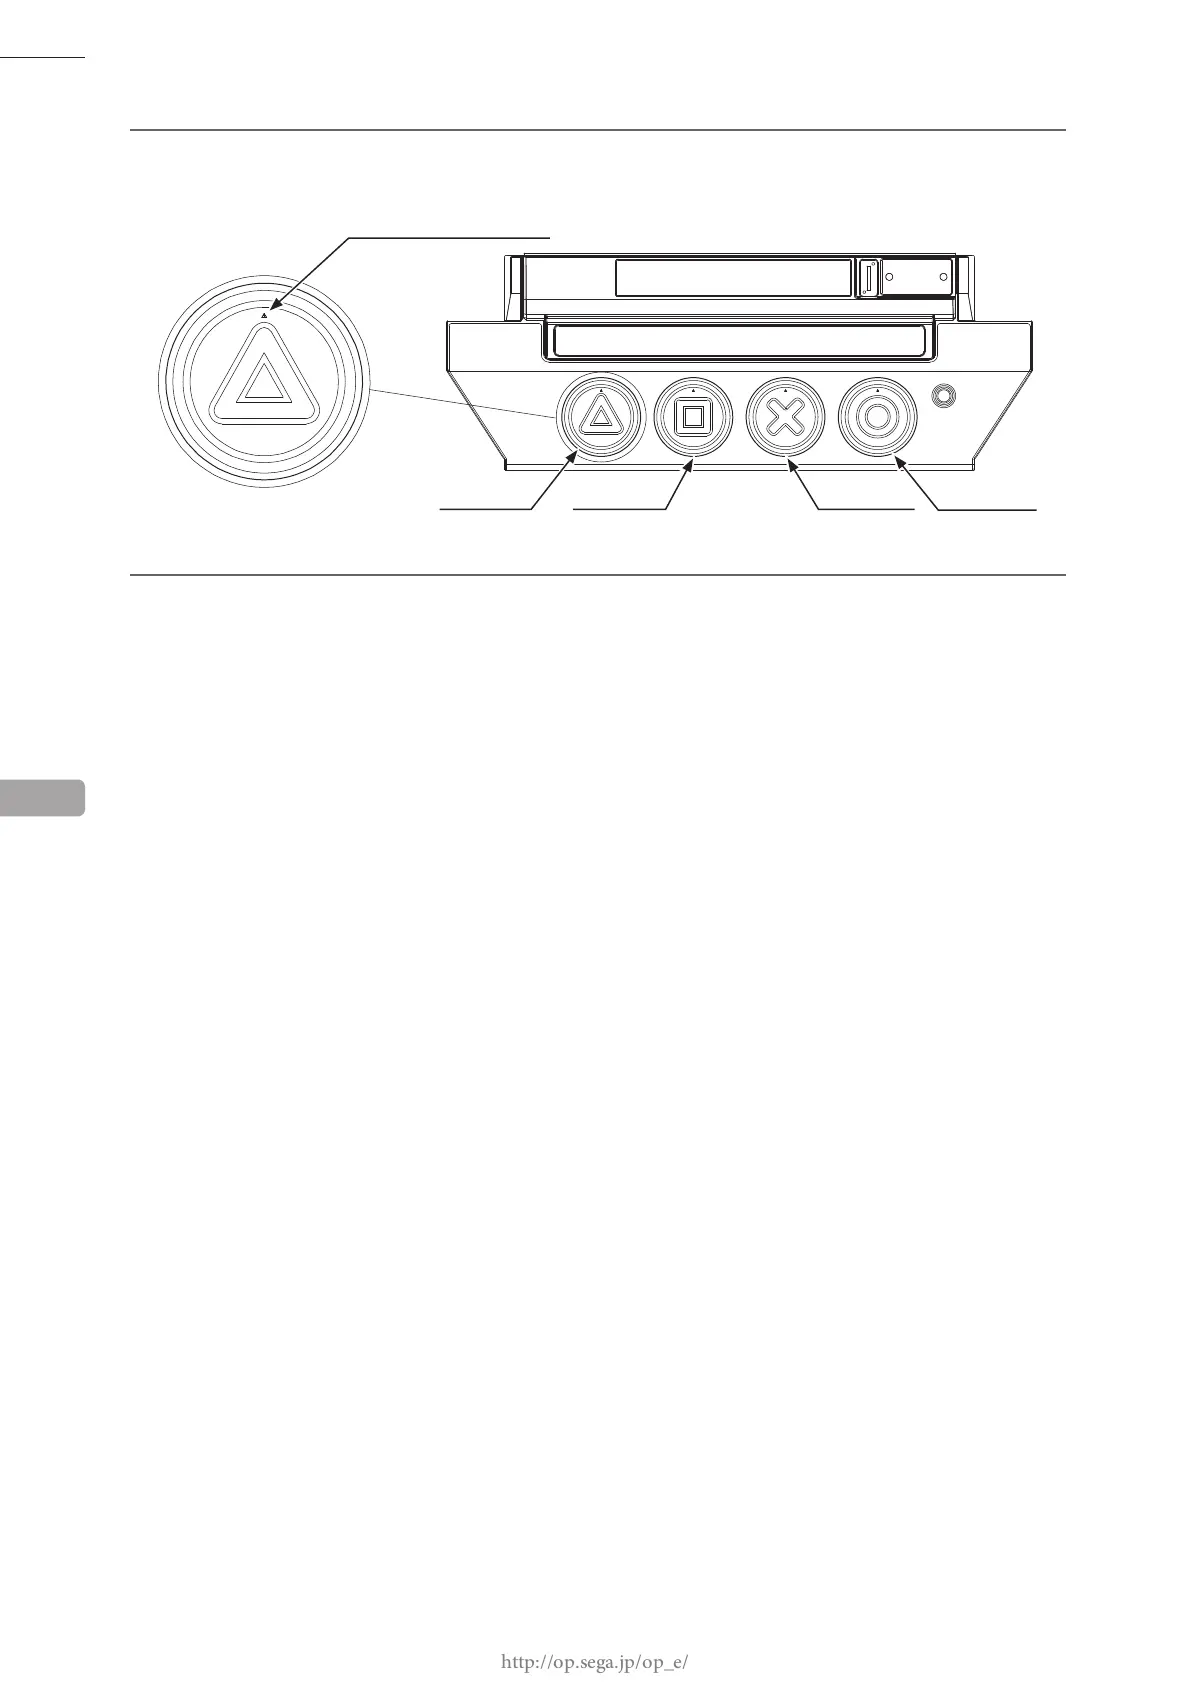
cabinet. When doing this, be aware of the correct button orientation and positioning.
6
Refer to Steps 2 and 3 in "12-1," and work in reverse order.
12
509-6256-04
Correct orientation indicator
509-6256-01
△
BUTTON
□
BUTTON
509-6256-02
×
BUTTON
509-6256-03
○
BUTTON