88
LCD
4
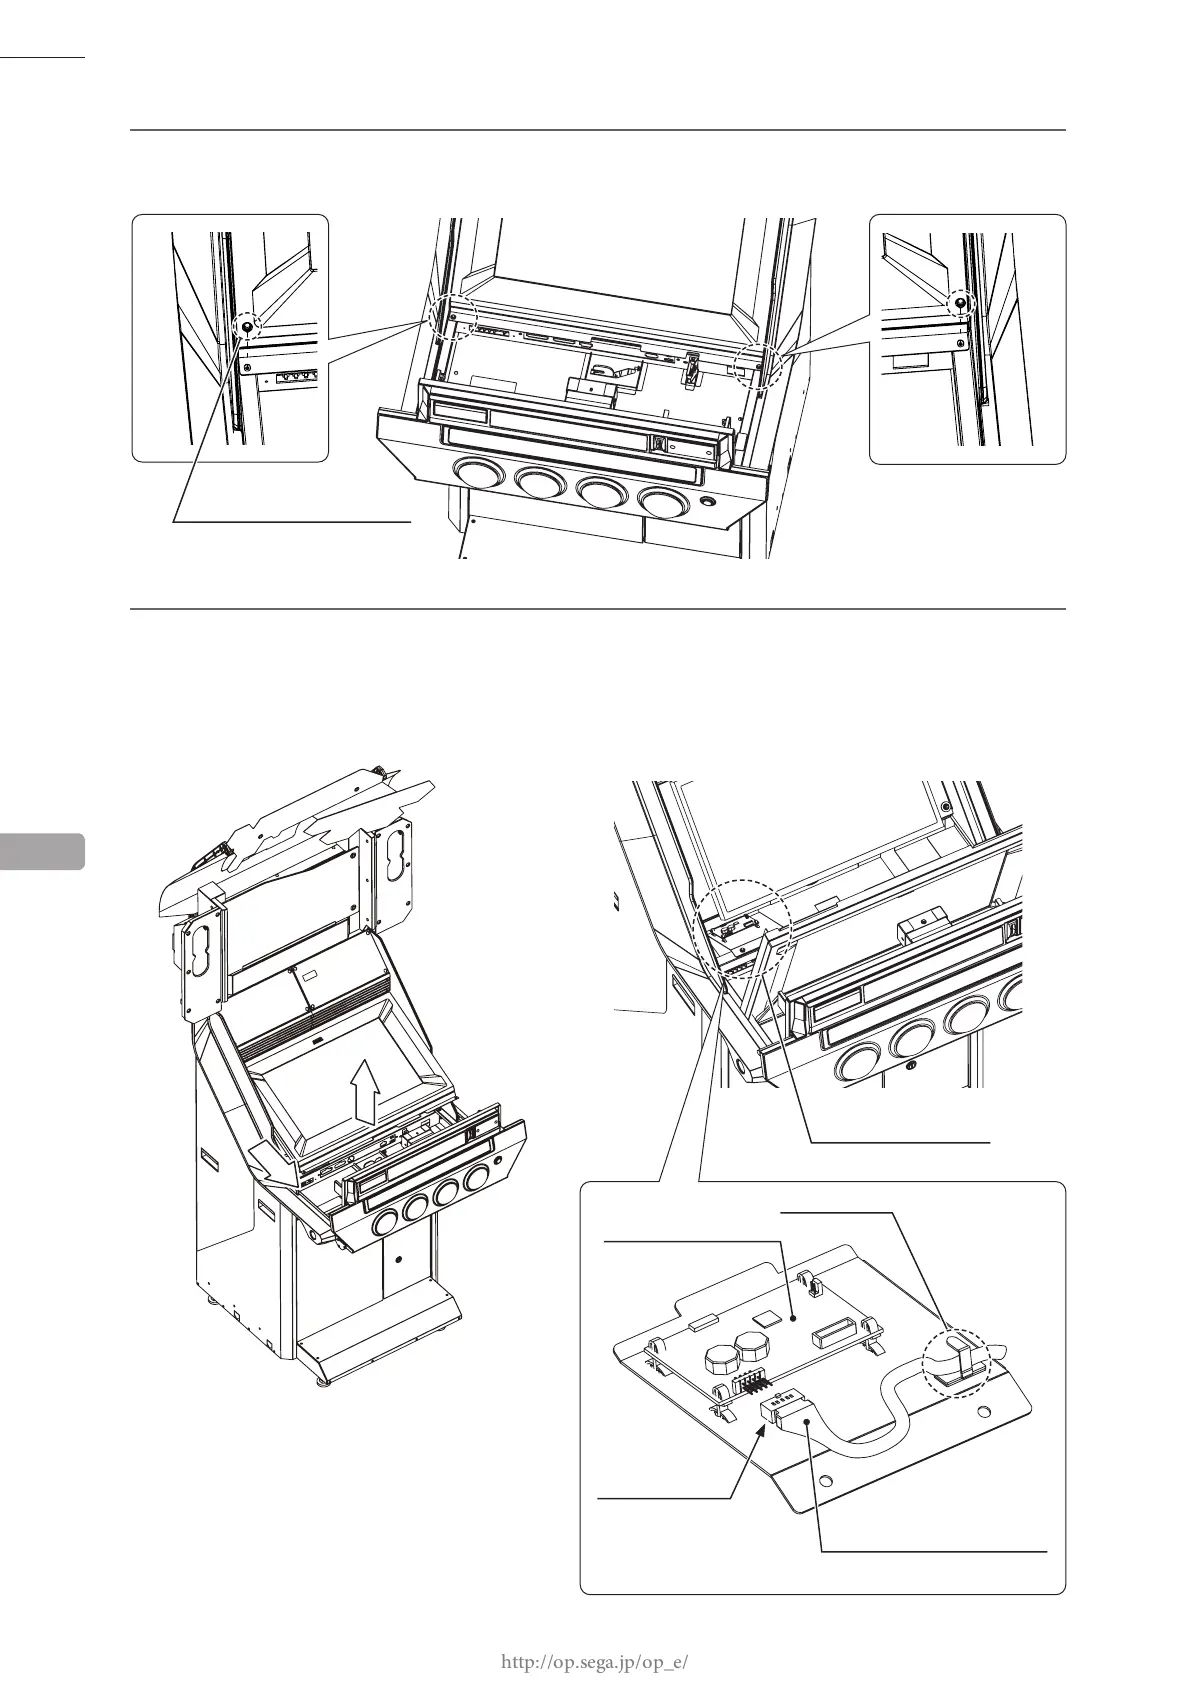
Remove 2 screws on the base of the monitor.
5
At the bottom-left of the touch panel unit is the touch panel board. Slightly lift up the bottom of the touch
panel unit and then undo the cord clamp securing the touch panel cable. Disconnect the connector from the
touch panel board.
The connector is fragile, and it is possible to insert it in the wrong direction. When connecting it, pay
attention to the direction of the connector.
13
1
2
(Connector convex side on top)
CORD CLAMP
M4 x 8, w/at & spring washers
SCREW (2)
TOUCH PANEL BOARD
TOUCH PANEL BOARD
CONNECTOR (1)
51127MOLEX20P
TOUCH PANEL CABLE