OmniHub 6/6D– User Manual
Page 40 of 182
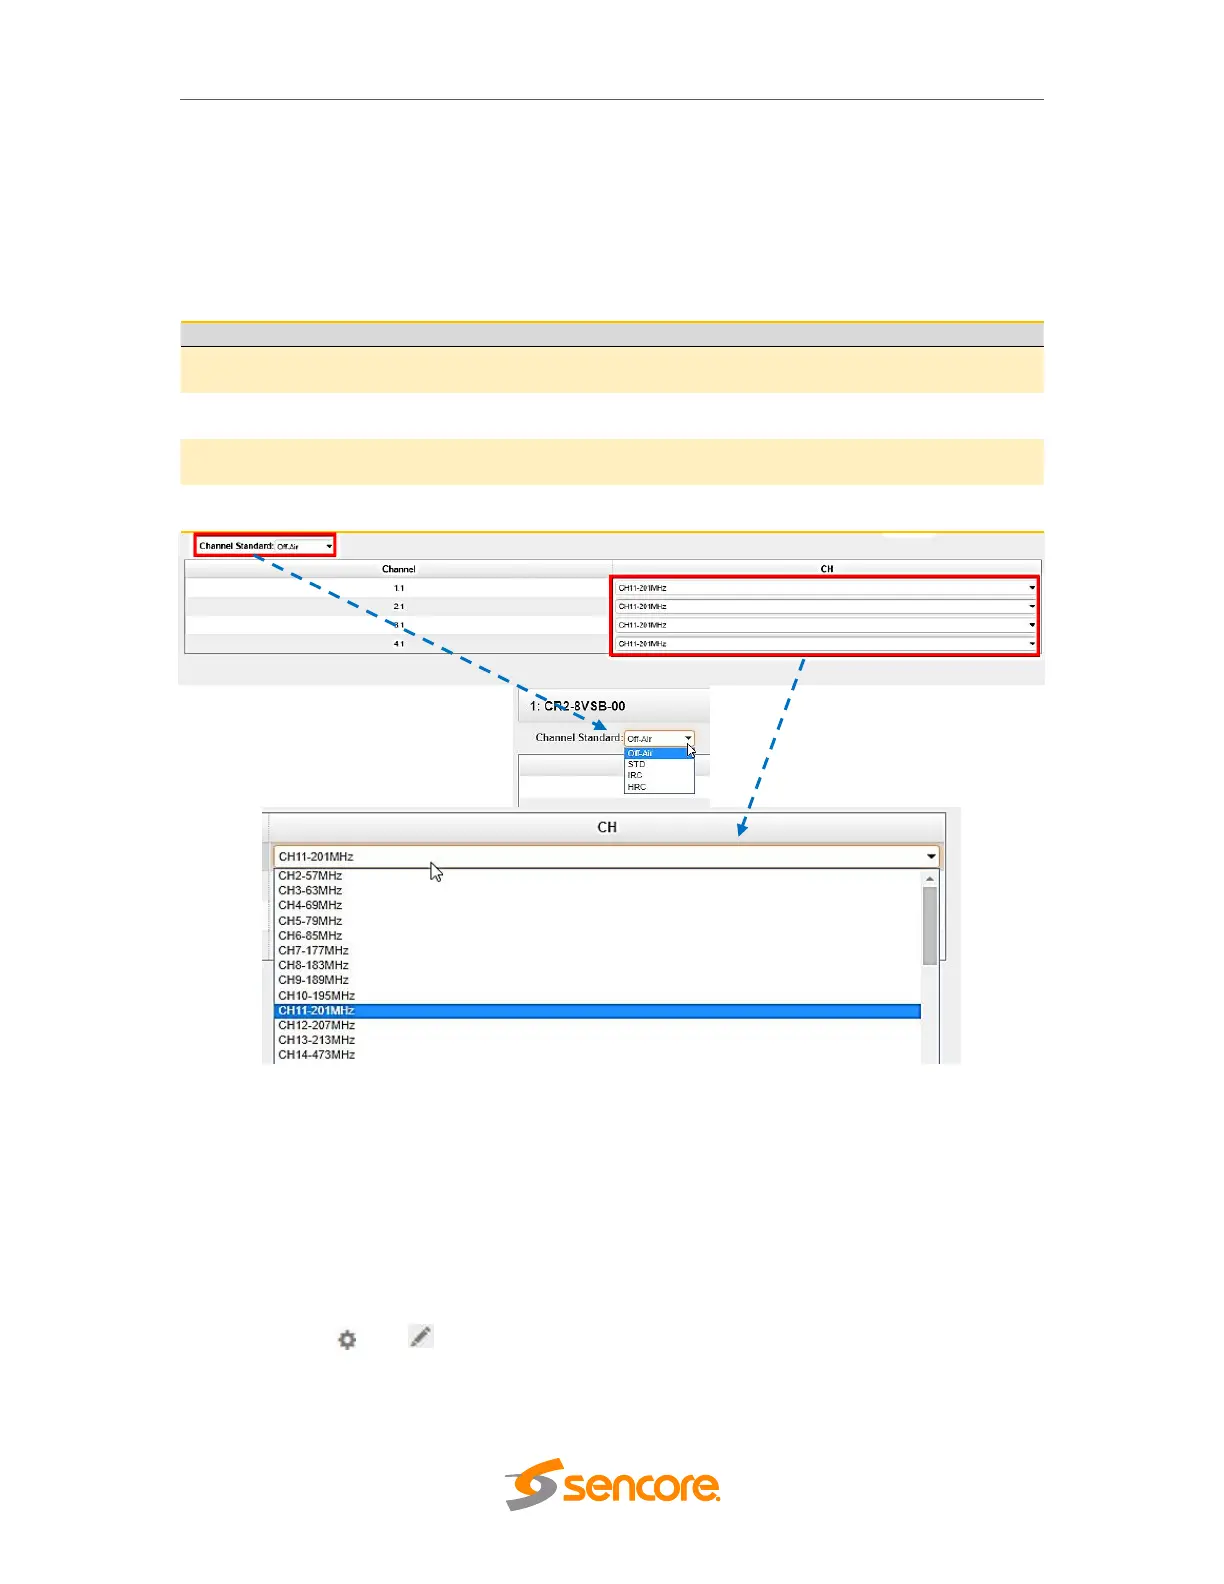
To make configuration changes in the context of the channel plan and the receiving
frequency of a specific RF input, select the appropriate receiving module and then click
on the Settings tab. The channel plan and frequency of a specific receiver can be
selected using drop-down lists.
Table below presents supported channel plans.
CH2 57MHz, CH3 63MHz, CH4 69MHz~CH67 791MHz, CH68797MHz,
CH69 803MHz
CH2 57MHz, CH363MHz, CH4 69MHz~ CH133 849MHz, CH134855MHz,
CH135 861MHz
CH2 57MHz, CH3 63MHz, CH4 69MHz ~ CH133 849MHz, CH134,
855MHz, CH135 861MHz
CH2 55.75MHz, CH3 61.75MHz, CH4 67.75MHz~ CH133847.75MHz,
CH134 853.75MHz, CH135 859.75MHz
3.3.5.3 Modules Service Configuration
Service Configuration tab displays the configuration page where you can manage the
received services and output them to their designated interface. Configuration steps for
IP input and all receiving and encoding modules in OmniHub 6/6D are mostly the same.
First, you need to scan the port of each TS with LOCKED signal status. Each port might
be scanned automatically or need to be scanned manually one at a time when its source
signal is replaced.
After scanning each channel, you can output each transport stream or service by
clicking the icon and below “Destination Settings”. You can route the whole stream
or a service/s from the input channel toward the available output channel (IP or RF).
Two types of routing are possible