12 13Chapter 1: Getting Started
Sequential Prophet X User’s Guide
Chapter 1: Getting Started
To swap Layer A and Layer B:
1. Press the edit b layer button.
2. Press Soft Key 3 (swap a > b).
3. Press Soft Key 1 to conrm. Layers A and B are swapped.
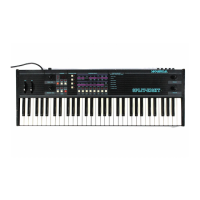
Split Programs
In split mode, playing a key on the left side of the keyboard will play the
Layer A sound and playing a key on the right side will play the Layer B
sound. Polyphony is allocated equally between the two sounds, with half
of the available voices on Layer A and half on Layer B.
The specic key that starts the Layer B sound is called the split point,
and is saved with the program.
All factory programs have a “B” layer, even if that layer isn’t currently enabled.
To turn Split on:
• If it’s not currently lit, press the split button. The button becomes lit.
The left side of the keyboard plays the Layer A sound and the right side
of the keyboard plays the Layer B sound.
To turn Split off:
• If it’s currently lit, press the split button. The button becomes unlit.
Only the program on Layer A is heard across the full range of the
keyboard.
To set the split point:
1. Press and hold down a key on the keyboard.
2. Press the split button. This sets the start point for Layer B.
3. Play a few notes to conrm that the split is where you want it.
4. If you want to re-set the split to a different note, disable split by press-
ing the split button again, then repeat steps 1 and 2.
You can also press the edit b layer button and set the split point with Soft Knob 4.
To create exactly the kind of split you want, sometimes you may need to
swap the sounds on Layer A and B.
To swap Layer A and Layer B sounds:
1. Press the edit b layer button.
2. Press Soft Button 3 (swap a< >b). The layers are now swapped.
Exploring the Prophet X
Before you explore the sound creation possibilities of the Prophet X,
we’d like to point you toward a few things that will help you tailor it to
your needs. The better you know it, the more you’ll get out of it.
First, read about “Global Settings” “Global Settings” on page 122.
There are many useful settings and functions found in the Global menu
that will affect the overall behavior of your Prophet X, including tuning,
MIDI connections, calibration, and more. In particular, read about Pot
Modes and determine which works best for you when you’re editing
sounds.
Also, starting on page 114, read about the various connectors on the
back of your Prophet X and how you can use its various pedal, audio,
MIDI, and USB inputs and outputs.
Finally, be on the lookout for tips and notes scattered throughout this
manual to gain a better working knowledge of the Prophet X. We wish
you many hours of musical exploration!