2 3Chapter 1: Getting Started
Sequential Prophet X User’s Guide
Chapter 1: Getting Started
First Things First
You’re probably eager to power up your Prophet X and take a tour through
its sounds. Here’s how to get up and running:
Getting Started:
1. Plug the power cable into the AC power connector on the back panel of
the Prophet X.
2. If you have a sustain pedal, connect it to the sustain jack on the back of
the Prophet X. If you have an expression pedal, connect it to the pedal/
cv jack.
3. Turn on the Prophet X. It takes few moments for the sound library to
load.
4. Connect the main/a output on the back of the Prophet X to your amp/
mixer/powered speakers using unbalanced, ¼ inch audio cables. (These
are the main stereo outputs for the synth. They carry Layer A and also
Layer B if no cables are connected to the b output jacks.)
5. Turn up the volume on your amp/mixer/powered speakers.
6. Turn up the volume on the Prophet X.
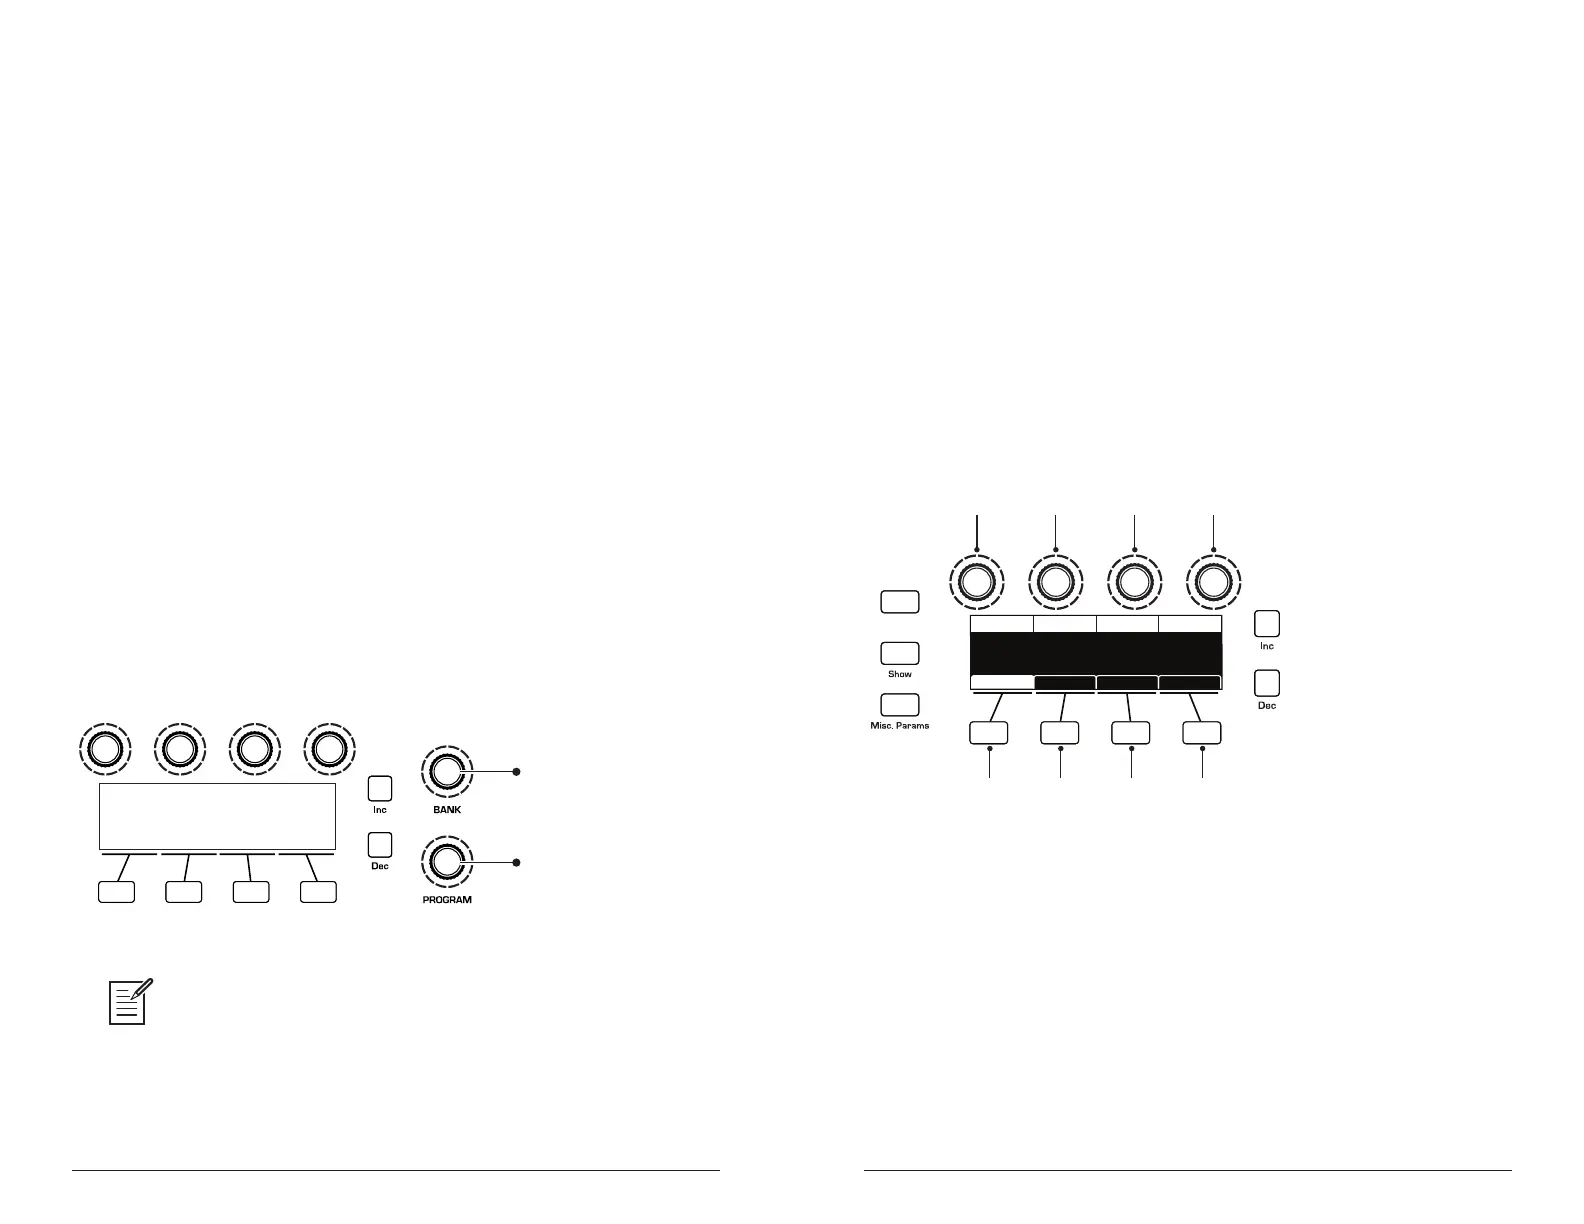
7. Use the bank and program knobs to scroll through the factory sounds.
You can also use Soft Knob 1 and Soft Knob 2 as well as inc and dec
buttons to scroll through the sounds in the currently selected bank.
U1
Prophet Evolution
P1 120
Turn to scroll through
User and Factory banks
Turn to scroll through
programs 1-128 in each bank
Bank and Program controls
Each of the factory presets has interesting and useful modulation functions
programmed into Slider 1 and 2 and the Mod wheel. While you’re trying out the factory
sounds, play with these performance controls and listen how the sound changes.
Each preset also has a pre-programmed sequence. To hear it, press the play button in
the seq section.
Using the Main Display
The most frequently used controls on the Prophet X are on its front
panel. But there are many additional controls (as well as numeric display
of values) visible in its main display.
For example, adjusting a knob or switch in the Mixer section reveals
the instrument level and oscillator level parameters in the display. The
display also reveals additional parameters not found on the front panel
such as panning. You can select and edit these additional parameters
using the four Soft Knobs and Soft Keys located above and below the
display.
The Soft Knobs are detented encoders that are useful for dialing in values
with precision. The Soft Keys select between various menu tabs.
soft knob 1
parameter 1
soft knob 2
parameter 2
soft knob 3
parameter 3
soft knob 4
parameter 4
soft key 1
menu tab 1
soft key 2
menu tab 2
soft key 3
menu tab 3
soft key 4
menu tab 4
Revert
INST 1 LEVEL
Inst 1 Level Osc 1 LevelInst 2 Level Osc 2 Level
INST 2 LEVEL
60 20 2060
OSC2 LEVEL
OSC1 LEVEL
Env AmtMixer LPF MiscPanning Hack/Deci
The Main Display