88 89Synthesis 101: Synth Bass
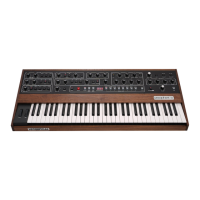
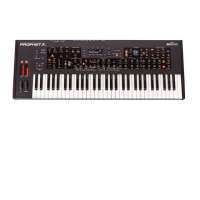
Sequential Prophet X User’s Guide
Synthesis 101: Synth Bass
Next, you’ll use the lter to shape the raw sound of the sawtooth wave.
To adjust the lter:
1. Press and hold down a key and turn the lter’s cutoff knob. Notice
how it cuts the high frequencies as you rotate counter-clockwise,
making the sound of the oscillator less bright. If you turn the cutoff
knob fully counterclockwise you’ll lter out all frequencies and hear
nothing.
2. Return the cutoff knob to its halfway position, play and hold a note
again then turn the resonance knob about halfway up. Notice how the
sound changes as a band of frequencies near the cutoff is amplied.
3. Rotate the lter’s cutoff knob again and you’ll hear a classic resonant
lter sweep. You’re going to use this to create your synth bass.
4. Set the lter cutoff to a value of 40 (refer to the main display to see its
numeric value).
5. Set the lter resonance to a value of 100. This is going to give the
synth bass its funky “zap.”
6. Play a note and listen to the sound. At this point you won’t hear
anything because you’ve mostly closed the lter. You’ll need to open
the lter using the lter envelope (so you don’t have to turn the cutoff
knob by hand).
Now, you’ll use the lter envelope to control the lter sweep.
To adjust the lter envelope:
1. In the Envelopes section, turn the Filter Envelope’s env amount knob
to a value of 50 (refer to the main display to see its numeric value).
2. Play a low note on the keyboard. Instant synth bass!
Notice how the sound has changed. The Filter Envelope is controlling
lter cutoff by the amount you set with the env amount knob.
3. Continue experimenting with the Filter Envelope’s env amount knob.
Notice how greater env amount settings amplify the effect of the enve-
lope on the lter.
4. Repeatedly strike a note on the keyboard as you turn the Filter Enve-
lope’s decay knob clockwise and counterclockwise. Notice how it
changes the sound as the note decays faster or slower.
Be aware that the Filter Envelope and Amplier Envelope work in
conjunction, with the Filter Envelope controlling how the lter opens and
closes and the Amplier Envelope controlling the overall volume shape.
To learn more about the Amplier Envelope, see page 42.
5. The Filter Envelope’s release parameter acts in conjunction with the
Amplier Envelope. In other words, you can’t hear a long release on
the lter envelope if the amplier envelope is short! So to hear the lter
envelope’s release parameter in action, rst set the Amp Envelope’s
release value to 75.
6. Now repeatedly strike a note on the keyboard as you turn the Filter
Envelope’s release knob clockwise and counterclockwise. Notice how
the note fades out faster or slower as you change the release value.
Using Unison
You can use Unison to thicken the synth bass sound even more. When
unison is on, the Prophet X acts like a monophonic synthesizer — only
one note can be played at a time. However, that single note can be
powered by as many as 8 voices, depending on how many you choose
to stack together. (You can stack up to 16 voices if you are in 16-voice
mode.)
To use Unison:
1. Press the unison button on the front panel.
2. Repeatedly strike a note on the keyboard as you use Soft Knob 2
(mode) to choose the number of voices to stack. The more voices you
stack, the denser the sound.
3. To detune the oscillators while in unison, use Soft Knob 3 (detune) to
set the amount of detuning between voices.
Now you know how to create a simple synth bass program using the
most essential synthesizer components of the Prophet X: the oscillators,
the lter, and the envelopes. Using just these three things you can create
an enormous variety of sounds. Keep experimenting with them and if
you like what you’ve created, save the programs in one of the user banks.
(See “Saving a Program” on page 7.)