(7) Customized keys
The keys that appear here can be changed to show
settings or functions that you prefer.
☞ Customizing displayed keys (page 5-11)
(8) [Preview] key
Touch to check the image that will be sent in the touch
panel before transmission.
☞ CHECKING THE IMAGE TO BE TRANSMITTED
(Preview) (page 5-69)
(9) [Resend] key/[Next Address] key
The destinations of the most recent 8 transmissions by Scan
to E-mail, fax and/or Internet fax are stored. Touch this key
to select one of these destinations. After a destination is
selected, this key changes to the [Next Address] key.
☞ USING THE RESEND FUNCTION (page 5-27)
RETRIEVING A DESTINATION (page 5-19)
(10) Image settings
Image settings (original size, exposure, resolution, file
format, and color mode) can be selected.
☞ IMAGE SETTINGS (page 5-53)
(11) key
This key appears when a special mode or 2-sided
scanning is selected. Touch the key to display the
selected special modes.
☞
Checking what special modes are selected (page 5-11)
(12) key
Touch this key to specify a destination using a search number
*
.
* 4-digit number assigned to a destination when it is stored.
☞ USING A SEARCH NUMBER TO RETRIEVE A
DESTINATION (page 5-21)
(13) [Special Modes] key
Touch this key to use a special mode.
☞ SPECIAL MODES (page 5-71)
(14) [Stored to] key
Touch to select the folder in USB memory where a file
will be stored.
☞ SPECIFY THE FOLDER IN WHICH THE FILE WILL
BE STORED (page 5-39)
(15) [File Name] key
Touch this key to enter a file name when storing a file to
USB memory.
☞ ENTERING A FILE NAME (page 5-40)
(16) / / key
When "Hold Setting for Received Data Print" or
"Received Data Image Check Setting" is enabled in the
system settings (administrator), this will appear when an
Internet fax is received.
: Only "Hold Setting for Received Data Print" is
enabled
: Only "Received Data Image Check Setting" is
enabled
: Both settings are enabled
☞ PRINTING A PASSWORD-PROTECTED FAX
(Hold Setting For Received Data Print) (page 5-106)
☞ CHECKING THE IMAGE BEFORE PRINTING
(page 5-107)
(17) [I-Fax Manual Reception] key
Touch this key to receive an Internet fax manually.
☞
MANUALLY RECEIVING INTERNET FAXES (page 5-105)
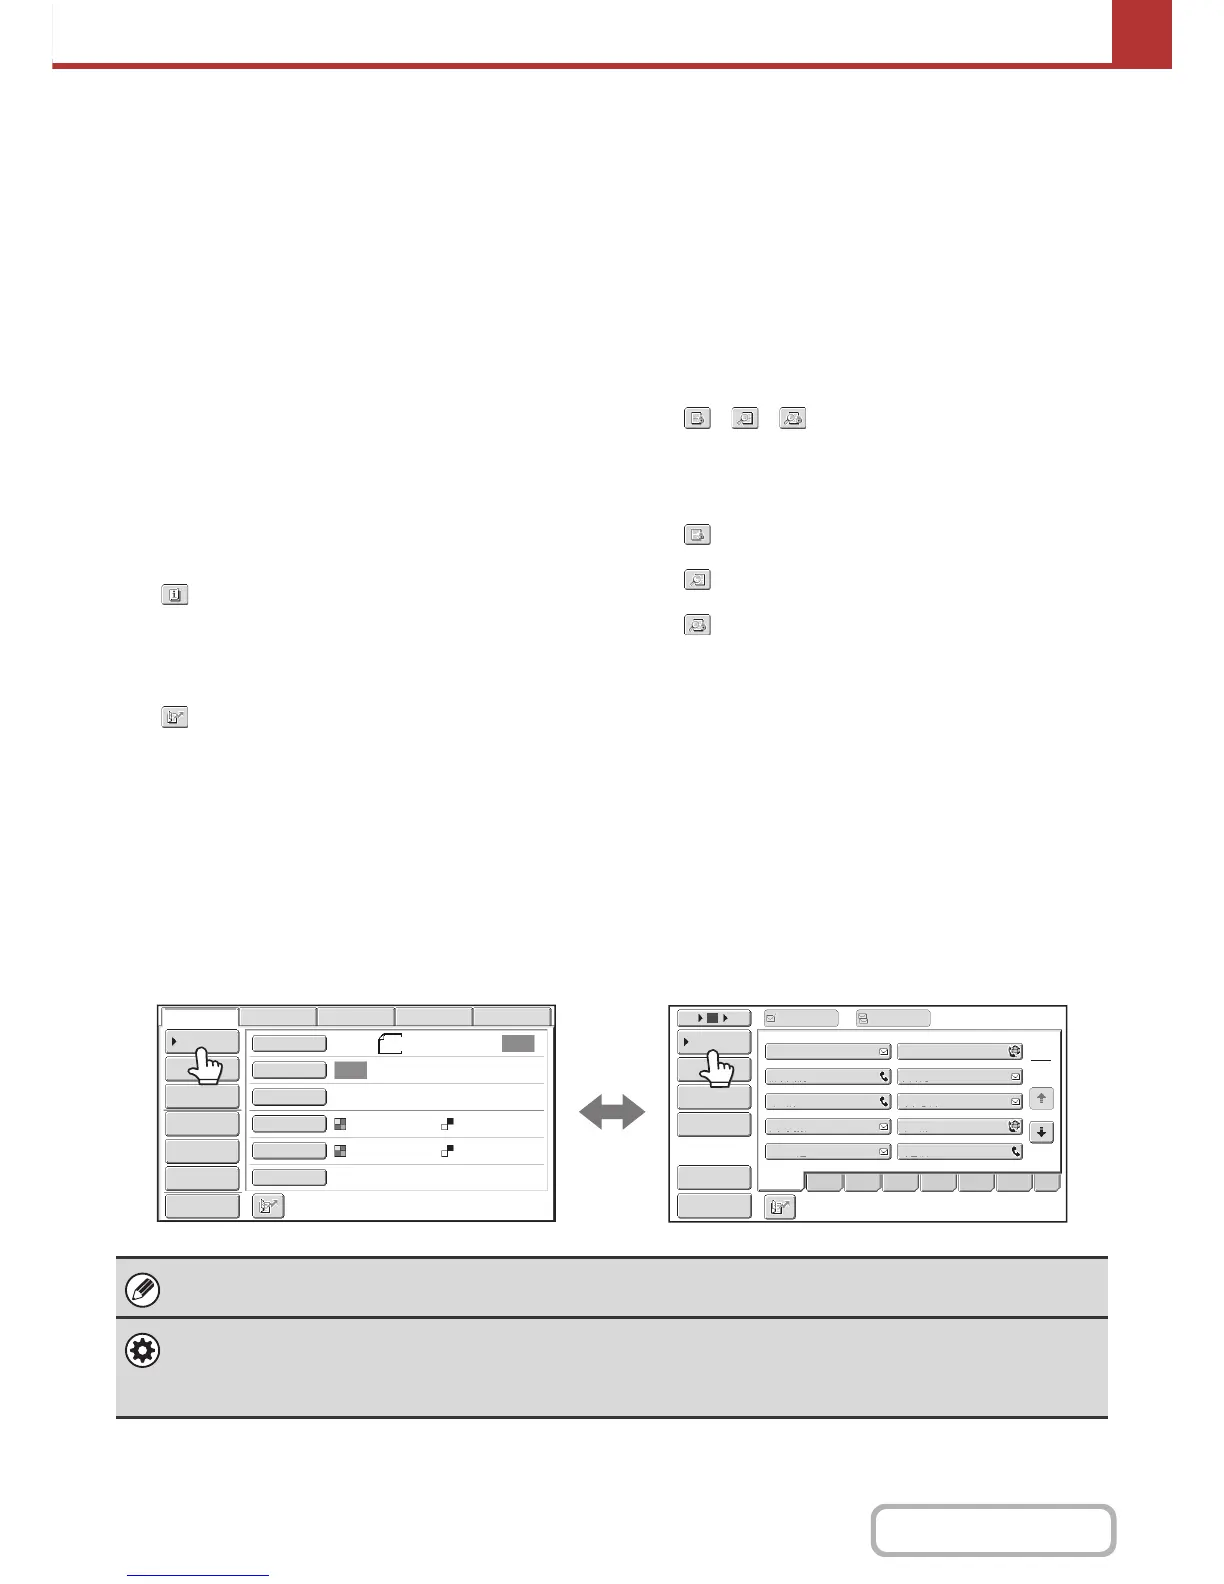
When sending an image, you can retrieve and use a stored transmission destination from the address book screen. The
address book screen is shared by scan mode, Internet fax mode, fax mode and data entry mode.
Touch the [Address Book] key in the base screen to switch to the address book screen. Touch the [Condition Settings]
key in the address book screen to switch to the base screen.
• This chapter uses the base screen of scan mode as an example when operations common to all modes are explained.
•
The procedures in this chapter assume that the base screen of scan mode appears when the [IMAGE SEND] key is touched.
System Settings (Administrator): Default Display Settings
One of the following screens can be selected for the initial screen that appears when the [IMAGE SEND] key is touched.
• Base screen of each mode (scan, Internet fax, fax, or data entry mode)
• Address book screen
 Loading...