MX-M700N ADJUSTMENTS 6 – 40
3) Select MAX. POSITION using the numeric keypad.
4) Press the Start key.
The maximum width detection level is recognized.
5) Press the SYSTEM SETTINGS key.
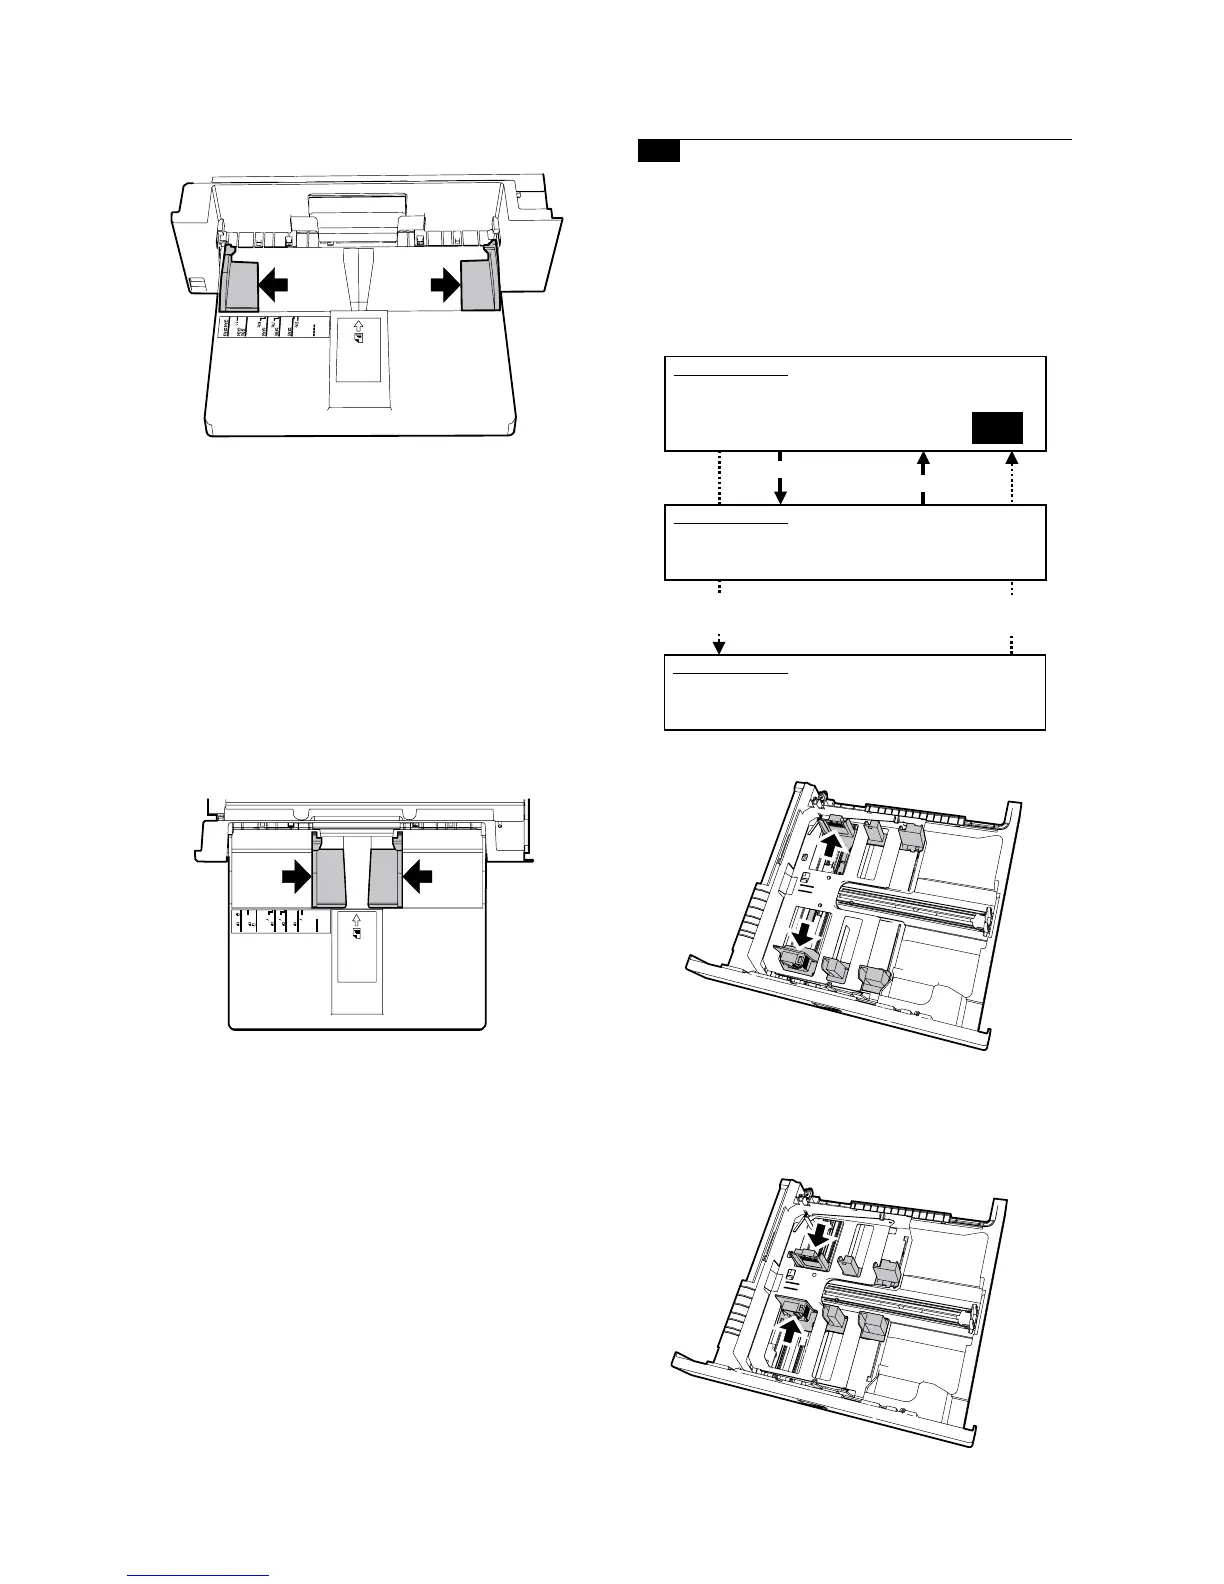
6) Set the manual paper feed guide to the width for the A4R size.
7) Select POSITION 1 using the numeric keypad.
8) Press the Start key.
The A4R width detection level is recognized.
9) Press the SYSTEM SETTINGS key.
10) Set the manual paper feed guide to the width for the A5R size.
11) Select POSITION 2 using the numeric keypad.
12) Press the Start key.
The A5R width detection level is recognized.
13) Press the SYSTEM SETTINGS key.
14) Open the manual paper feed guide to the minimum width posi-
tion.
15) Select MIN. POSITION using the numeric keypad.
16) Press the Start key.
The minimum width detection level is recognized.
* When each of the above operations has been completed, the
"COMPLETE" message appears; when any of the operations
has failed, the "ERROR" message appears.
14-B Adjust the paper width sensor for paper
feed tray 3
This adjustment is needed in the following situations:
* The paper feed tray section has been disassembled.
* The paper feed tray unit has been replaced.
* U2 trouble has occurred.
* The PCU PWB has been replaced.
* The EEPROM of the PCU PWB has been replaced.
1) Go through the modes specified in Simulation 40-12.
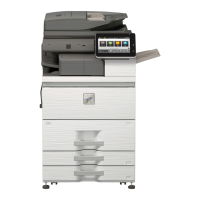
2) Open the paper feed guide to the maximum width position.
3) Select MAX. POSITION using the numeric keypad.
4) Press the Start key.
The maximum width detection level is recognized.
5) Press the SYSTEM SETTINGS key.
6) Open the paper feed guide to the maximum width position.
5
11
1
2
A5
A4
B4
B5
A3
A4
B5
7
1
2
8
1
2
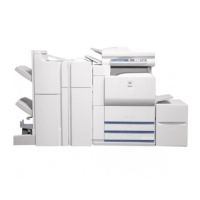
Press [START] key. Press [SYSTEM SETTINGS] key.
SIMULATION 40-12
TRAY3 ADJUSTMENT. SELECT 1-2, AND PRESS START.
1. MAX. POSITION
2. MIN. POSITION
1
SIMULATION 40-12
TRAY3 ADJUSTMENT.
MAX. POSITION ··· COMPLETE (or "ERROR")
Select 1, and press [START] key.
Press [SYSTEM SETTINGS] key.
SIMULATION 40-12
TRAY3 ADJUSTMENT.
MIN. POSITION ··· COMPLETE (or "ERROR")