Another way to restore access to the board when its IP address is unknown is to reset its
settings to default. For more information, refer to "Reset the settings (default CFG)" on page 19.
Communication with PC
The MK 6.0 Radar Interface box receives commands from VarpPCI using this port. Default
value is 5062. The same value must be used in the VarpPCI.ini file (see "MK6 related settings in the
VarpPCI.ini file" on page 30).
Radar control
Currently the radar control functionality is implemented for the Litton/Sperry radar only. To
enable the radar control, select the Litton/Sperry radar in the settings, then save the
configuration and restart the MK 6.0 Radar Interface box.
Differential outputs
The MK 6.0 Radar Interface box can generate three differential signals for external systems.
These signals goes to the “T+” and “T-” pins of the “SYNC”, “AZIM” and “MARK” connectors.
“SYNC” output is always switched on and is in “0” state but “AZIM” and “MARK” outputs are in
high impedance state by default. Each of these outputs can be independently configured to
generate a correspondent synchronization signal for the external system. No restart of the
system is required after applying these changes.
Ú
Note: The Azimuth Reset Pulse connector is labelled as MARK.
Reset theMK 6.0 Radar Interface box settings (default CFG)
All settings of the MK 6.0 Radar Interface box can be reset to default. When you set them to
default, the CFG file is erased in the flash. This can be useful if you do not remember the
password or IP address and do not have access to the WEB interface. The reset can be done
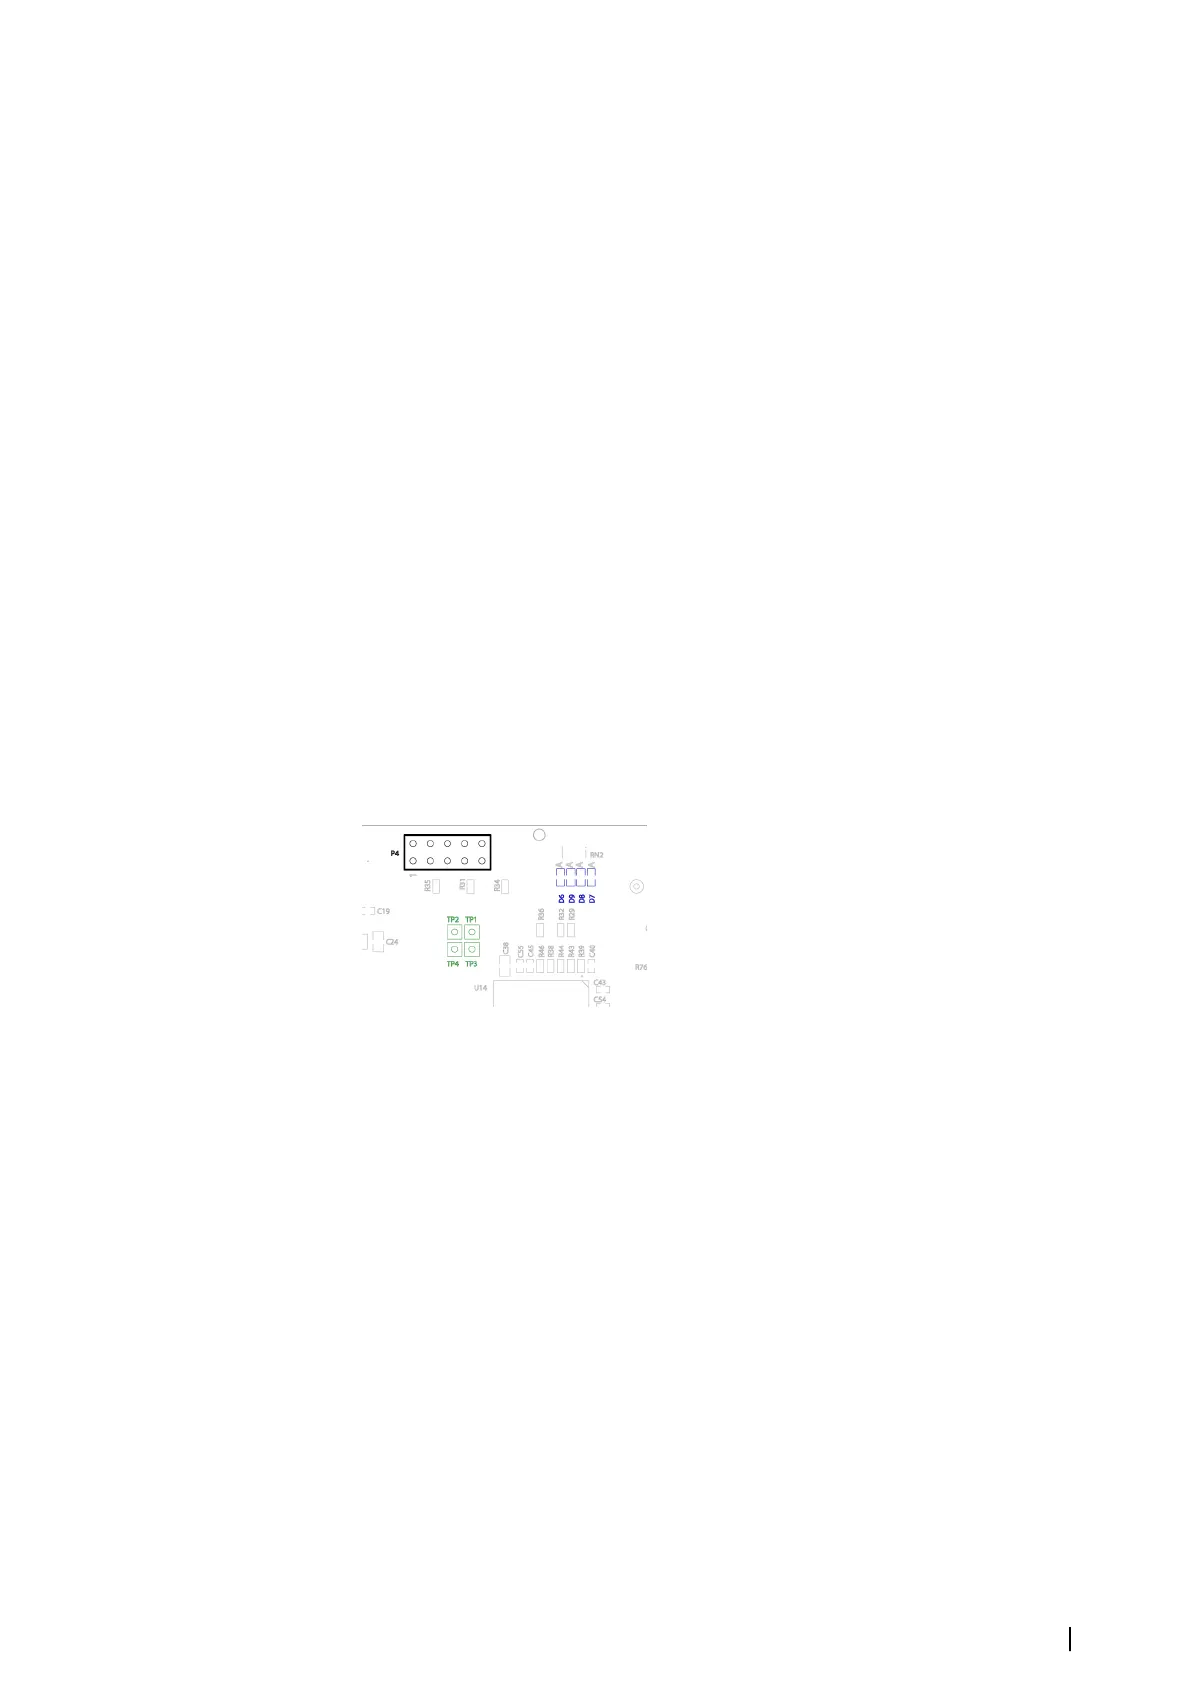
using a jumper. By default the jumper connects “TP1” and “TP2”.
To reset the board to default settings, perform the following steps:
1. Switch the board off
2. Remove the jumper which connects "TP1" and "TP2"
3. Use the jumper to connect "TP1" and "TP3"
4. Switch the board on
5. Wait until it completes initialization. Initialization is completed when LEDs D11 and D12 are
blinking. (see "Indication of the status with LEDs" on page 7)
6. Switch the board off
7. Restore the jumper to its original position.
The board is set with default settings.
Work page
The Work page provides information about acquisition of the video signal and
synchronization signals.
After a successful initialization, the system operates in WorkMode and starts the data
acquisition process using the video and synchronization settings from the CFG file. This is the
“Normal Work” mode.The “Normal Work” button which is located at the top of the page is
selected.
It is necessary to modify the default settings during the system installation on board a ship.
While the installation is in process, different submodes are available. To switch between
them select a proper button at the top of the page. For example, Video, Sync, Azimuth, etc.
Remember, that these submodes are not available after the installation process is finished.
Settings | MK 6.0 Installation Manual
19