Sinterit LISA X User Manual | 56
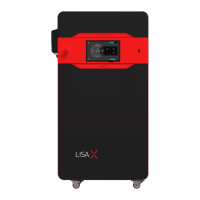
Fig. 12.64 Loose the three screws of the tighten mechanism. Fig. 12.65 Screw the marked bolt with a torque wrench.
11. Using a 7 mm wrench, tighten back the three screws marked in gure 12.64.
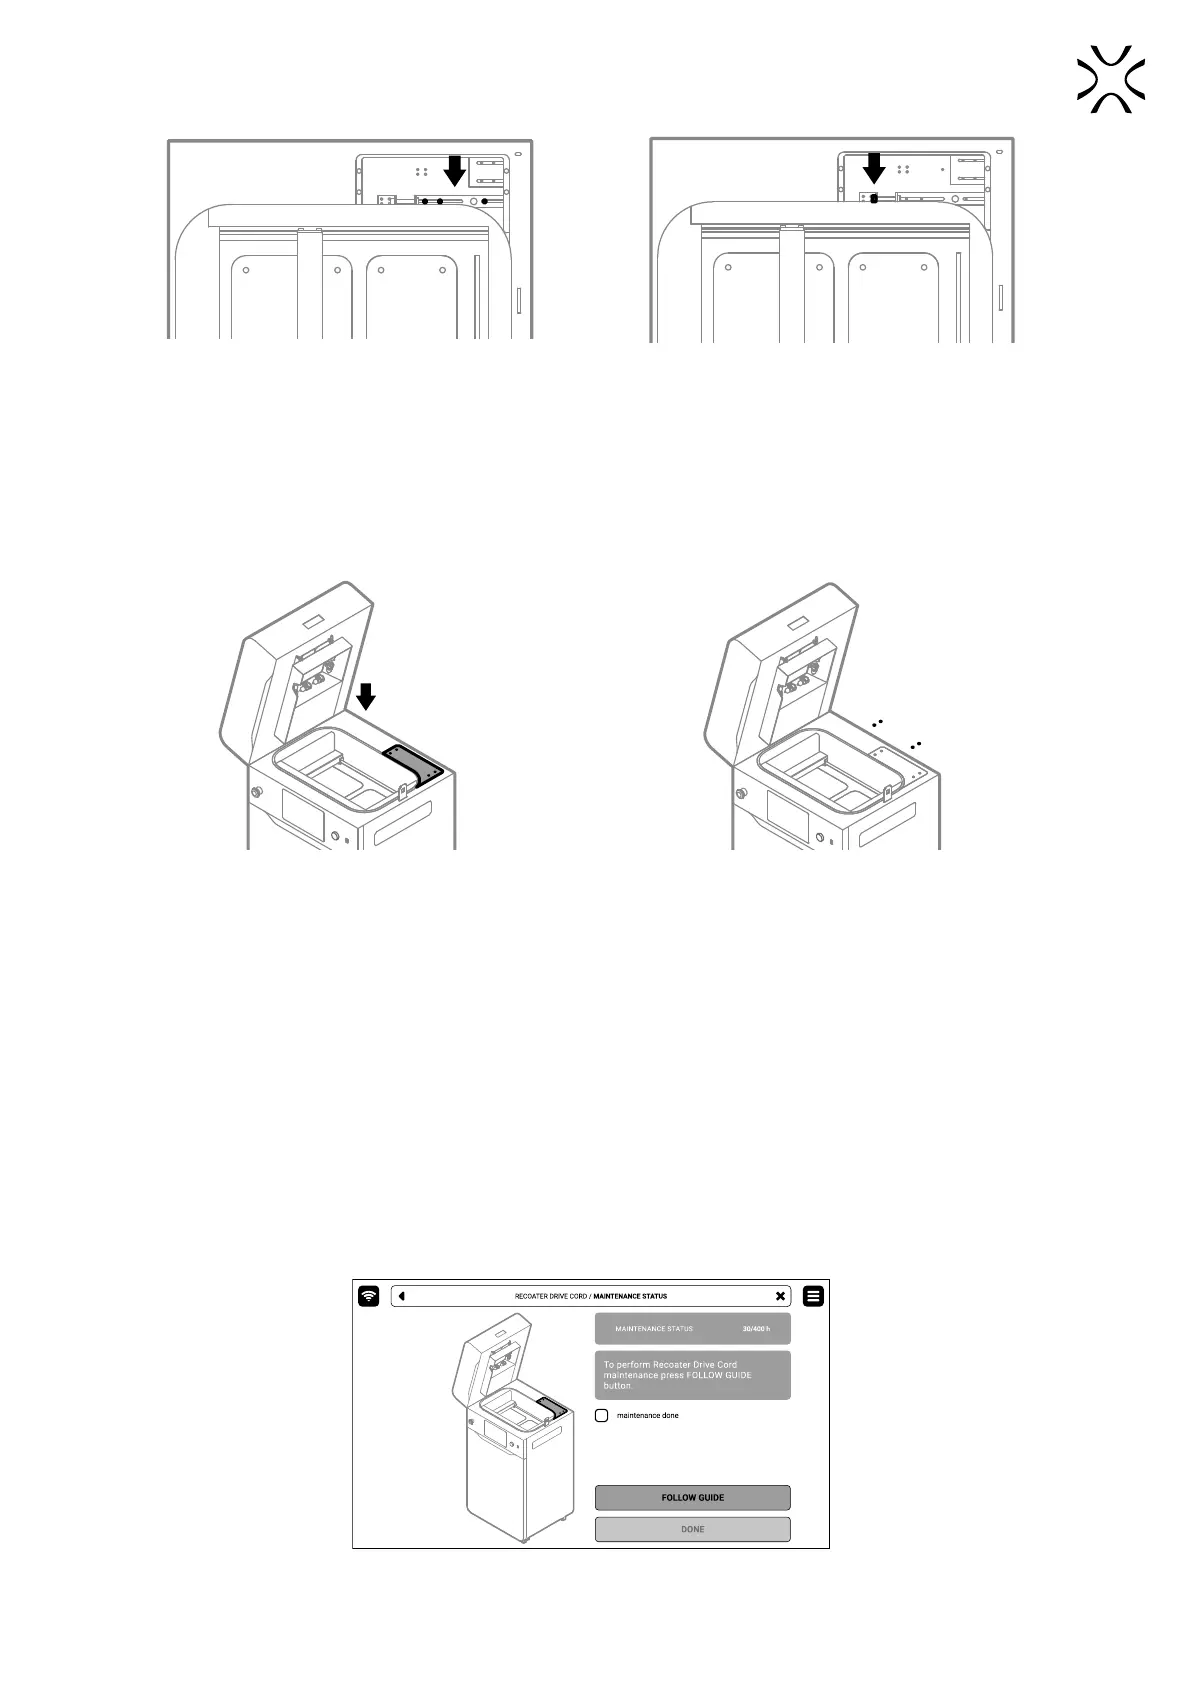
12. Mount back the access panel on the top side of the printer (g. 12.66).
13. Using a 2 mm allen key, tighten back the four screws securing the access panel on the top of the printer (g. 12.67).
14. Good job. The maintenance timer will reset to zero.
Fig. 12.66. Mount back the access panel. Fig. 12.67 Tighten back four screws of the access panel.
12.12 CHECKING THE TENSION OF THE RECOATER DRIVE UNIT CORD. (REV. C)
You will need: 2 mm allen key, 2.5 mm allen key, 7 mm wrench, 10 mm torque wrench
Every approx. 400 hours is required to check the tension of the Recoater Drive Unit Cord. A properly tensioned cable is
springy, with no curve, and under nger pressure, it exes by about 0,5 cm.
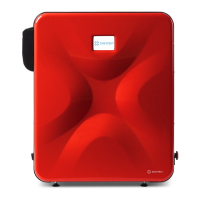
1. On the PRINTER STATUS tab, select the Recoater DRIVE CORD position.
2. The maintenance tab of the checking Recoater Drive Unit Cord will appear on the screen. You can use the step-by-step
guide (press FOLLOW GUIDE) or perform the replacement yourself.
3. In this case, mark MAINTENANCE DONE once you have completed the procedure, and then the DONE button. The
timer will reset to zero (g. 12.68).
Fig. 12.68 The screen of the maintenance of the Recoater Drive Unit Cord.