Sinterit LISA X User Manual | 57
4. Choose UNLOCK LID on the screen.
5. Push on the lid and pull it up using the lid handle. Remember, you only have 10 seconds to open it before the lock
activates again.
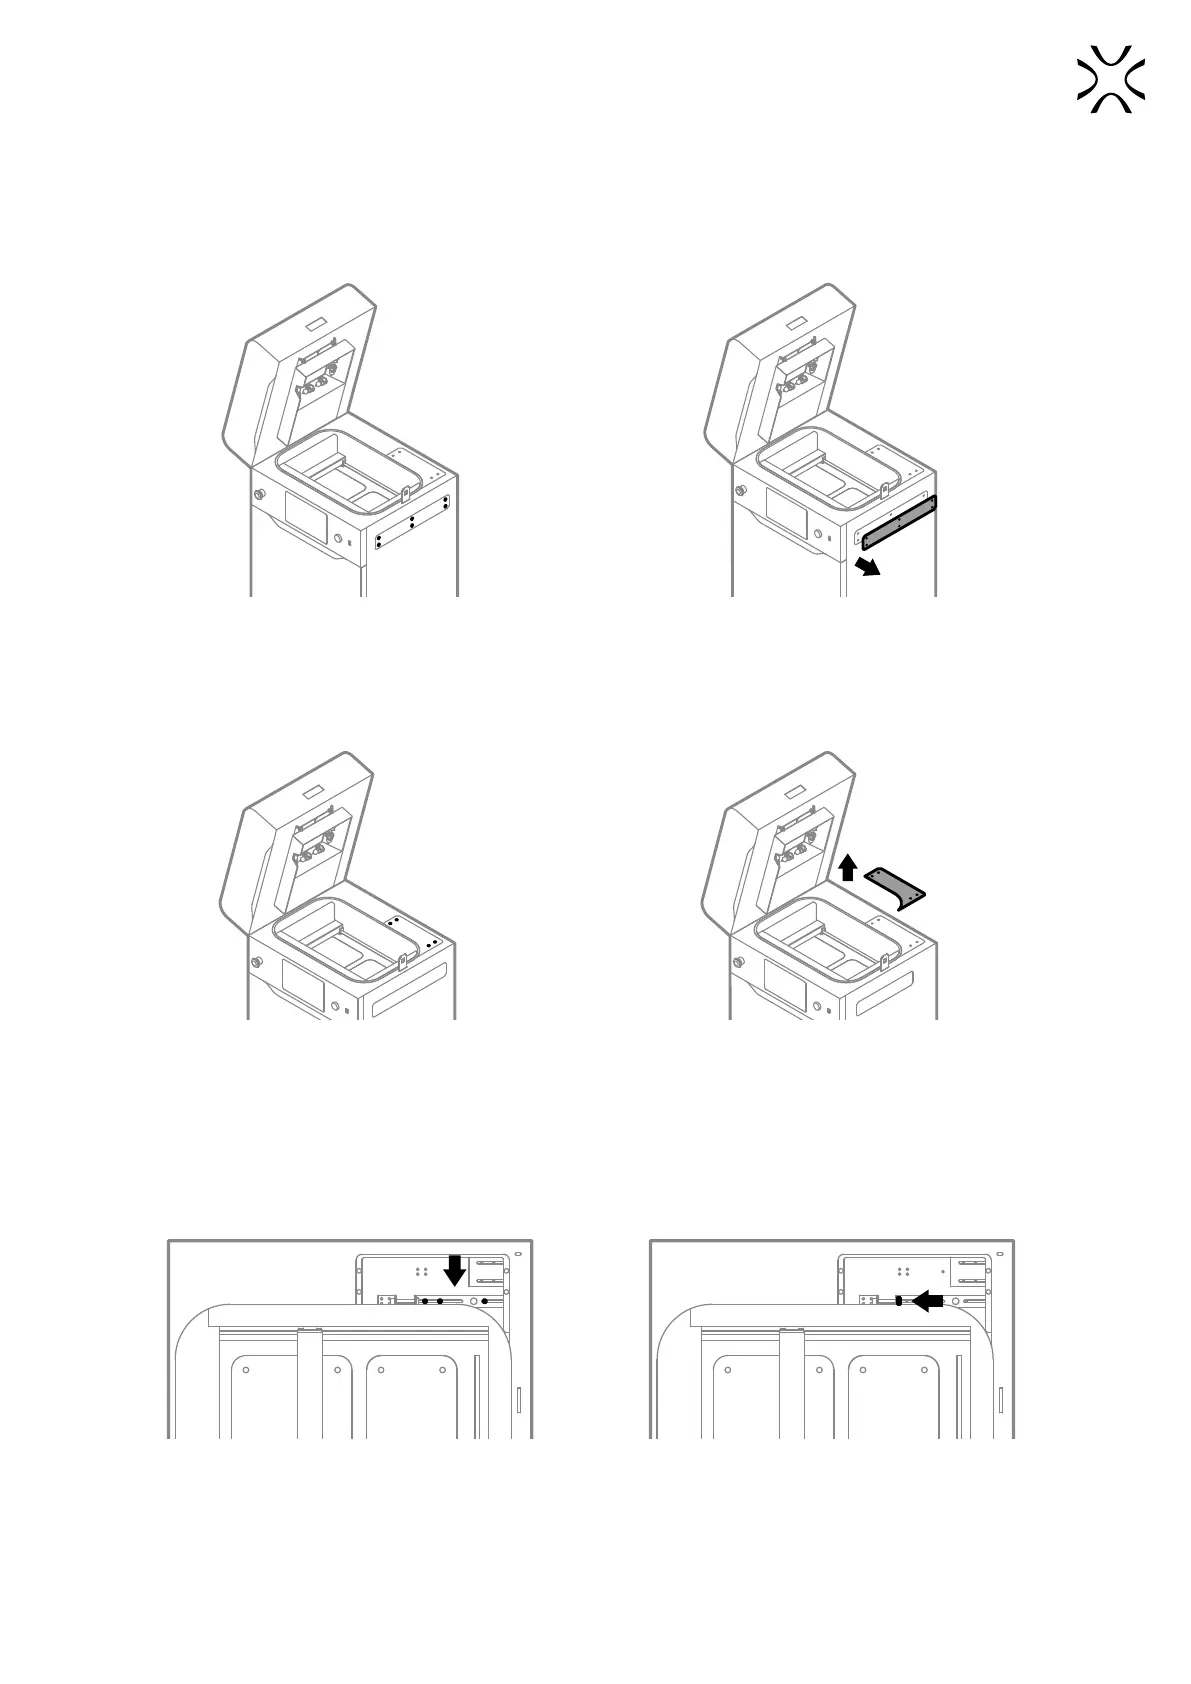
6. Using a 2.5 allen key, remove the six screws securing the access panel on the right side of the printer (g. 12.69).
7. Remove the access panel on the right side of the printer (g. 12.70).
Fig. 12.69 Remove six screws from the access panel. Fig. 12.70 Remove the access panel.
8. Using a 2 mm allen key remove the four screws securing the access panel on the top side of the printer (g. 12.71).
9. Remove the access panel on the top side of the printer (g. 12.72).
Fig. 12.71 Remove four screws from the access panel. Fig. 12.72 Remove the access panel.
10. Now you have access to the tightening mechanism.
11. To tighten the cord, use a 7 mm wrench and loosen the three screws marked in gure 12.73.
12. Through the inspection opening on the right side of the printer tighten the bolt marked with a torque wrench (g.
12.74). Tighten the cord for a value of 10 Ncm.
Fig. 12.73 Loose the three screws of the tightening mechanism. Fig. 12.74 Screw the marked bolt with a torque wrench.
13. Using a 7 mm wrench, tighten back the three screws marked in gure 12.73.
14. Mount back the access panel on the top side of the printer (g. 12.75).
15. Using a 2 mm allen key, tighten back the four screws securing the access panel on the top of the printer (g. 12.76).