Remove all teeth from the saw-cut model, apart from the one required.
Close the front flap and click "Continue" or "Continue with axis homing".
If "Continue with axis homing" is selected, a new reference travel of the axes, object holder or all
axes is first executed before the measurement is continued, after removing the stumps. The
object holder is moved into the predefined initial position for this.
This selection option is due to the fact that the motor driving the object holder could also be
turned by hand when switched on with a correspondingly high action of force. The motor is not
damaged by this, but the defined motor position is lost.
It may be the case in individual situations that greater force has to be applied for very tightly-fit
stumps, and the object holder is consequently turned inadvertently. Here a considerable "slipping
through" of the object holder can be heard, so that you usually recognize such a case. Select the
option "Continue" to continue the scan.
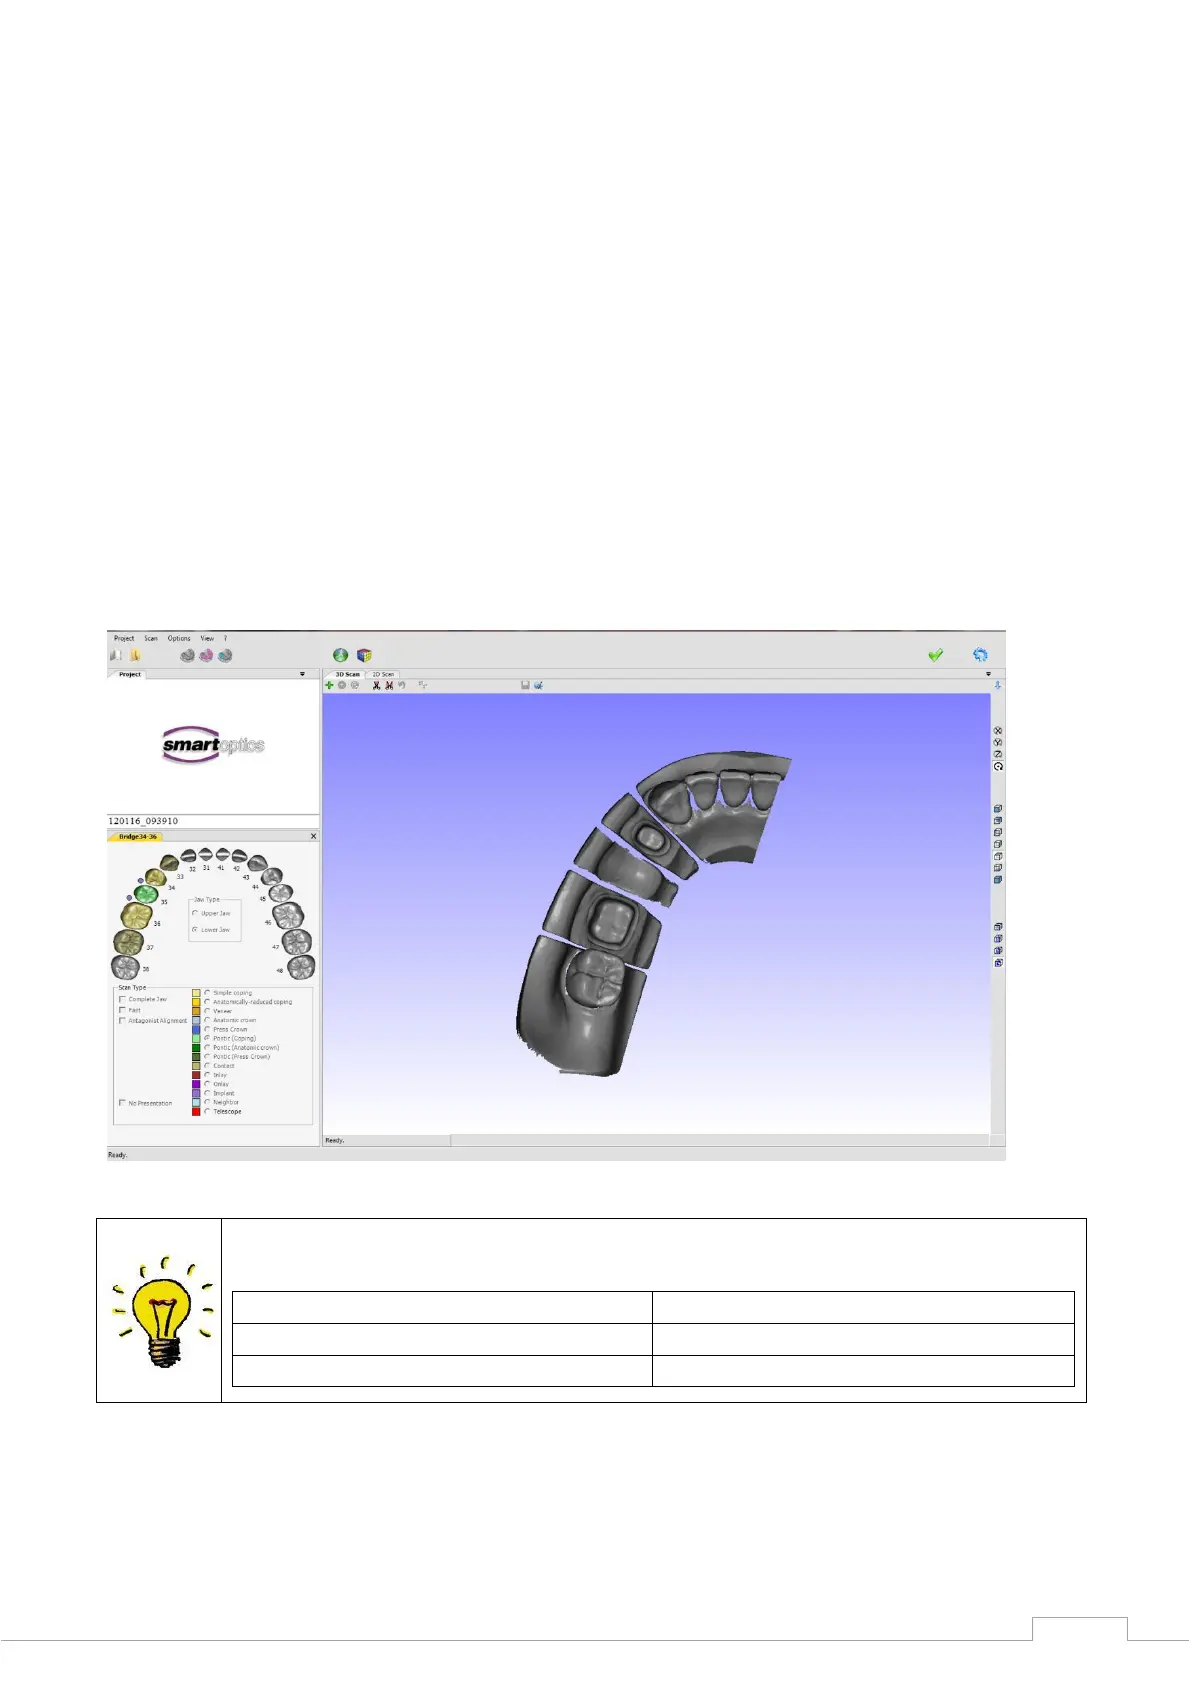
After the individual tooth presentation is completed, you can evaluate the scan data in the 3D
viewer for completeness (see Fig. 41).
If the model scan exhibits holes or blurred areas, you can correct these with the rescan function.
A green cross is located at the top of the 3D viewer, which can be used to start the "Rescan
Mode".