Chapter 7: Replacement Procedures 59
Chapter 7: Replacement Procedures
Display Replacement
Note: Consult Chapter 6, “Troubleshooting” before making any repairs.
Required Parts
Service Assembly, Display, MicroMaxx (P05463)
Required Tools
• #1 Phillips screwdriver
• Torque screwdriver, 2.0–10.0 inch pounds (0.23–1.1 newton meter)
•8mm nut driver
• An anti-static mat
• A wrist grounding strap
Display Removal
Caution:
Always use correct ESD procedures. ESD damage is cumulative and may not be noticeable at first.
Initial ESD symptoms may be slightly degraded performance or image quality.
Display
Removal
1 Remove the battery from the system. See Section , “Installing and Removing the Battery,” on
page 38 for battery removal.
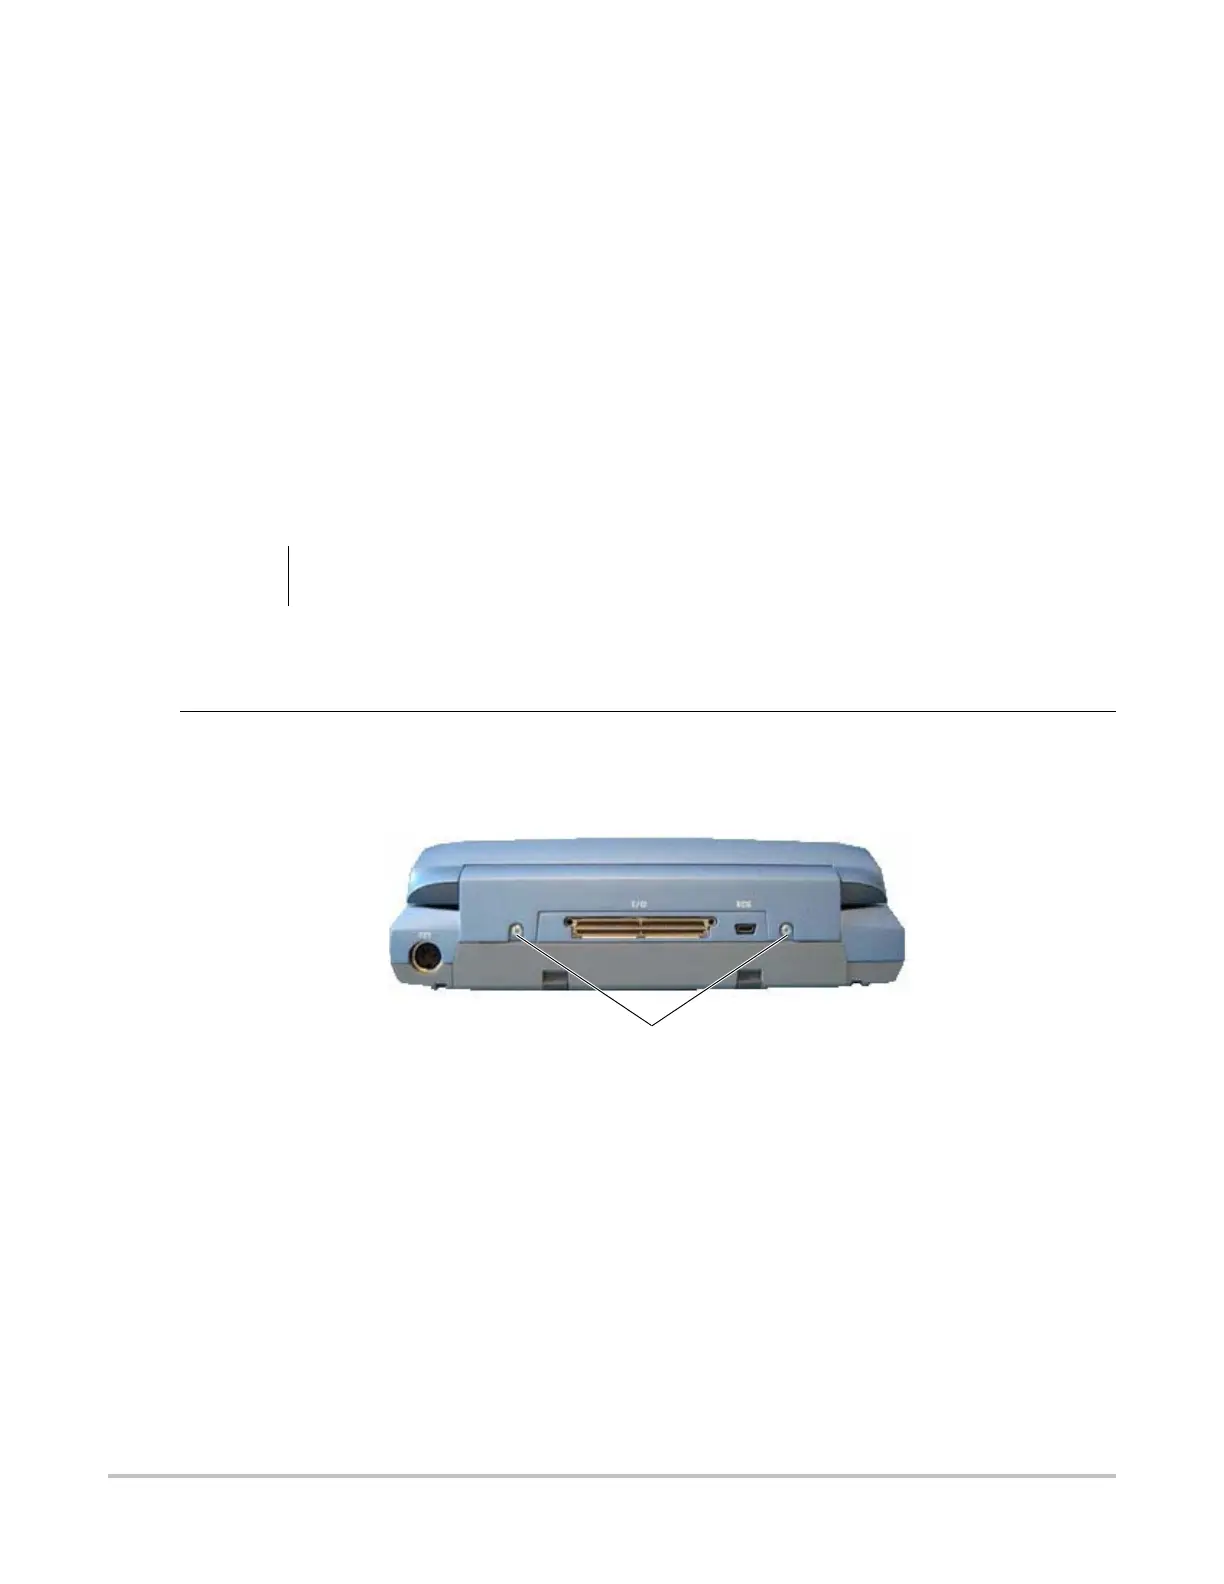
2 Remove the two screws from the back of the system per Figure .
Figure 7.1 System Rear
3 Lay the system on the top and remove the two screws from the bottom of the system per
Figure .
Screws (2)