76
GB
Using your printer with Windows computers
8
Click “Have Disk.”
9
Insert “Sony DPP-SV77” CD-ROM into your CD-ROM drive.
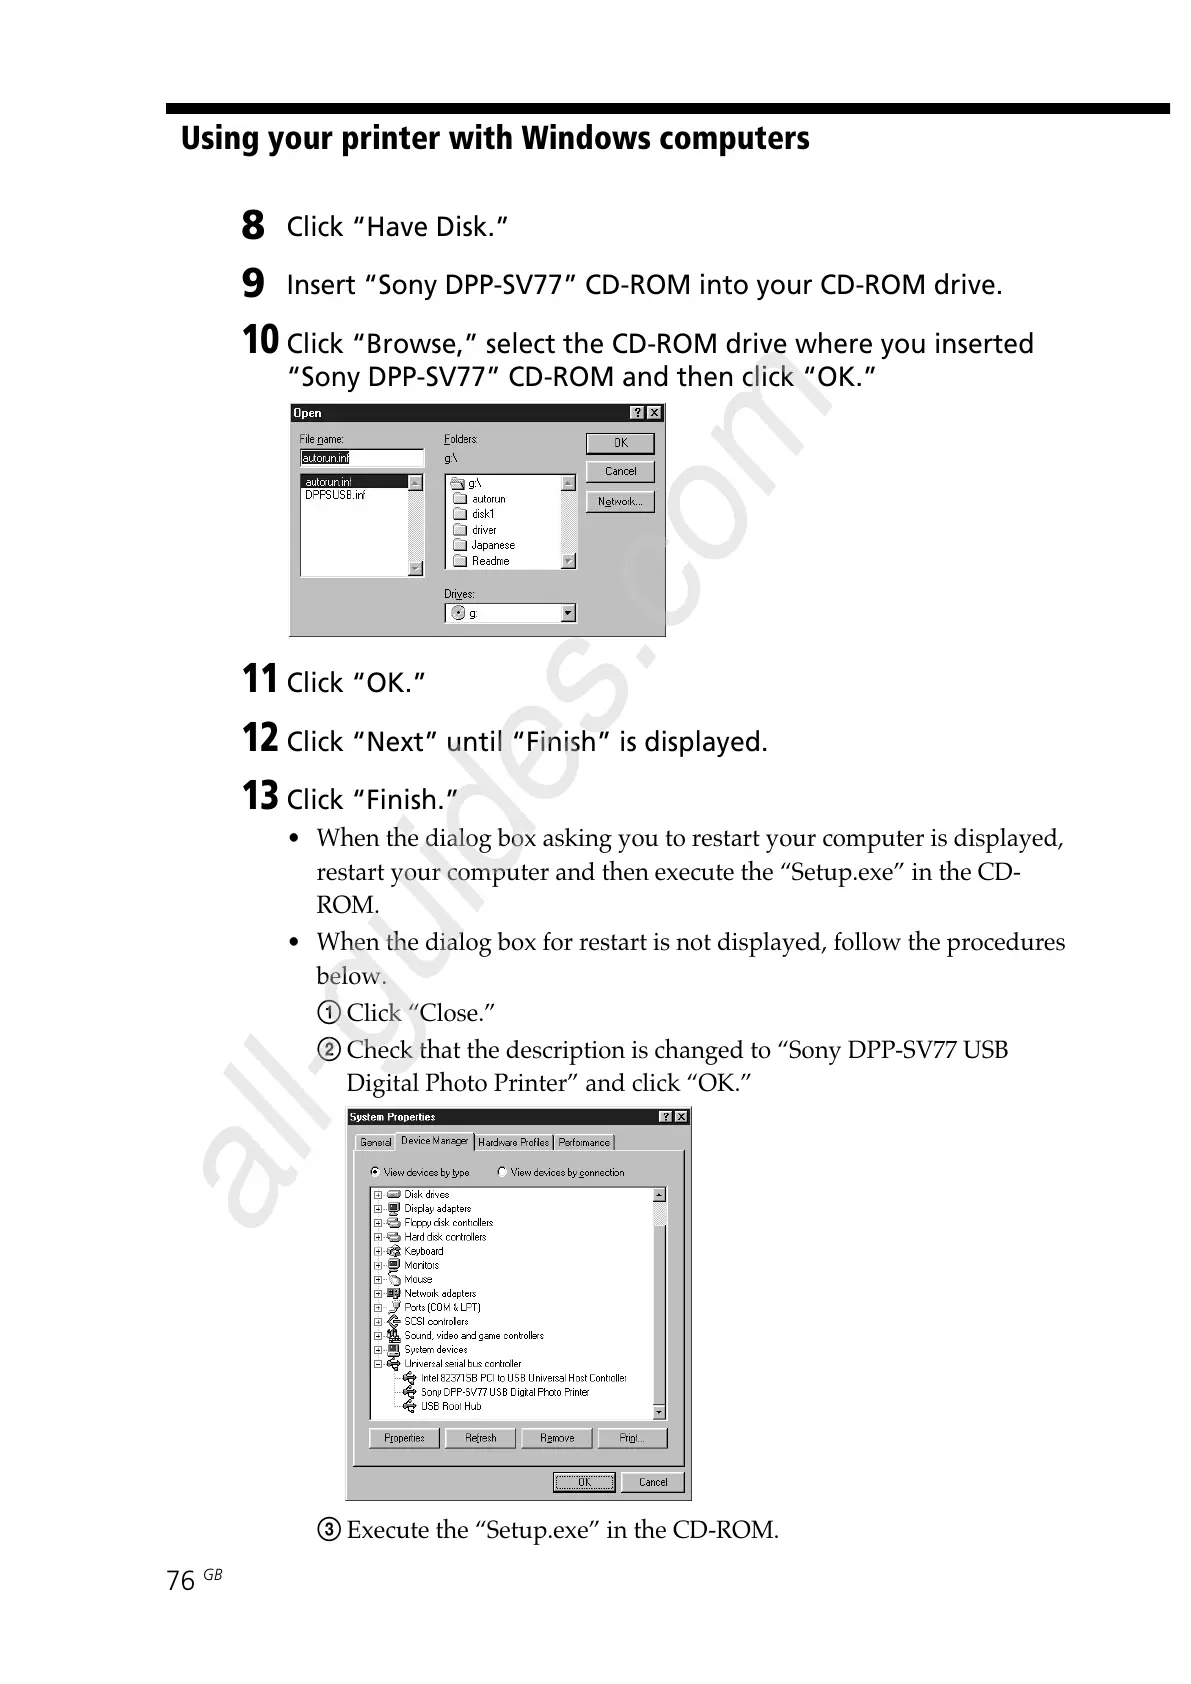
10
Click “Browse,” select the CD-ROM drive where you inserted
“Sony DPP-SV77” CD-ROM and then click “OK.”
11
Click “OK.”
12
Click “Next” until “Finish” is displayed.
13
Click “Finish.”
• When the dialog box asking you to restart your computer is displayed,
restart your computer and then execute the “Setup.exe” in the CD-
ROM.
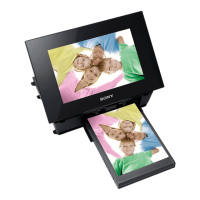
• When the dialog box for restart is not displayed, follow the procedures
below.
1 Click “Close.”
2 Check that the description is changed to “Sony DPP-SV77 USB
Digital Photo Printer” and click “OK.”
3 Execute the “Setup.exe” in the CD-ROM.