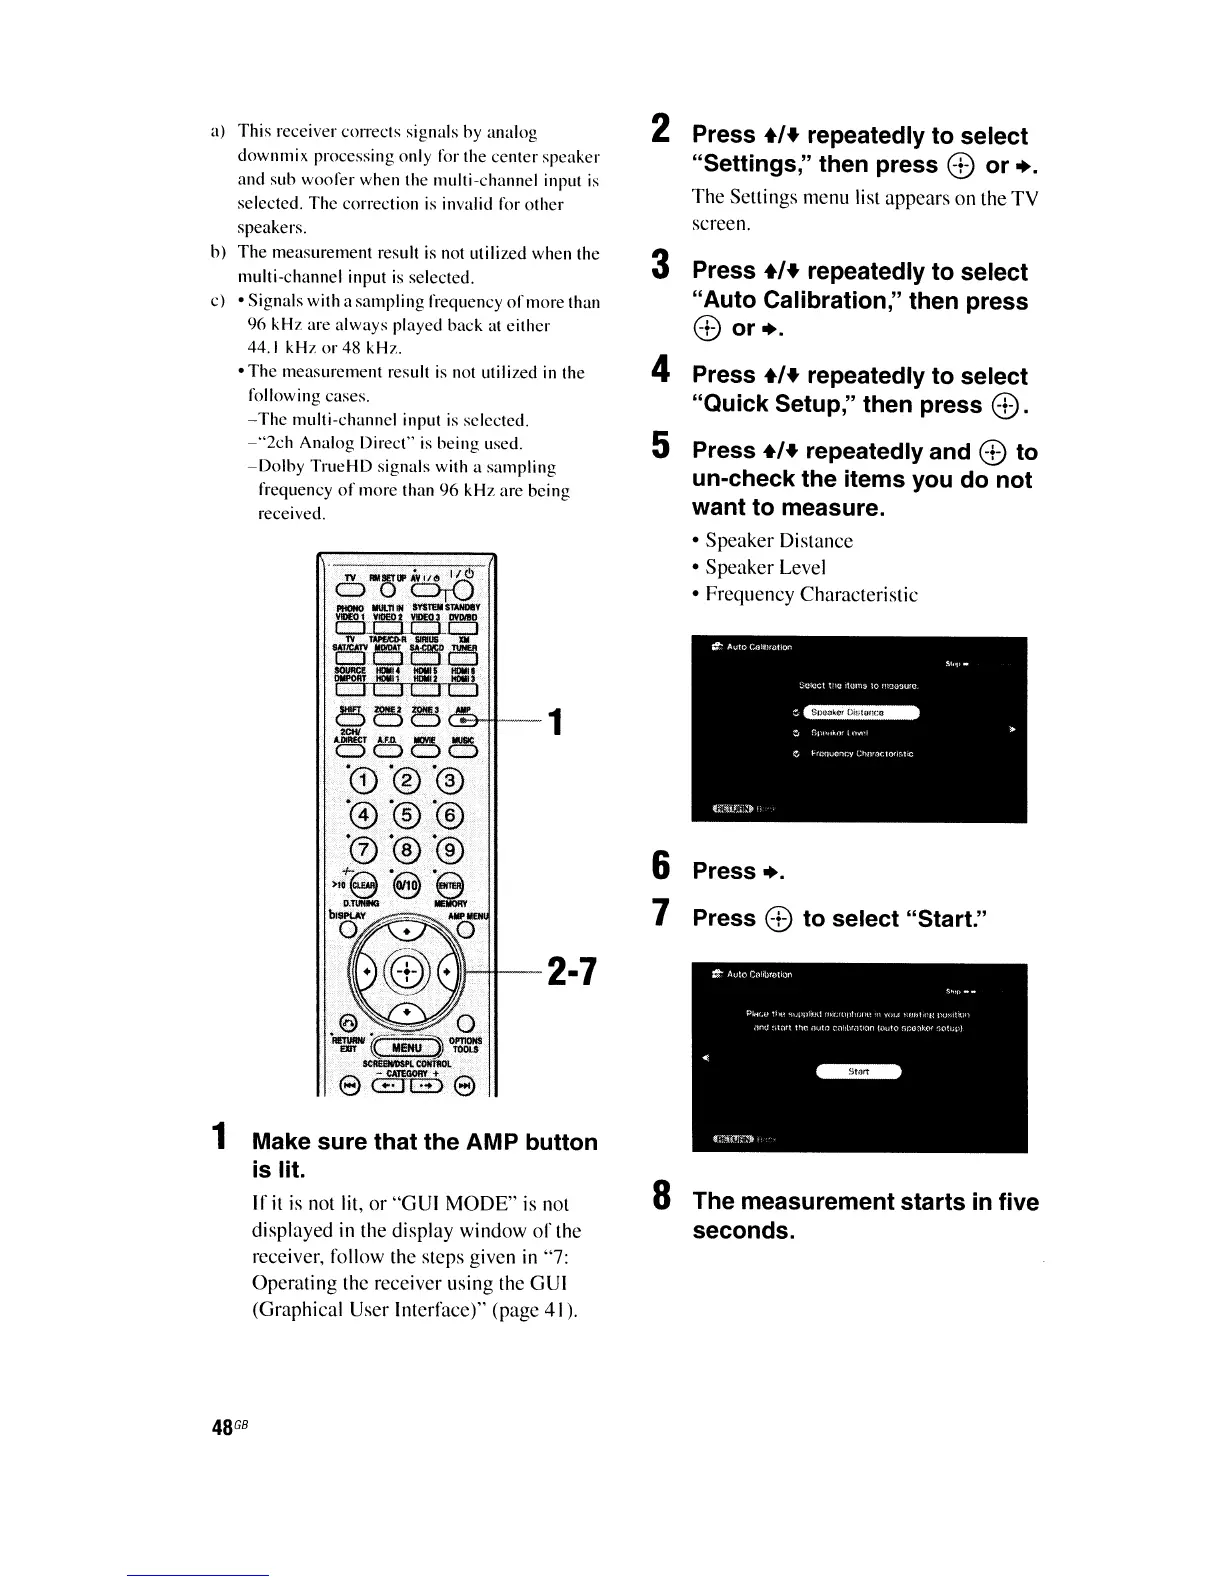
8 The measurement starts
in
five
seconds.
2 Press
+/+
repeatedly to select
"Settings;' then press
8)
or
•.
The Settings menu list appears on the TV
screen.
Press
8)
to select "Start."
Press
•.
6
7
3 Press
+/+
repeatedly to select
"Auto Calibration," then press
8)
or
•.
4 Press
+/+
repeatedly to select
"Quick Setup," then press
8).
5 Press
+/+
repeatedly and
8)
to
un-check the items you do not
want to measure.
• Speaker Distance
• Speaker Level
• Frequency Characteristic
-2·7
1 Make sure that the AMP button
is
lit.
If
it
is
not lit, or "GUI MODE"
is
not
displayed
in
the display window
of
the
receiver, follow the steps given
in
"7:
Operating the receiver using the
GUI
(Graphical User Interface)" (page 41).
a)
This
receiver
c,mects
signals hy analog
downmix processing only
1'01'
the ccnter
speaker
and sub woorer when the multi-channel input
is
selected. Thc correction is invalid
1'01'
other
speakers.
h)
The
measurement result is not utilized when the
multi-channel input
is
selected.
c) • Signals with a sampling rrequency
of
more than
96
kHz
are always played back at either
44.1
kHz
or
48 kHz.
• The measurement result
is
nol utilized
in
the
rollowing cases.
- The multi-channel input
is
selected.
-"2ch
Analog Direct"
is
being used.
-Dolhy
TrueHD
signals with a
sampling
frequency
of
more
than
96
kH7.
are being
received.