- 11 -
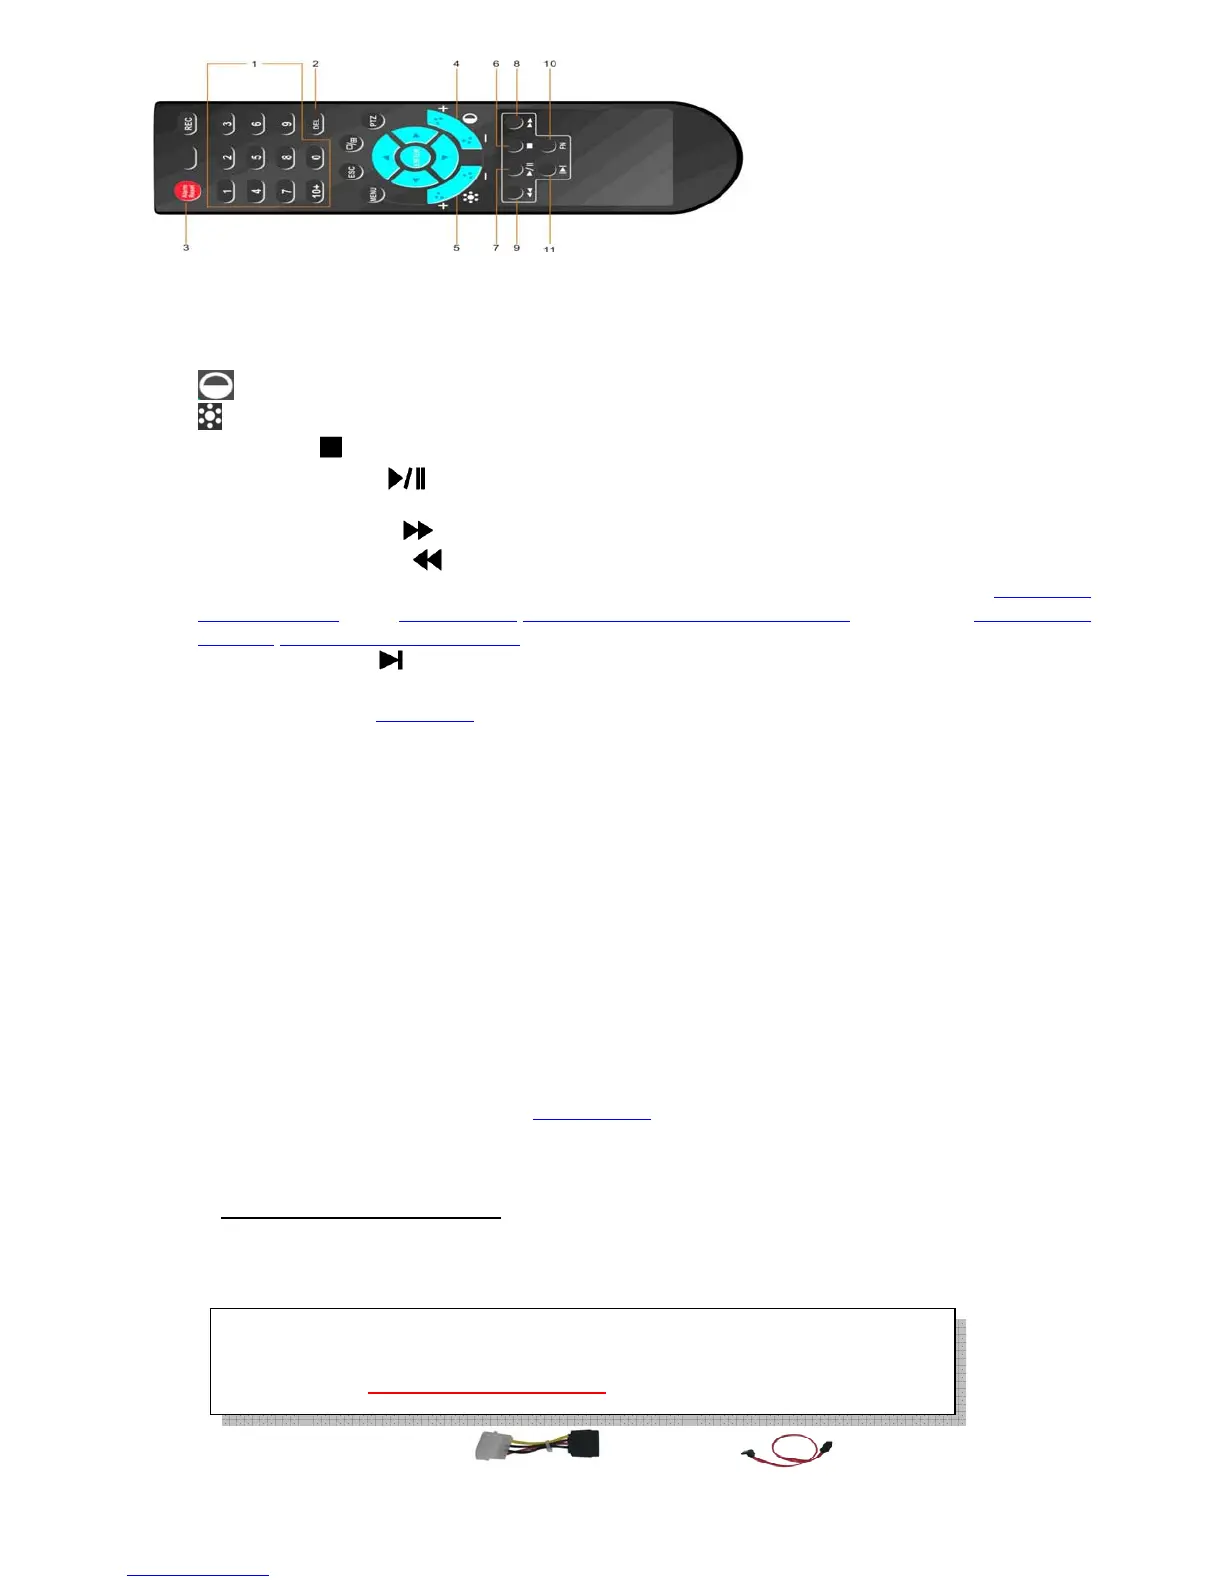
1. Alpha-numeric Buttons (1-9, 0, 10+):Press these buttons for camera selection in most circumstances.
These buttons can also be used to enter text and number
2. DEL Button (DEL): In text editing mode, this button is used as “del” key.
3. Alarm Reset Button: Press this button to cancel alarm activation; click this button will pop a message to
show the present alarm information.
4.
Contrast Button: Adjust image contrast up(+)/down(-).
5.
Brightness Button: Adjust image brightness up(+)/down(-).
6. Stop Button (
): Press this button to stop the playback.
7. Play/Pause Button (
): Press this button to search and play the recorded images, or pause the
playback.
8. Fast Forward Button (
): Press this button for fast forward playback.
9. Fast Backward Button (
): Press this button for fast backward playback.
10. Function Key(FN): Start time and Stop time setting of playback or back up in schedule record(Chapter 4.5
Video Playback), or 5.4.6 Motion/5.4.7 Privacy Mask setting(Mosaic) setting, or 5.3.2 Record
Schedule/5.6.4 Alarm Schedule setting
11. Single Step Button (
):Press this button to play the recorded images frame by frame.
The Other Buttons: Each of the other buttons corresponds to one of those buttons on the front panel. Please
refer to the descriptions in Section 2.1.
Front Panel
3. Hardware Installation
3.1 Basic Connections
Cameras: Connect the camera output to video input connector in real panel of the DVR.
The video input interface is standard BNC connector, 1Vp-p, 75 Ω.
Audio Connector: The audio input interface is standard RCA socket, 2Vp-p, 600 Ω.
The audio input resistance is a little bit high; please use active sound collection device or active
microphone. And the audio signal cable should keep away from the interference of strong
electromagnetism and electric field.
Monitor: Connect the main output connector to a monitor. Use BNC-to-RCA connector to
work with Audio/Video RCA cable.
Power: Use adapter come along with DVR, plug 12V
DC
output connector into the power
socket.
Alarm Input/output: Please refer to Chapter 5.6.2.
Ethernet: Connect the Ethernet connector to a standard twisted-pair Ethernet cable for remote access
via LAN or internet
USB 2.0 : Support Mouse, USB Flash Drive, USB portable HDD, USB portable DVD Burner.
Only support FAT32 file system
.
3.2 Hard Disk and internal DVD Burner Install
There are usually power cable and data cable with the DVD Burner you buy,
HDD must be formatted by DVR system before it can be used to record.
PS. Do not format HDD by PC, it will cause incompatibility.
Please refer to Section 4.3 Format HDD
to format the HDD.