- 23 -
General Operations
Press 【MENU】 button to enter into system setting screen.
Press 【●】 button to start/stop recording manually.
Press 【
】 button to play record file.
Press【PTZ】 button to enter into PTZ control screen.
Menu Selection
The highlight menu is the current active one. User can move highlight icon to the menu needed using
】,【 】 button, and press 【Enter】 button to confirm selection, or press 【ESC】to return to upper
menu.
Menu Operation
Use 【▲】, 【▼】to move highlight for configure items. Press 【
】,【 】button to change parameter.
Use mouse to input via on-screen keyboard or input value from remote controller.
Press【>>】open sub menu, and 【ESC】return upper menu.
Save/Exit
User can click × button on the right upper corner, or single right click mouse, or press 【ESC】 button to
enter into the Save & Exit screen. You can select exit directly or exit after being saved.
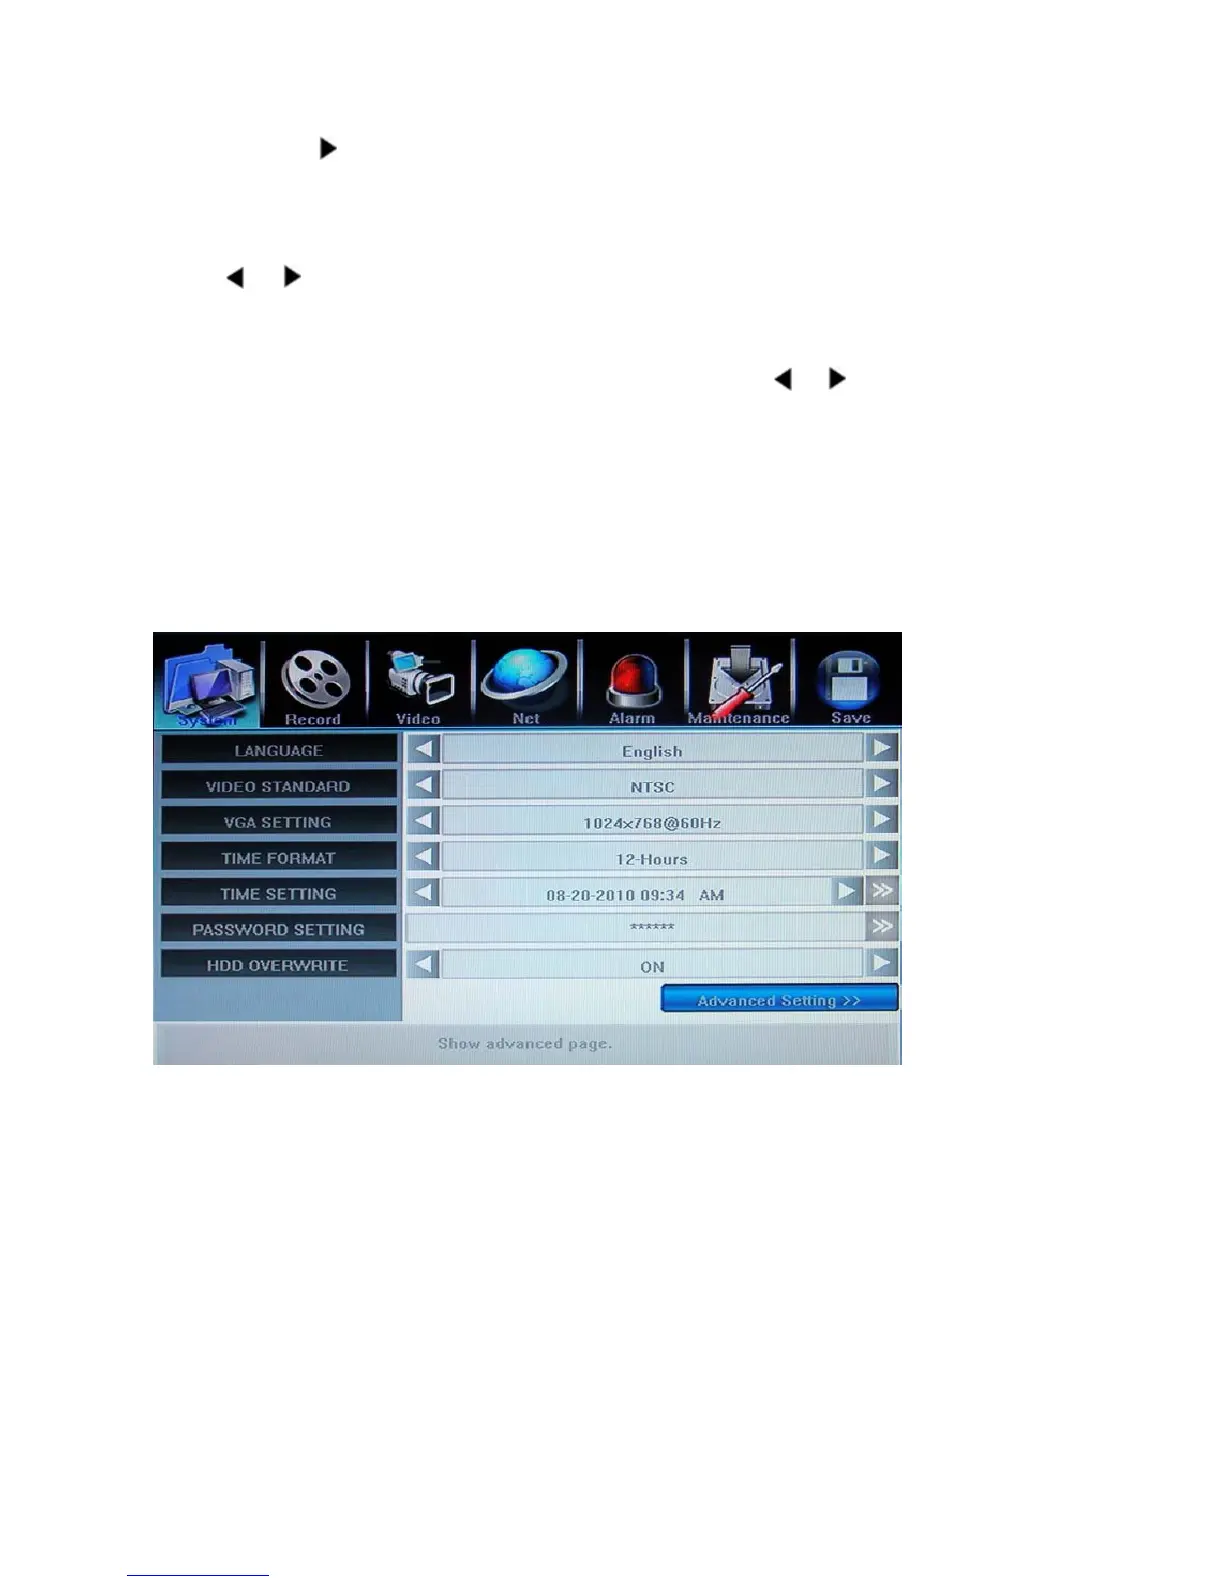
5.2 System Setting
5.2.1 Language
Change DVR menu text and OSD language depend upon your requirement.
**Take effect immediately **
5.2.2 Video Standard
Change DVR and camera video system, NTSC or PAL system.
**Take effect after being saved. **
5.2.3 VGA Setting
Switch different VGA output resolution, there are 800x600@60Hz, 1024x768@60Hz
1280x1024@60Hz, 1440x900@60Hz
if wrong VGA resolution to make the LCD display distorted, please press “ESC” -> “2” -> “ESC”
continuously(not over 3 second) of front panel/remote control to restore the display resolution to be
800x 600
5.2.4 Time Fomat
Switch time format between 12-Hours or 24-Hours.