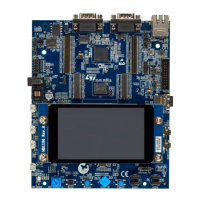
5.6 FW Page
This page enables the user to load and change firmware of the device. Clicking the [Load] button will cause a
Windows dialog window to pop up, prompting you to select a *.hex firmware file. After selecting the target file,
press the [Write] button to load the firmware into the device's NVM. A power cycle is then necessary for the
changes to take effect.
Upon a first power-up, calibration shall be performed by the user. During the calibration, it is necessary to leave
the power interface clear of all objects to provide as precise results as possible. The calibration may be executed/
repeated manually by clicking the [Calibrate] button.
The [Read All] button reads the contents of the NVM and saves it into a *.hex file, enabling the user to quickly
mirror/transfer it into a new device. The saved file contains both firmware and the parameters.
Important: Do not power down or disconnect the device during firmware loading. Doing so will stagger the UART, rendering
the device inaccessible by the GUI. In this state, the device can only be accessed by the SWD interface and
must be properly reset using this interface before any further use.
5.6.1 Obtaining the firmware update file
Firmware update file can be found on the ST website or obtained from your local ST support.
When the firmware is loaded into the chip, the configuration can be changed and saved to the chip. The new file
can be then created by the [Read All] button. This new file contains both the firmware and the configuration.
5.6.2 Loading the firmware into an empty device
A chip with no firmware loaded is considered empty. Connecting to an empty chip works the same as with an
already programmed one:
• Connect to the board
• Power up the board
• Start the GUI and press the [Connect] button
• Navigate to the FW tab and select a *.hex file to load. Both "FW only" and "FW+Configuration" file types
can be used for the first write.
• Calibration is necessary after a firmware update.
5.6.3 Updating firmware of a previously programmed device
The firmware of the device may be updated at any time. However, we recommend removing all magnetically
susceptible items from the Tx coil before doing so.
To update the firmware, navigate to the FW window, load the target *.hex file and click the [Write] button.
Calibration is necessary after the firmware is loaded.
5.6.4 Calibration
STWBC2 features a calibration function that enables the device to compensate for board build variations. This
ensures a supreme performance, regardless of the parts and assembling technology used. The calibration feature
improves performance of the ADC, Q measurement, and presence detection blocks.
The Tx coil should be clear of all objects during calibration. Upon completing a successful calibration, the
firmware saves the calibration data into the device's NVM, meaning no further calibration shall be necessary until
either a firmware or hardware change.
The calibration is possible either by button on the FW page or by UART command (see
Section 4.15.2.6: Calibration).
UM3286
Graphical user interface (GUI)
UM3286 - Rev 1
page 41/84