EasyManua.ls Logo

Stelpro ASMC402 - User Manual

Stelpro ASMC402
45 pages
Print Icon
To Next Page IconTo Next Page
Loading...
- 1 -- 1 -
USER GUIDE
SMART CONTROLLER
THERMOSTAT
Model: ASMC402
INS-ASMC402-US-0518

Table of Contents

Question and Answer IconNeed help?

Do you have a question about the Stelpro ASMC402 and is the answer not in the manual?

Summary

THE 360° COMFORT EXPERIENCE

CONTROL YOUR COMFORT FROM WHEREVER YOU ARE

Features for remote control of home comfort settings.

MADE AND DESIGNED FOR NORTH AMERICA

Information about the product's origin and design philosophy.

COMPATIBILITY

WHATS IN THE BOX AND TOOLS REQUIRED

WARNING

BEFORE YOU START

MAKE THE MOST OF YOUR MAESTRO

Introduction to maximizing the use of the MAESTRO system.

WHERE TO INSTALL YOUR MAESTRO CONTROLLER•THERMOSTAT

READ THIS GUIDE AND WATCH THE INSTALLATION VIDEO

FOUR STEPS TO MANAGING THE COMFORT OF YOUR HOME

1 INSTALL YOUR MAESTRO CONTROLLER•THERMOSTAT

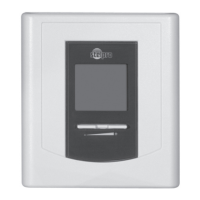
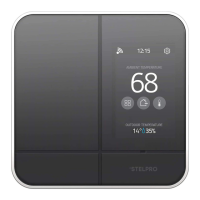
Instructions for installing the main controller unit.

2 INSTALL YOUR MAESTRO THERMOSTATS

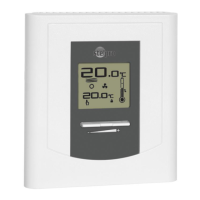
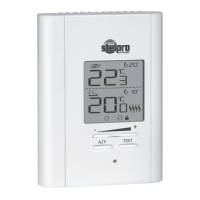
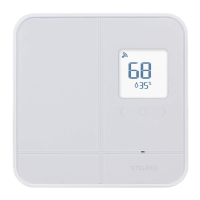
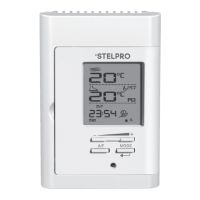
Instructions for installing additional thermostats.

3 INSTALL THE MAESTRO APP AND CREATE YOUR MAESTRO ACCOUNT

Guide to downloading the app and setting up an account.

4 BUILD YOUR MAESTRO NETWORK

Steps to connect the controller and thermostats into a network.

INSTALLING THE MAESTRO CONTROLLER•THERMOSTAT

1 CUT OFF POWER SUPPLY

Essential safety step to turn off power before installation.

2 REMOVE EXISTING THERMOSTAT

Steps to safely remove an old thermostat.

3 SECURE THE MAESTRO CONTROLLER•THERMOSTAT MOUNTING PLATE

Instructions for attaching the mounting plate to the electrical box.

4 CONNECT THE WIRES

Guide for wiring the controller, including safety notes.

5 SECURE THE CONTROLLER•THERMOSTAT ON THE MOUNTING PLATE

Instructions for attaching the controller to the installed mounting plate.

6 TURN POWER BACK ON

Steps to restore power and check initial operation.

7 SET-UP BASIC OPTIONS ON FIRST START

Configuration of initial settings like language and temperature format.

ENJOY THE FULL 360° COMFORT EXPERIENCE

HOME SCREEN

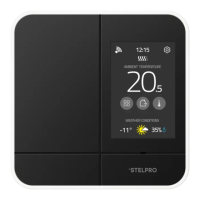
Overview of the controller's main display and its elements.

USING THE CONTROLLER•THERMOSTAT

CONTROLLING YOUR MAESTRO SYSTEM WITH THE MAESTRO APP

How to use the mobile app for remote control.

OBTAINING THE REGISTRATION CODE FOR THE CONTROLLER•THERMOSTAT

Procedure to get the registration code for the MAESTRO app.

CREATING YOUR HOMES MAESTRO NETWORK

CONNECTING A THERMOSTAT TO THE CONTROLLER•THERMOSTAT (With the MAESTRO app)

Guide to pairing thermostats with the controller via the app.

CONNECTING A THERMOSTAT TO THE CONTROLLER•THERMOSTAT (Without the MAESTRO app)

Guide to pairing thermostats directly with the controller.

CHANGING STATUSES OR ACTIVITIES

DESCRIPTION OF STATUSES

Explains home statuses like 'I am away', 'I am home', etc.

EXAMPLES OF STATUS AND ACTIVITY CHANGES

Illustrates how statuses and activities affect temperature settings.

SELECTING A STATUS FOR YOUR HOME

How to manually choose a home status from the device.

SELECTING AN ACTIVITY

How to manually choose an activity from the device.

MANAGING GEOFENCING

ACTIVATING OR DEACTIVATING GEOFENCING

Instructions to enable or disable the geofencing feature.

DELETING MOBILE DEVICES

How to manage devices linked to the geofencing feature.

DEFINING THE SETPOINT TEMPERATURE OF THE CONTROLLER • THERMOSTAT

TEMPORARILY MODIFYING THE SETPOINT TEMPERATURE OF A GROUP OF THERMOSTATS

TEMPORARILY MODIFYING THE SETPOINT TEMPERATURE OF A THERMOSTAT

REMOVING A THERMOSTAT FROM THE HOME

ACTIVATING OR DEACTIVATING OPEN WINDOW DETECTION

ACTIVATING OR DEACTIVATING PROXIMITY SENSOR

LOCKING OR UNLOCKING THE CONTROLLER-THERMOSTAT SCREEN

VIEWING ACTIVE ALERTS

VIEWING TECHNICAL INFORMATION ON THE CONTROLLER • THERMOSTAT

MODIFYING DISPLAY OPTIONS ON THE CONTROLLER•THERMOSTAT

MODIFYING THE DISPLAY LANGUAGE

Changing the language displayed on the controller.

MODIFYING THE TEMPERATURE FORMAT DISPLAY

Changing temperature units between Celsius and Fahrenheit.

MODIFYING THE HEAT MODE

MODIFYING THE TIME FORMAT DISPLAY

MODIFYING THE SCREEN SAVER” OPTION

RESETTING THE CONTROLLER • THERMOSTAT

CONTROLLER•THERMOSTAT TROUBLESHOOTING

COMMON PROBLEMS

A table listing common issues and their solutions.

DEACTIVATING THE ZIGBEE NETWORK FROM A CONTROLLER• THERMOSTAT

MENU TREE

CONTROLLER•THERMOSTAT DEFAULT VALUES

TECHNICAL SPECIFICATIONS

ELECTRICAL DATA

Details on voltage, minimum and maximum load.

TEMPERATURE DISPLAY

Information on temperature measurement and setpoint increments.

CONNECTIVITY

Specifications for Zigbee and Wi-Fi protocols.

STORAGE AND OPERATING CONDITIONS

Environmental limits for storage and operation.

WARRANTY

Stelpro ASMC402 Specifications

General IconGeneral
DisplayLCD
Accuracy±0.5 °C
ControlElectronic
MountingWall-mounted
CertificationCSA
Wattage4000 W @ 240 V
Amperage16.7 A (240 V)
Temperature Range5°C to 30°C (41°F to 86°F)

Related product manuals