- 2 -- 2 -
TABLE OF CONTENTS
THE 360° COMFORT EXPERIENCE 3
COMPATIBILITY 4
WHAT’S IN THE BOX AND TOOLS REQUIRED 4
WARNING 5
BEFORE YOU START 6
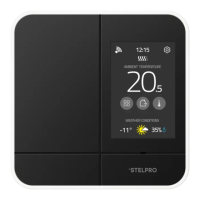
Make the most of your MAESTRO 6
Where to install your MAESTRO controller
•
thermostat 7
Read this guide and watch the installation video 7
Four steps to managing the comfort of your home 8
1
Install your MAESTRO controller
•
thermostat 8
2
Install your MAESTRO thermostats 8
3
Install the MAESTRO app and create your MAESTRO account 9
4
Build your MAESTRO network 9
INSTALLING THE MAESTRO CONTROLLER
•
THERMOSTAT 10
1
Cut off power supply 10
2
Remove existing thermostat 11
3
Secure the MAESTRO controller
•
thermostat mounting plate 12
4
Connect the wires 13
5
Secure the controller
•
thermostat on the mounting plate 14
6
Turn power back on 15
7
Set-up basic options on rst start 16
ENJOY THE FULL 360° COMFORT EXPERIENCE 17
Home screen 17
USING THE CONTROLLER
•
THERMOSTAT 18
Controlling your MAESTRO system with the MAESTRO app 18
Connecting the controller
•
thermostat to your wi- network
and registering it in the MAESTRO app 18
Obtaining the registration code for the controller
•
thermostat 19
Creating your home’s MAESTRO network 20
Connecting a thermostat to the controller
•
thermostat 20
With the MAESTRO app 20
Without the MAESTRO app 21
Changing statuses or activities 22
Description of statuses 22
Examples of status and activity changes 23
Selecting a status for your home 24
Selecting an activity 24
Managing geofencing 25
Activating or deactivating geofencing 26
Deleting mobile devices 26
Dening the setpoint temperature of the controller
•
thermostat 27
Temporarily modifying the setpoint temperature
of a group of thermostats 28
Temporarily modifying the setpoint temperature of a thermostat 29
Removing a thermostat from the home 30
Activating or deactivating open window detection 31
Activating or deactivating proximity sensor 31
Locking or unlocking the controller
•
thermostat screen 32
Viewing active alerts 33
Viewing technical information on the controller
•
thermostat 34
Modifying display options on the controller
•
thermostat 35
Modifying the display language 35
Modifying the temperature format display 35
Conguring the heat mode 36
Modifying the time format display 37
Modifying the “screen saver” option 37
Resetting the controller
•
thermostat 38
CONTROLLER
•
THERMOSTAT TROUBLESHOOTING 39
Common problems 39
Deactivating the Zigbee network from a controller
•
thermostat 41
MENU TREE 42
CONTROLLER
•
THERMOSTAT DEFAULT VALUES 43
TECHNICAL SPECIFICATIONS 44
Electrical data 44
Temperature display 44
Connectivity 44
Storage and operating conditions 44
WARRANTY 45