4-4
10083002 Operator Manual Post Installation Verification
4.4 Check
System Operation
Verify that electrical power is applied to the control center.
Harmony LED Control Center: Turn control on by pressing “ON” touch pad.
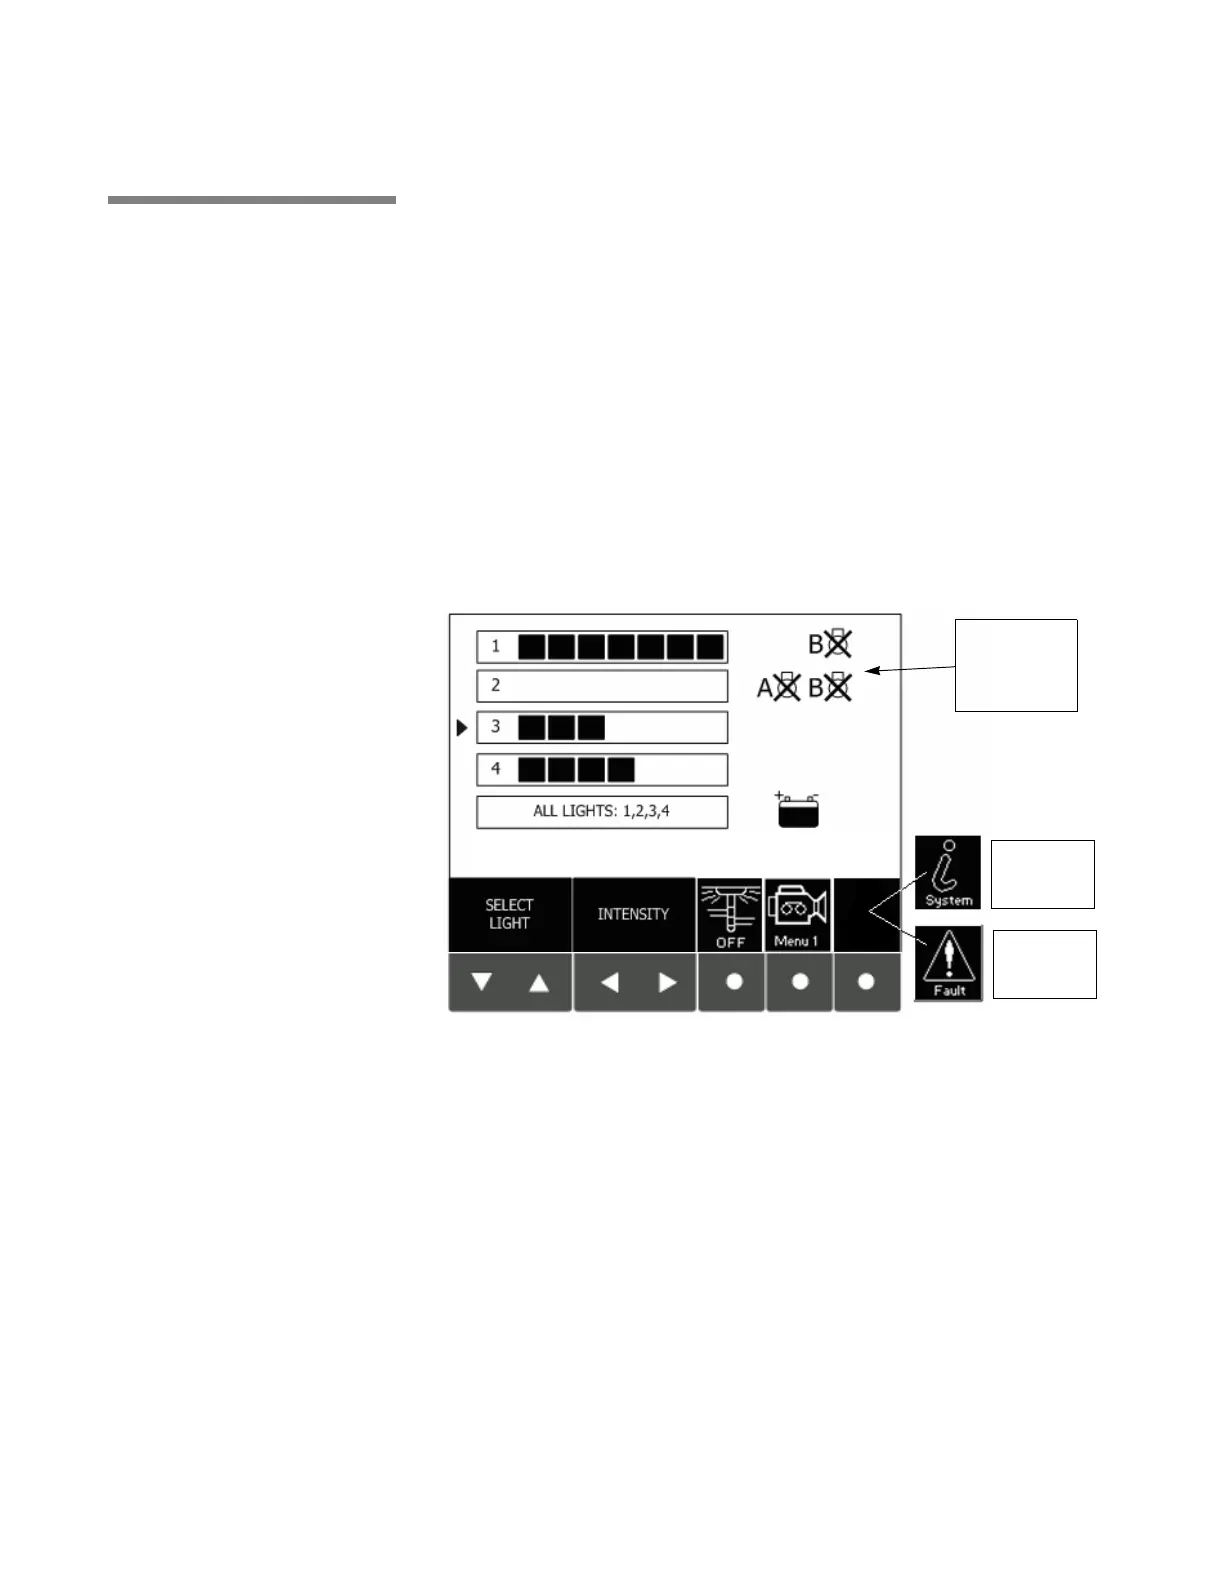
Verify that the Light Control Screen is displayed after self-diagnostics and
startup is completed. (See Figure 4-4.)
Use the arrow keys to select each lighthead and verify that the intensity can
be adjusted using the control center keypad. Verify there are no faults and
that no fault indication icon is displayed on the Light Control Screen. If the
fault indicator appears on the control center keypad, press the fault key and
record the faults indicated on the fault screen. Immediately report all faults
and LED Module out indications to a qualified service technician.
NOTE: Turn power OFF to each lighthead using intensity controls when
testing is complete.
Check LED Module Failure Indicators: If any lamp fault graphic on the
control center display is visible, one or more LED modules may have failed.
Any service for LED module failure must be referred to a trained, qualified
service technician (call STERIS for assistance with failed LED modules).
Check Fault LED: If the status LED on any of the lightheads is blinking,
immediately report flash sequence to a qualified service technician. Refer to
Section 5.3, Lighthead Fault Indications, page 5-4.
Figure 4-4. Use Control Center to Check System Operation
Harmony LED
System Module
Failure
Indicators
System
Configuration
Icon
Fault
Indication
Icon