24
02.11
Strapex SMA 20
6 OPERATION
6.1 ADJUST STRAP TENSION
– Turn Main switch (3/1) to position „1“.
– Toggle switch (3/6) on.
– Activate push-buttons „Strap tension weaker“ (3/3)
or „Strap tension stronger“ (3(5), until required
value is shown on the „Strap tension“ digital dis-
play (3/4).
Digital display Strap tension
00 approx. 5 N
01 approx. 10 N
10 approx. 250 N
20 approx. 450 N
These values are dependent on the basic
setting of the strap tension (see Chapter 6.6).
– Execute a strapping cycle so that the set value is
stored.
To exclude danger of injuries, the strap
tension should not be set higher than level
12 during continuous operation.
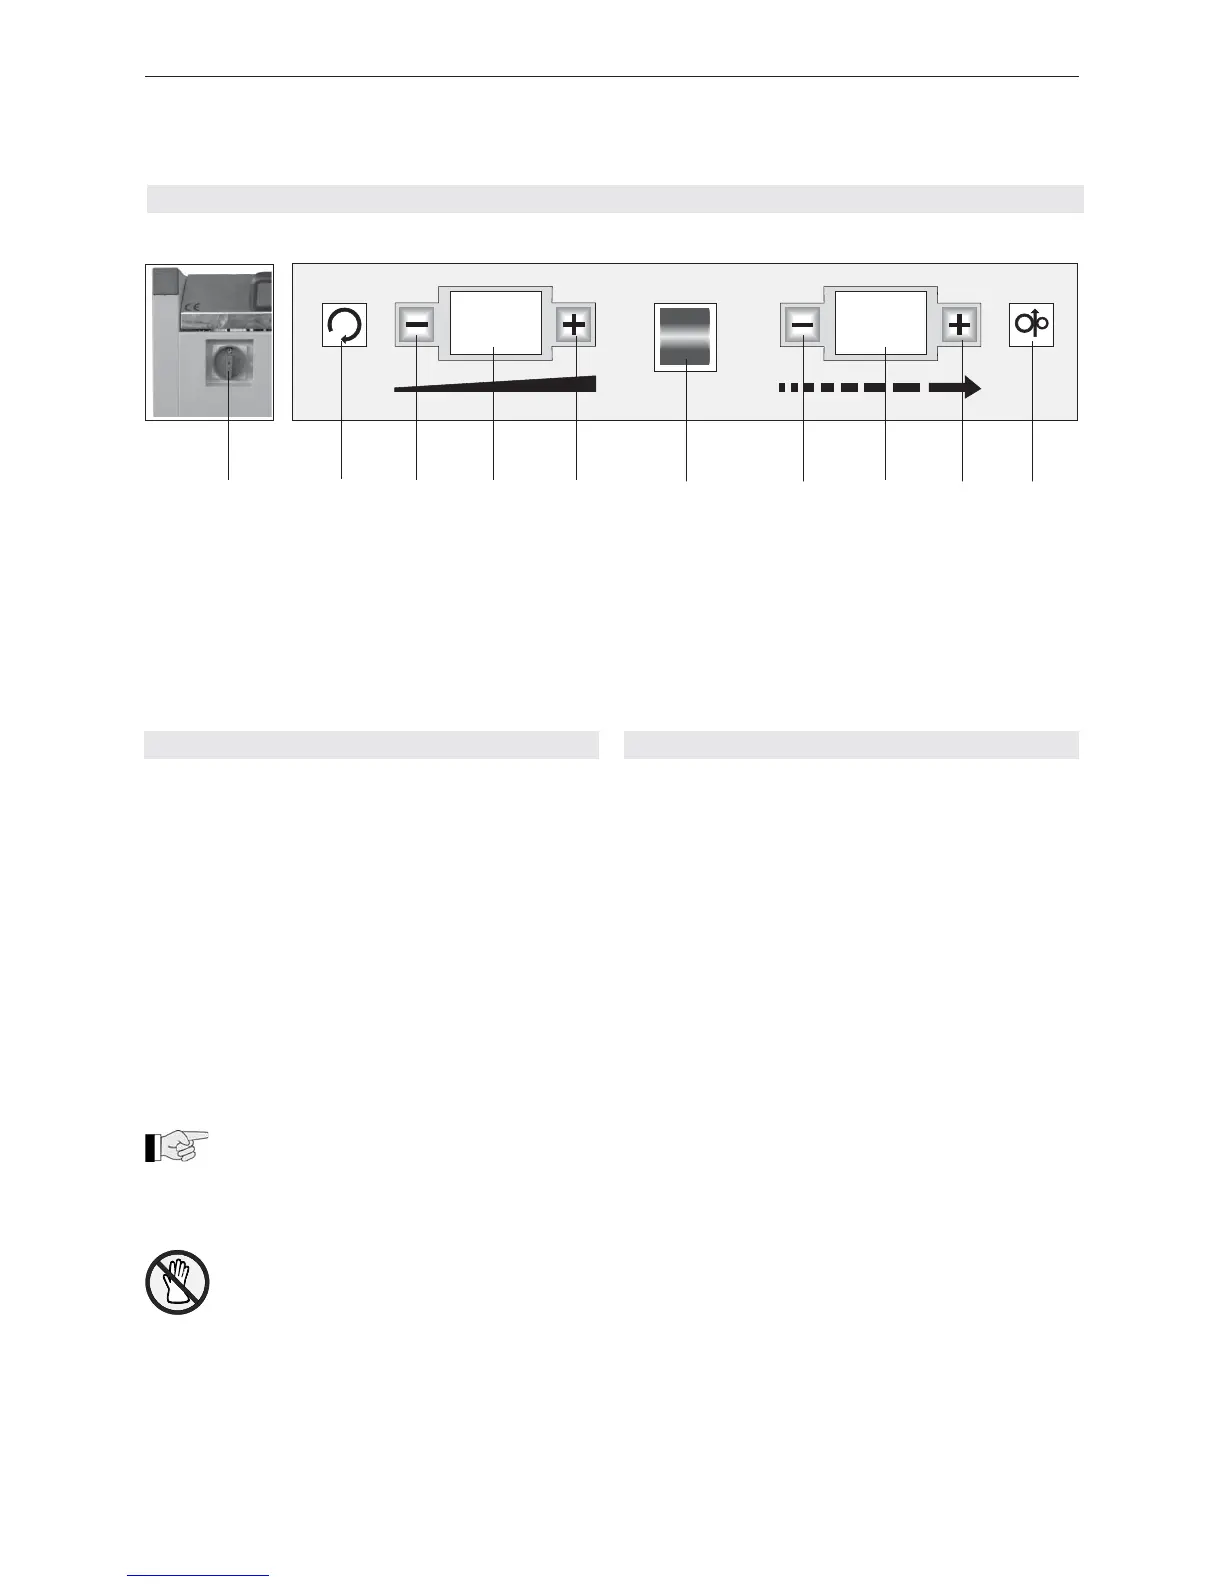
Fig. 3 Control panel
1 Main switch
2 Reset, aggregate returns to starting position and
cuts the strap (push-button)
3 Strap tension weaker (push-button)
4 Strap tension (digital display)
5 Strap tension stronger (push-button)
6 Machine on/off (toggle switch)
7 Strap length shorter (tip-activated button)
8 Strap length (digital display)
9 Strap length longer (tip-activated button)
10 Manual strap feed (push-button)
6.2 ADJUST STRAP FEEDING
The strap feeding can be adjusted as follows:
a) Manual
– Turn Main switch (3/1) to position „1“.
– Toggle switch (3/6) on.
– Activate push-button „Manual strap feed“ (3/10) until
the strap reaches the wanted length.
b) Permanent input
– Turn Main switch (3/1) to position „1“.
– Toggle switch (3/6) on.
– Activate push-button „Strap length shorter“ (3/7) or
„Strap length longer“ (3/9) until the wanted value is
shown on display „Strap length“ (3/8).
Digital display Strap length
00 approx. 400 mm
01 approx. 500 mm
10 approx. 1400 mm
20 approx. 2400 mm
0 6
1 9
1 2 3 4 5 6
7 8 9 10