30
02.11
Strapex SMA 20
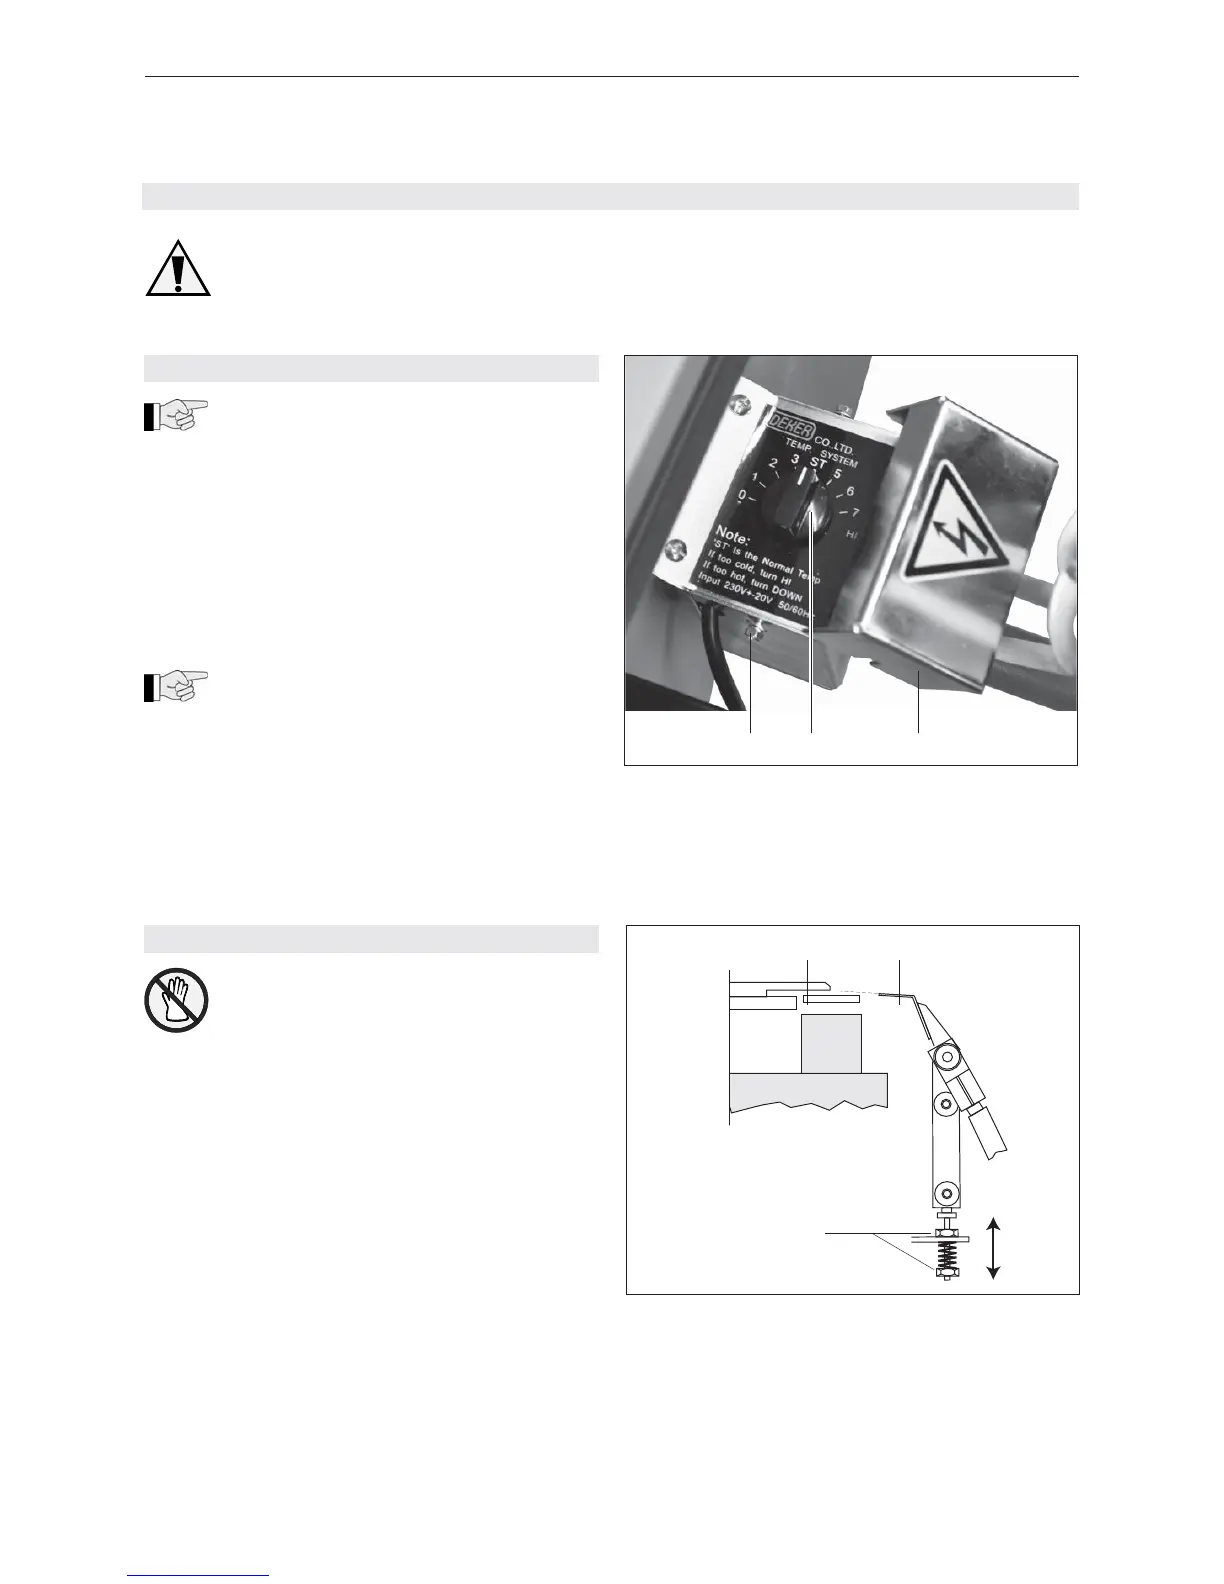
Fig. 12
1 Hexagonal head parker screw
2 Potentiometer
3 Cover
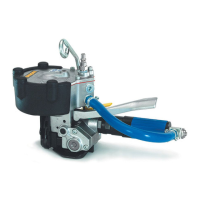
Fig. 13
1 Strap separator
2 Heating element
3 Nuts
8 CORRECTIVE MAINTENANCE
Disconnect the machine from the mains
supply before undertaking any maintenance
work.
8.1 ADJUST WELDING TEMPERATURE
The welding temperature can be adjusted to
suit the strap thickness and strap quality:
– For narrow, thin straps = low temperature.
– For wide, thick straps = high temperature.
– Open table top.
– Loosen two hexagonal head parker screws (12/1)
and remove cover (12/3).
– Set potentiometer (12/2) to desired temperature.
– ST = Default (factory setting)
– Pos. 0 = lowest temperature, approx. 220°C
– Pos. 7 = highest temperature, approx. 325°C
The warming-up time for the heating element
is about 45 seconds.
– Mount the cover (12/3) and fi x it with the hexagonal
head parker screws (12/1), close table top.
3
12
8.2 ADJUST HEIGHT OF HEATING ELEMENT
First of all let the heating element cool down.
– Open table top
– With a long hexagon-socket screw wrench (placed
through hole in side wall) turn coupling in direction
of arrow, until the heating element has reached the
position shown in Fig. 13.
– With the nuts (13/3) set the heating element (13/2)
in such a way that the upper side of the heating
element is a little (approx. 0.2 mm) over the top of
the strap separator (13/1).
1 2 3