33
02.11
Strapex SMA 20
8.7 REPLACE CLAMPS (KNIFE)
Remove
– Turn Main switch to position „1“.
– Toggle switch (3/6) on.
– Activate push-button „Reset“ (3/2).
– Open table top.
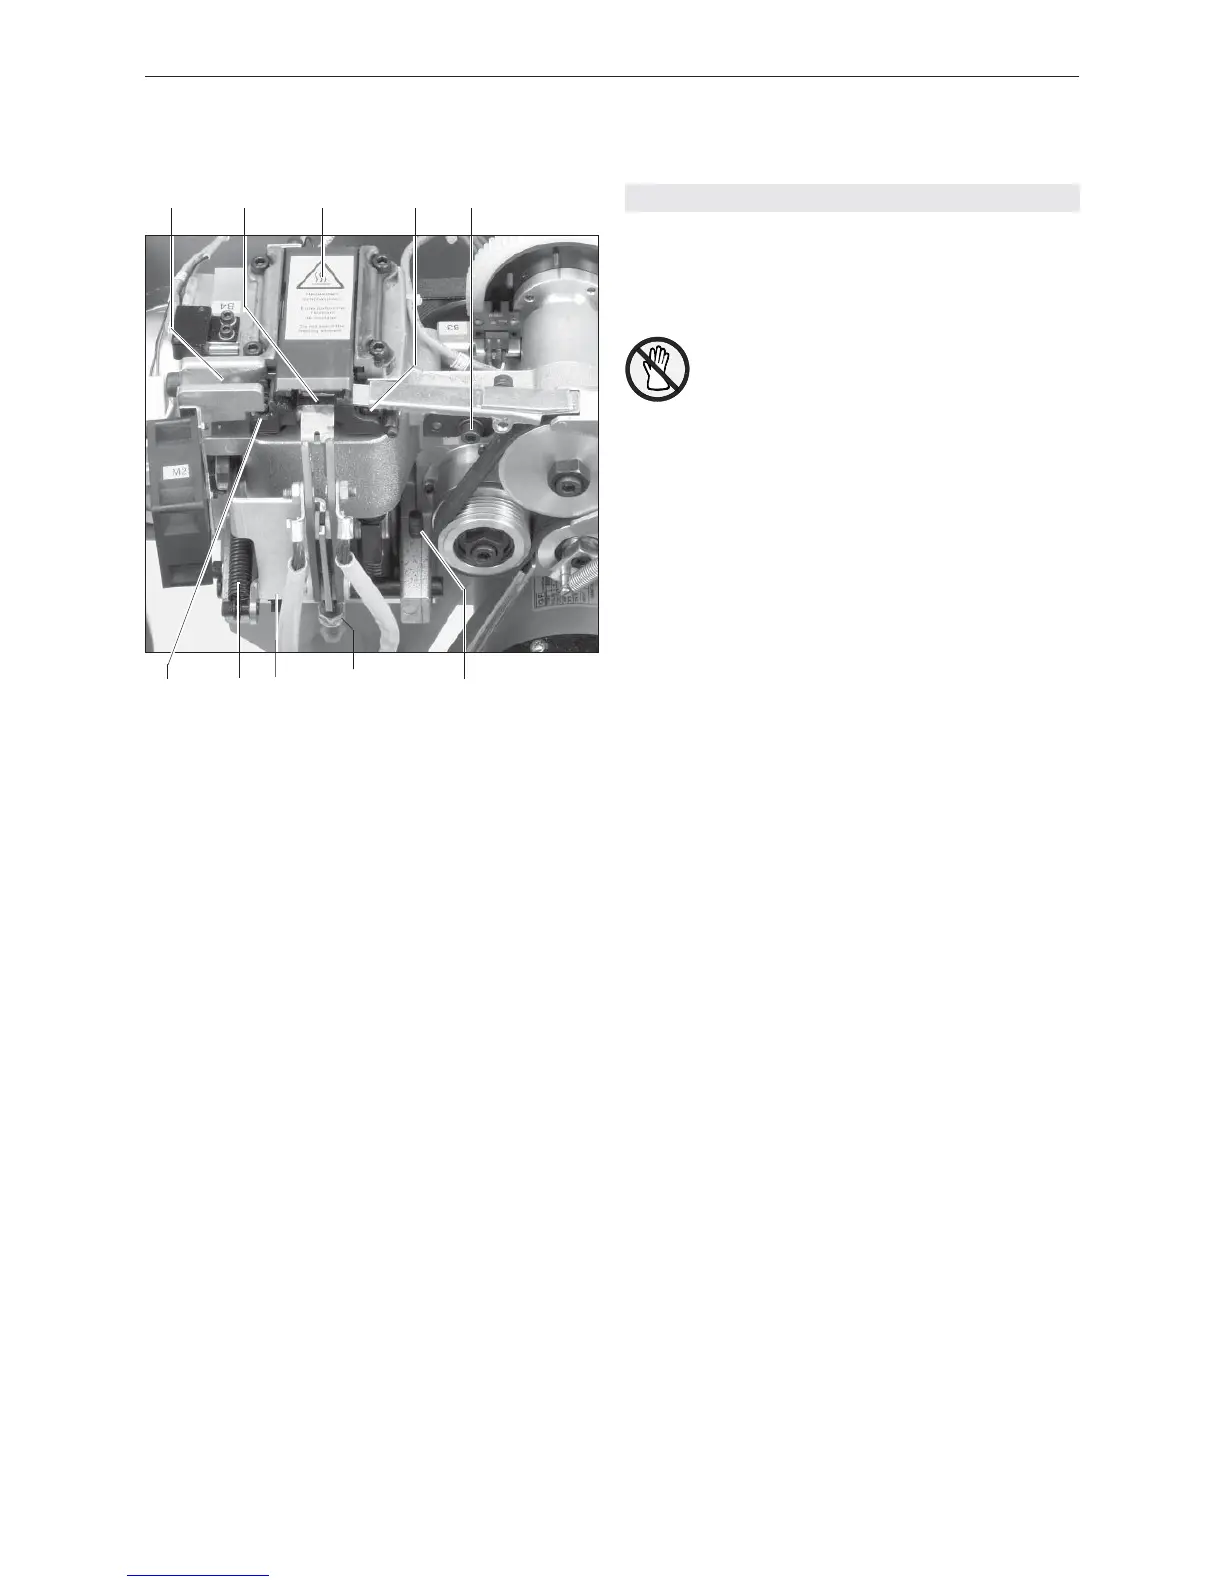
Do not touch hot heating element!
– Press torsion spring downwards with the thumb and
drive slide plate (18/3) backwards out of the sealing
unit.
– Undo cylinder screw (18/5) and remove strap
channel.
– Undo hexagon screw and swivel away strap cen-
tring device (18/1) together with fan. With a long
hexagon-socket screw wrench (placed through hole
in side wall) turn coupling in direction of arrow, until
the heating element has been driven completely for-
wards. Detach spring (18/9).
– Turn aggregate back to 0° position.
– Undo two cylinder screws and swing swivel plate
(18/8) away.
– Undo two cylinder screws (18/6) about 2.5 cm, so
that the tension of the spring is released.
– Undo cylinder screw and remove left clamp (18/10).
– Undo the hexagon screw (18/7) below at the centre
tappet, and then carefully remove centre clamp
(18/2) with torsion spring and pressure piece.
– Undo cylinder screw (18/4) and remove right clamp.
– Replace worn clamps.
Install
– Fit right clamp, only tighten cylinder screw (18/4)
slightly.
– Manually turn aggregate further into the zero
position.
– Fit slide plate (18/3) and manually press right clamp
against slide plate, tighten cylinder screw (18/4).
– Adjust centre clamp parallel according to right
clamp.
– Further reassembly in reverse order of disassembly.
Fig. 18
1 Strap centering device
2 Clamp centre
3 Slide plate
4 Cylinder screw
5 Cylinder screw
6 Cylinder screw
7 Hexagon screw
8 Swivel plate
9 Spring
10 Clamp left
1 2 3 4 5
10 9 8 7 6