31
02.11
Strapex SMA 20
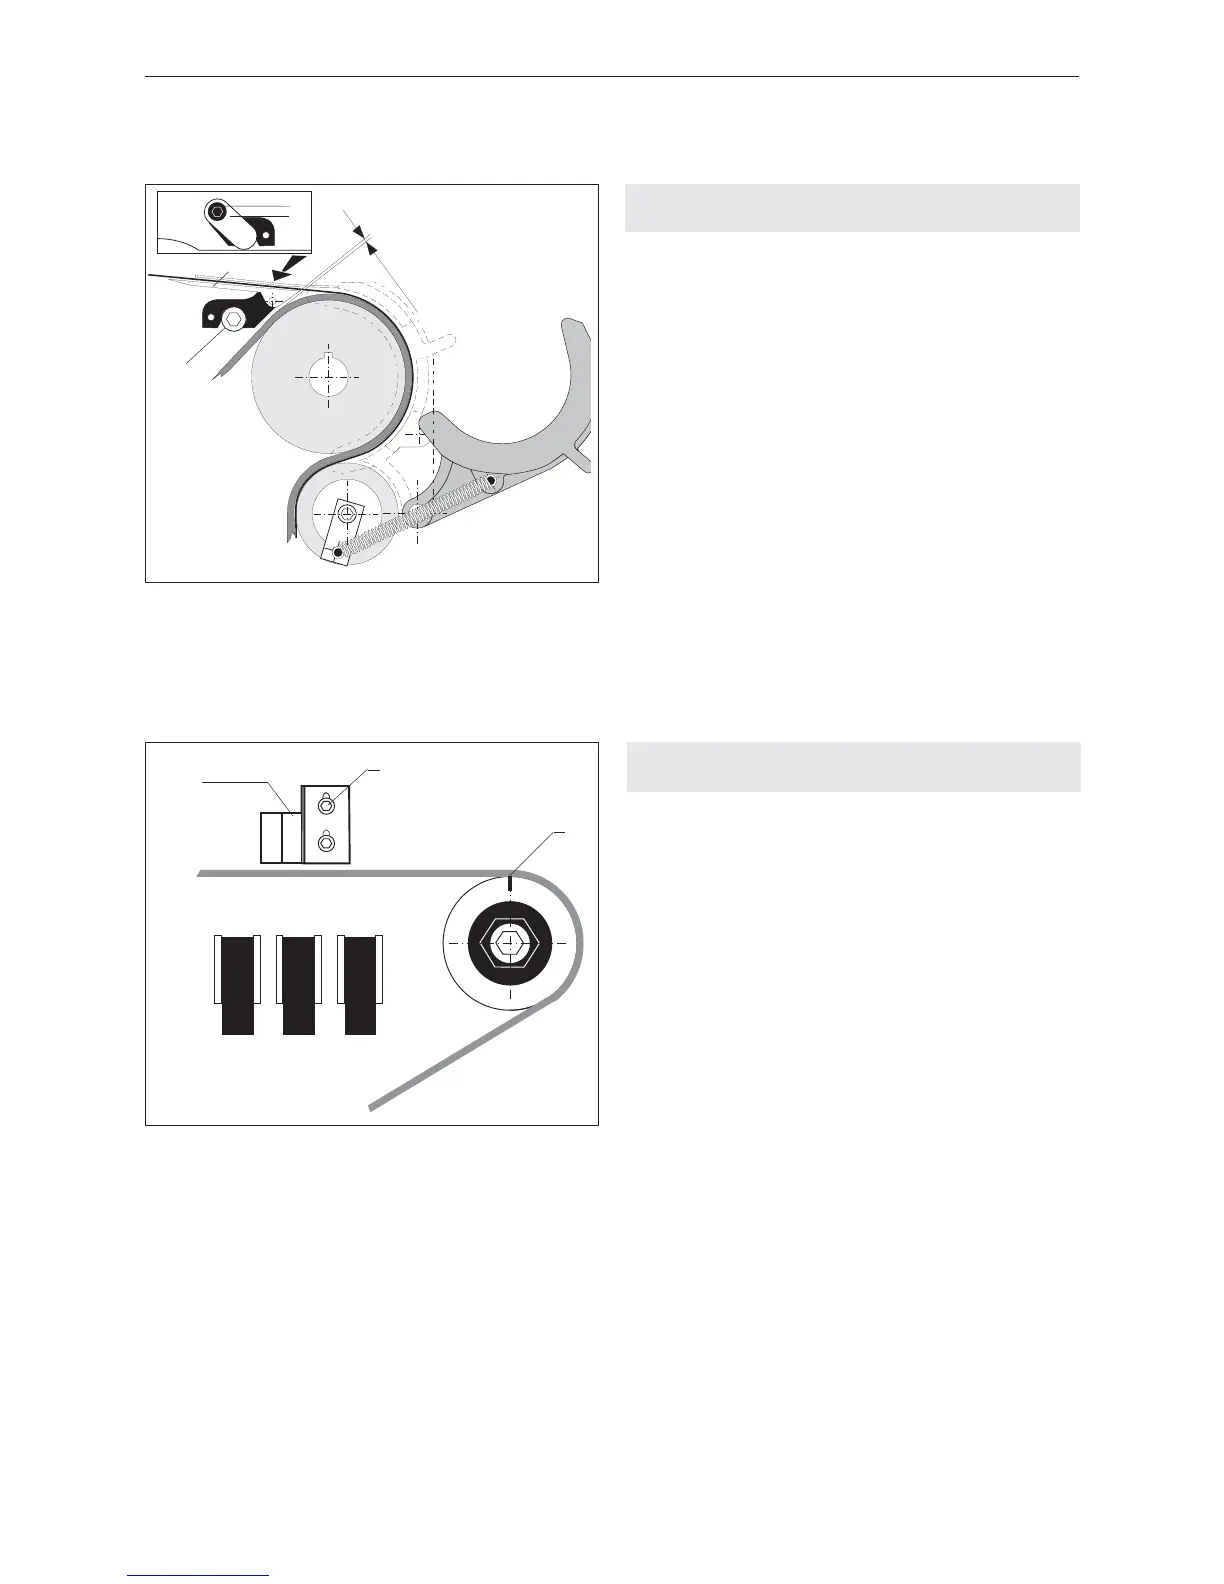
8.3 ADJUST GAP BETWEEN TENSION BELT
AND STRAP CHANNEL
– Open table top.
– Swivel back slide plate.
– Undo cylinder screw (14/1).
– Undo cylinder screw (14/4) and adjust strap chan-
nel (14/3) so that the gap between strap channel
and tensioning belt is 0.2 mm.
– Tighten cylinder screw (14/4).
– Position link (14/2) and tighten cylinder screw
(14/1), check gap once more.
Fig. 14
1 Cylinder screw
2 Link
3 Strap channel
4 Cylinder screw
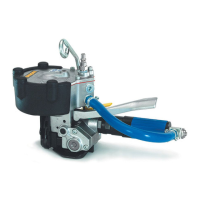
8.4 ADJUST ZERO-POSITION
(STARTING POSITION)
– Open table top.
– With a long hexagon-socket screw wrench (placed
through hole in side wall) turn coupling in direction
of arrow, until the aggregate is in the 0° position
(perceptible engagement when the three clamps
are in the lower position).
– Mark coupling above in the centre (15/1).
– Remove hexagon-socket screw wrench and close
table top.
– Turn Main switch to position „1“.
– Toggle switch (3/6) on.
– Activate push-button „Reset“ (3/1). The aggregate
moves into the 0° position.
– Open table top.
– If the marker (15/1) on the coupling is located in the
„+“ direction, the proximity switch B1 (15/3) must be
adjusted downwards. For this purpose the two
hexagon screws (15/2) must be loosened.
– If the marker on the coupling is located in the „–“
direction, the proximity switch B1 must be adjusted
upwards.
– Repeat the sequence until the marker is located in
the above middle of the coupling.
Fig. 15
1 Marker
2 Hexagon screw
3 Proximity switch B1
–
+
B2
B1
2
1
3