SSeerrvviiccee
TTrraannssffeerr rreemmoovvaall
TToooollss rreeqquuiirreedd::
• T25 Torx driver
• 5/32'' hex wrench
PPrroocceedduurree::
1. Remove the trolley. See
Trolley removal
(page 33).
2. Put the transfer into the transport position all the way into the vehicle compartment.
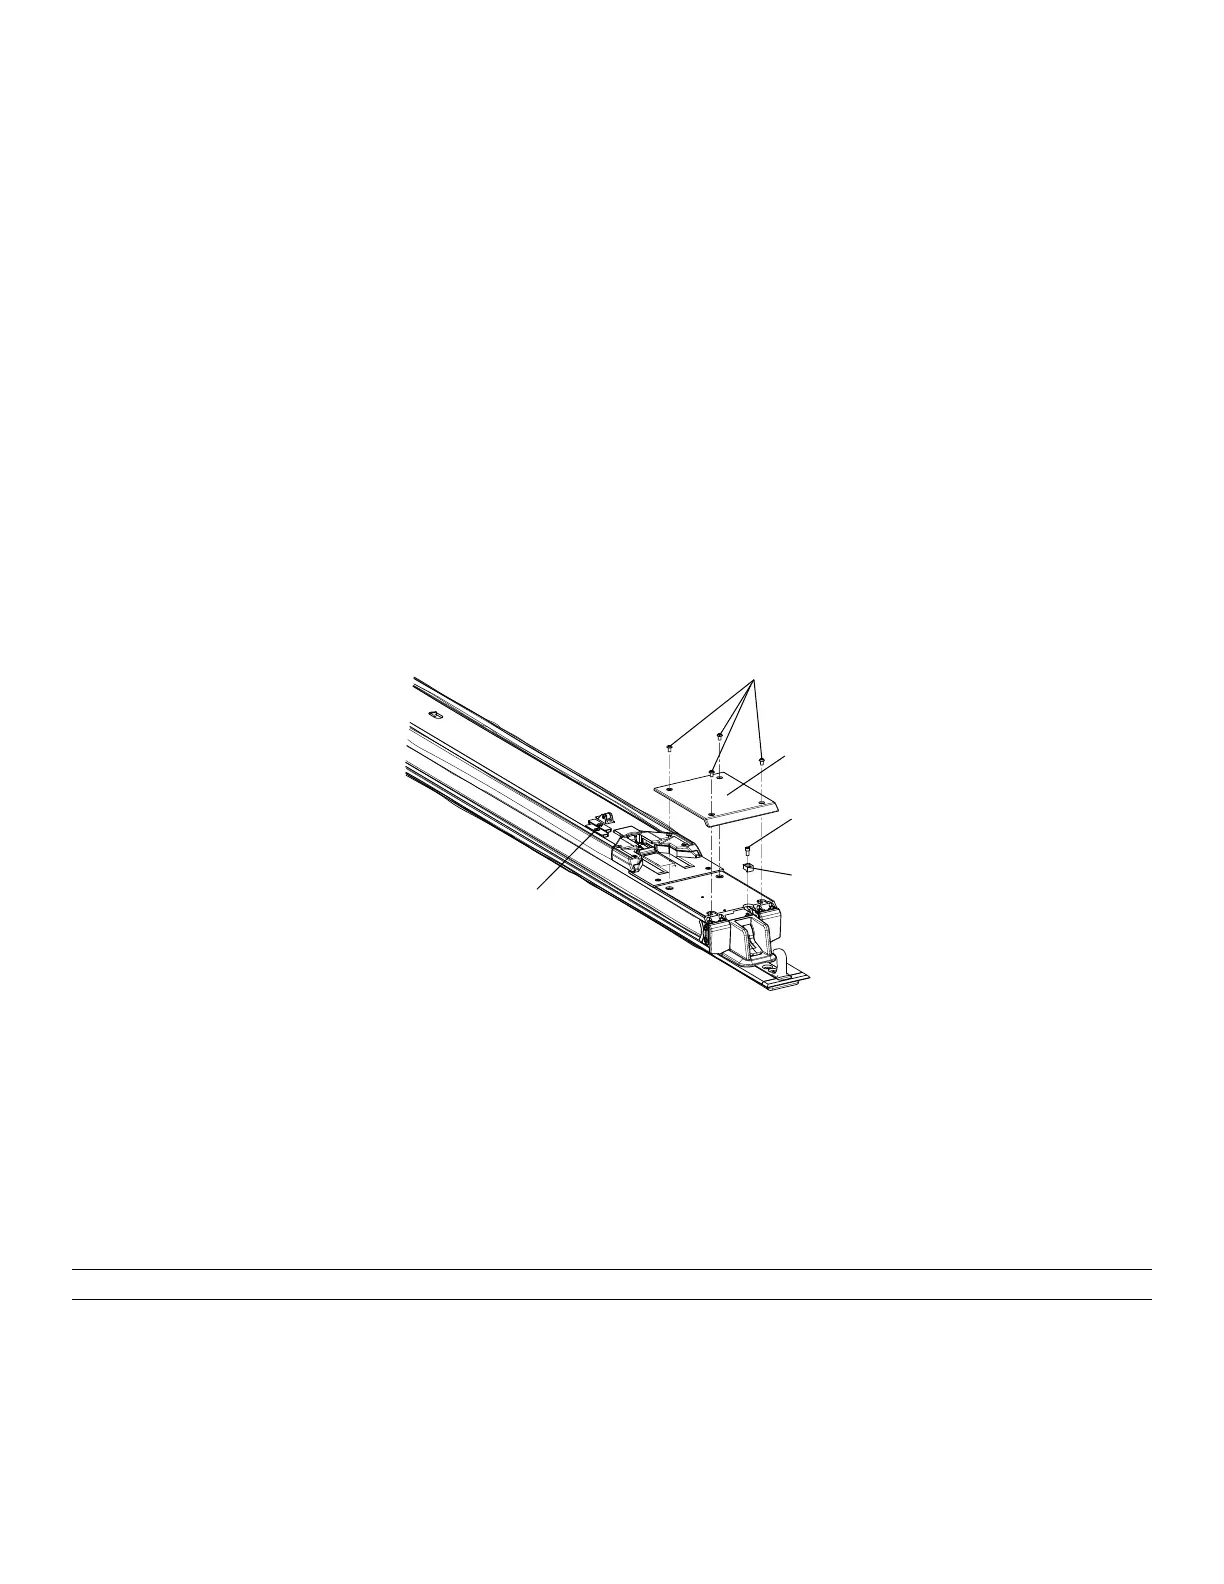
3. Using a T25 Torx driver, remove the four screws (A) that secure the foot end transfer wear pad (B) to the transfer
extrusion (Figure 9).
4. Using a 5/32" hex wrench, remove the screw (C) that secures the trolley magnet activator (D) to the anchor extrusion to
remove the trolley magnet activator (Figure 9).
5. Slide both transfer lock triggers (E) to extend and pull the transfer off of the anchor completely (Figure 9).
NNoottee -- The transfer assembly is heavy and may require assistance to remove.
6. Reverse steps to reinstall.
7. Verify proper operation before you return the product to service.
FFiigguurree 99 –– FFoooott eenndd ttrraannssffeerr ccoommppoonneennttss
TTrroolllleeyy rreemmoovvaall
TToooollss rreeqquuiirreedd::
• T25 Torx driver
• 3/16'' hex wrench
PPrroocceedduurree::
WWAARRNNIINNGG -- Always have two installers lift and position the trolley assembly.
1. Raise the lifting arms (A) (Figure 10).
2. Press the trolley release button at the head end of the anchor (B) (Figure 10).
3. Pull the trolley toward the foot end to the middle of the transfer assembly.
4. Slide the patient right transfer lock trigger (C) to extend (Figure 10).
6390-309-002 Rev AB.0 33 EN
 Loading...


