PPrriimmaarryy ccooiill rreeppllaacceemmeenntt,, hheeaadd eenndd
TToooollss rreeqquuiirreedd::
• 5/32'' hex wrench
• (2) 1/8'' hex wrench
• 3/8'' hex driver
• T25 Torx driver
• Diagonal pliers
• Torque wrench (ft-lb) > 60 ft-lb
PPrroocceedduurree::
1. Remove the trolley. See
Trolley removal
(page 33).
2. Remove the transfer. See
Transfer removal
(page 33).
3. Using a 3/8'' hex driver, remove the four anchor mounting bolts that secure the anchor to the floor place.
4. Unplug the main power cable from the patient compartment to the anchor assembly at the head end.
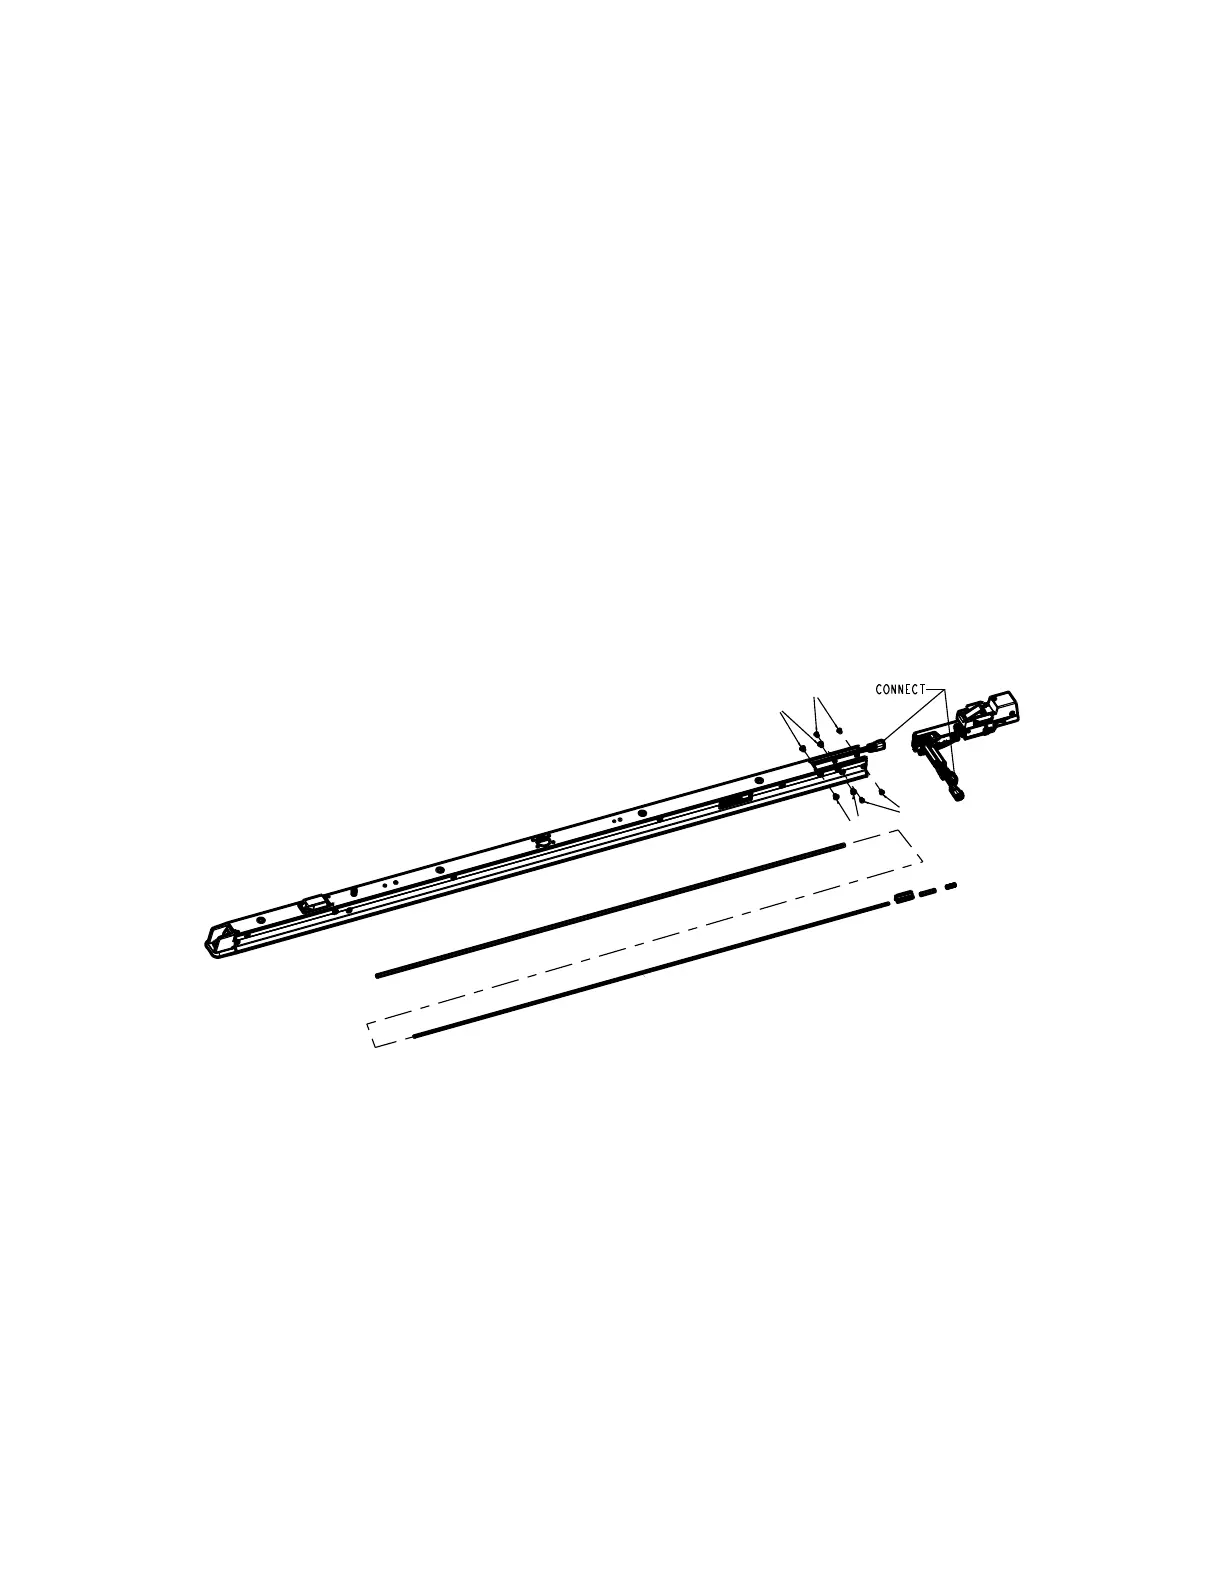
5. Using a 5/32'' hex wrench, remove the four screws (A) (Figure 50).
6. Using two 1/8'' hex wrenches, remove the four flat head cap screws (B) that secure the anchor pawl assembly to the
anchor (Figure 50).
7. Pull the anchor pawl assembly toward the head end of the anchor to remove the anchor pawl assembly.
FFiigguurree 5500 –– RReemmoovvee tthhee aanncchhoorr ppaawwll aasssseemmbbllyy ffrroomm tthhee aanncchhoorr
8. Unplug the power cables from the extension cable from the anchor.
9. Unplug the two coil wires from the inductive primary board.
10.Using diagonal pliers, cut the cable ties (D) that secure the coil wires to the wire management strap (Figure 51).
6390-309-002 Rev AB.0 63 EN
 Loading...


