FFiigguurree 5533 –– RReemmoovvee tthhee aanncchhoorr hhoouussiinngg aasssseemmbbllyy
13.Remove and discard the anchor housing.
NNoottee -- Do not dispose of as unsorted municipal waste. Refer to your local distributor for return, and or collection
systems available in your country.
14.Reverse steps to reinstall. Use a torque wrench to tighten each anchor mounting post to 60±10 ft-lb.
15.Verify proper operation before you return the product to service.
TTrraannssffeerr lloocckk bbeeaarriinngg rreemmoovvaall aanndd rreeppllaacceemmeenntt
TToooollss rreeqquuiirreedd::
• 5/32'' hex wrench
PPrroocceedduurree::
1. Remove the trolley. See
Trolley removal
(page 33).
2. Remove the transfer. See
Transfer removal
(page 33).
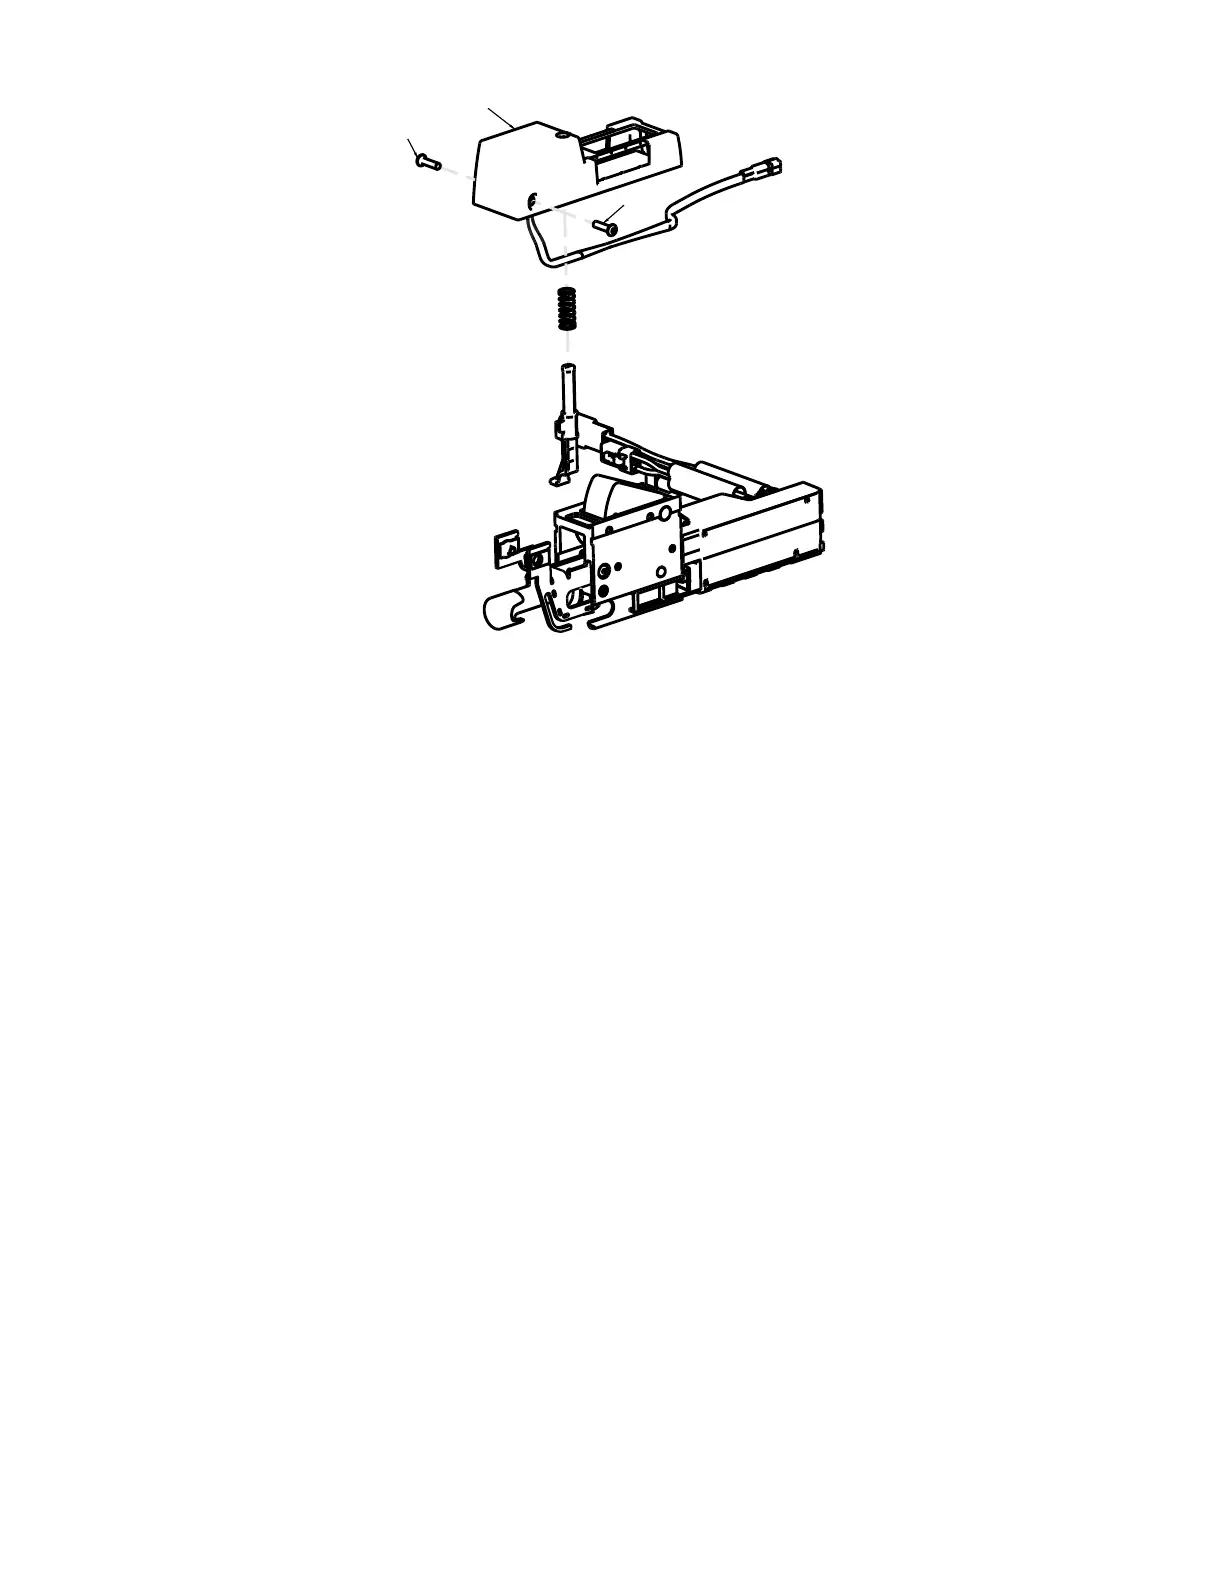
3. Using a 5/32'' hex wrench, remove the four flat head cap screws (A) that secure the transfer lock cap (B) to the anchor
extrusion (Figure 54).
4. Remove the transfer lock cap (B) (Figure 54).
5. Remove the transfer lock pin assembly (C), compression spring (D), and bronze bearing (E) from the anchor extrusion
(Figure 54). Discard the bronze bearing.
6. Clean the transfer lock pin assembly (C) and compression spring (D) thoroughly (Figure 54).
7. Install the supplied bronze bearing (D), compression spring (D), and transfer lock pin assembly (C) into the anchor
extrusion (Figure 54).
NNoottee -- Before you reinstall, grease the transfer lock pin assembly with molybdenum disulfide lubricant (6390-001-263).
8. Using a 5/32'' hex wrench, reinstall the four flat head cap screws that secure that transfer lock cap (B) to the anchor
extrusion. Start each screw first and then tighten all four screws.
6390-309-002 Rev AB.0 65 EN

 Loading...


