NNoottee -- Hydraulic fluid will leak from the cylinder and hoses. Lay down towels to catch fluid.
8. Using a 5/8" combination wrench, loosen (do not remove) the jam nuts on both of the cylinder hose fittings, and
unthread the fitting from the hydraulic cylinder. Save all parts for reinstallation.
NNoottee -- Pay attention to the hose routing and location for reinstallation.
9. Using a 1/8" hex wrench, remove the velocity fuse from the hydraulic cylinder. Save the fuse for reinstallation.
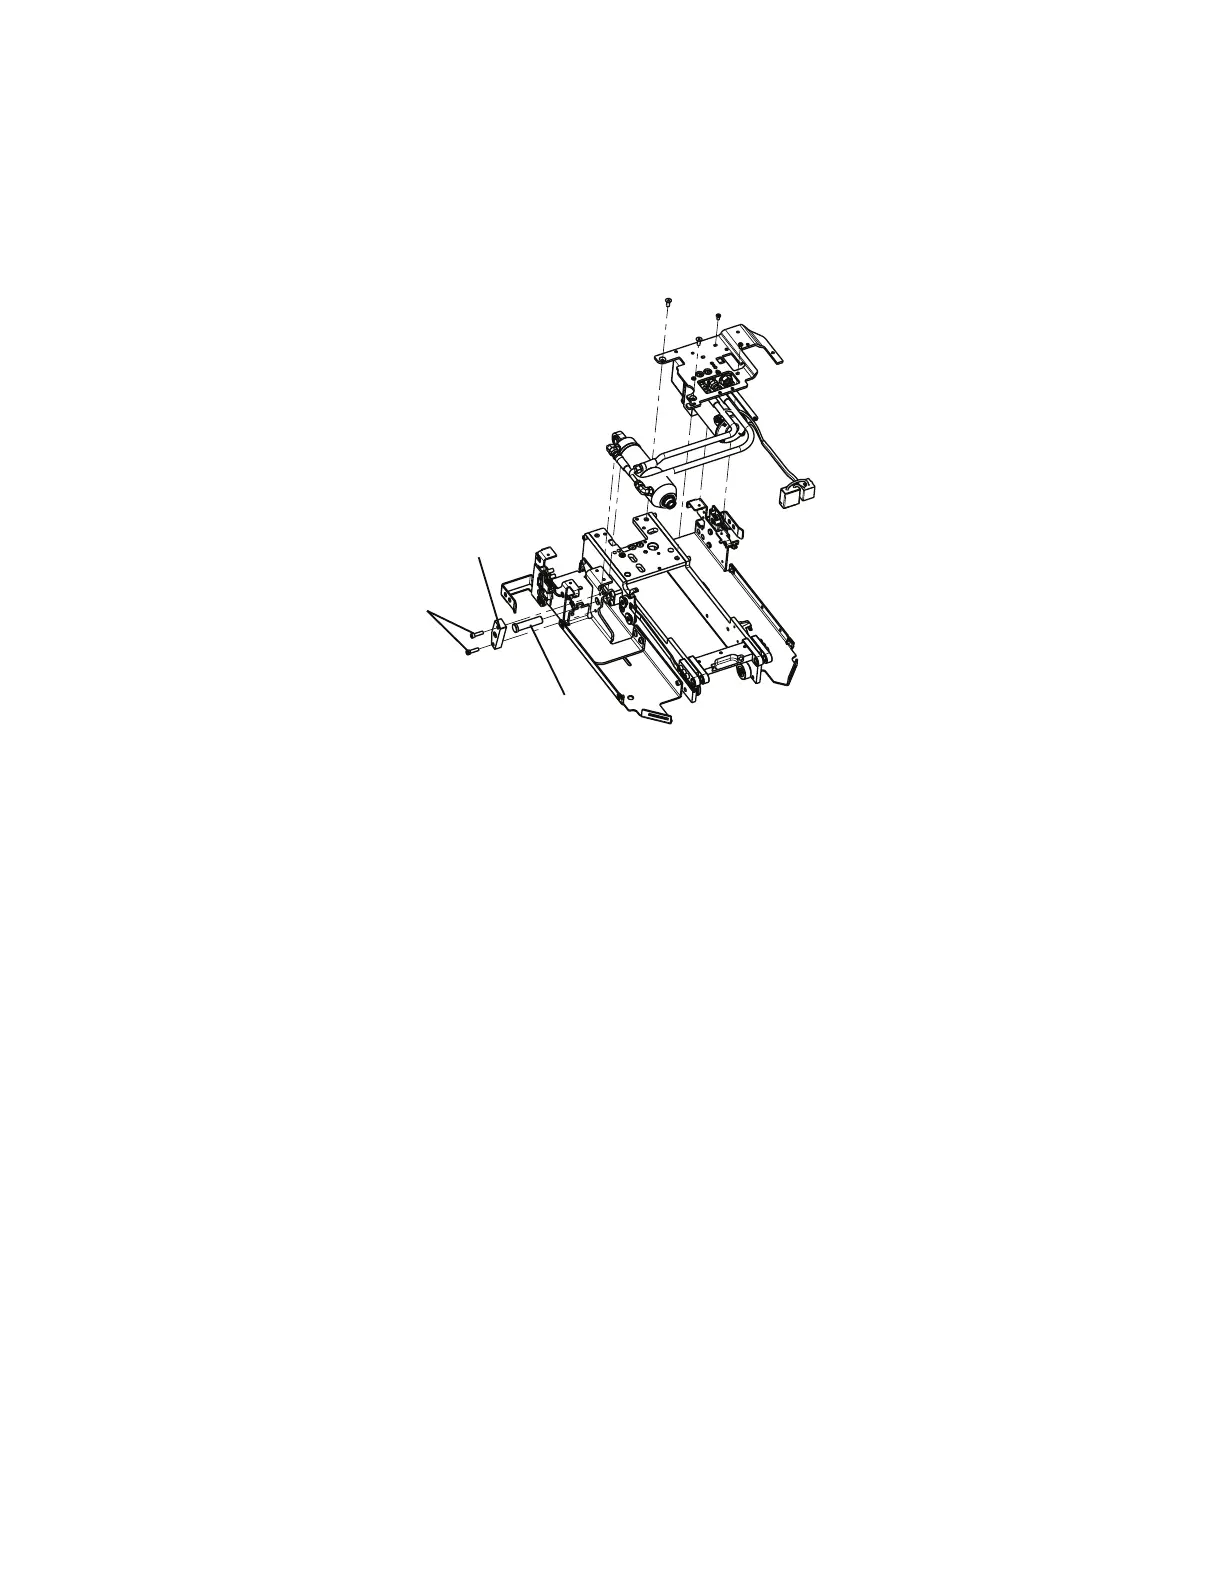
10.Using a 3/16" hex wrench, remove the two screws (E) that secure the cylinder bracket (F) to the trolley and remove the
end cap cylinder pin (G) (Figure 36).
FFiigguurree 3366 –– HHyyddrraauulliicc ccyylliinnddeerr ppiinn llooccaattiioonn
11.Remove the hydraulics assembly and discard.
12.Using a 1/8" hex wrench, install the velocity fuse into the cylinder.
13.Reverse steps to reinstall.
14.Check the fluid level before you return the product to service. See
Filling the reservoir
(page 60).
15.Verify proper operation before you return the product to service.
VVeelloocciittyy ffuussee rreemmoovvaall aanndd rreeppllaacceemmeenntt
TToooollss rreeqquuiirreedd::
• 1/8'' hex wrench
• 11/16'' combination wrench
• 5/8'' combination wrench
• Torque wrench (in-lb)
PPrroocceedduurree::
1. Pull the trolley assembly out of the patient compartment until it locks into the loading position.
NNoottee -- This makes working on the product easier, but is not required.
2. Remove the trolley covers. See
Cover removal and replacement
(page 35).
3. Using an 11/16" combination wrench, disconnect the hydraulic hose (A) closest to the mounting bracket at the head end
of the trolley (Figure 37).
NNoottee -- Hydraulic fluid will leak from the cylinder and hoses. Lay down towels to catch fluid.
EN 52 6390-309-002 Rev AB.0
 Loading...


