• 11/16" combination wrench
PPrroocceedduurree::
1. Pull the trolley assembly out of the patient compartment until it locks into the loading position.
NNoottee -- This makes working on the product easier, but is not required.
2. Press the manual release button on the PPoowweerr--LLOOAADD control panel until the lifting arms are in the lowest position.
3. Remove the trolley covers. See
Cover removal and replacement
(page 35).
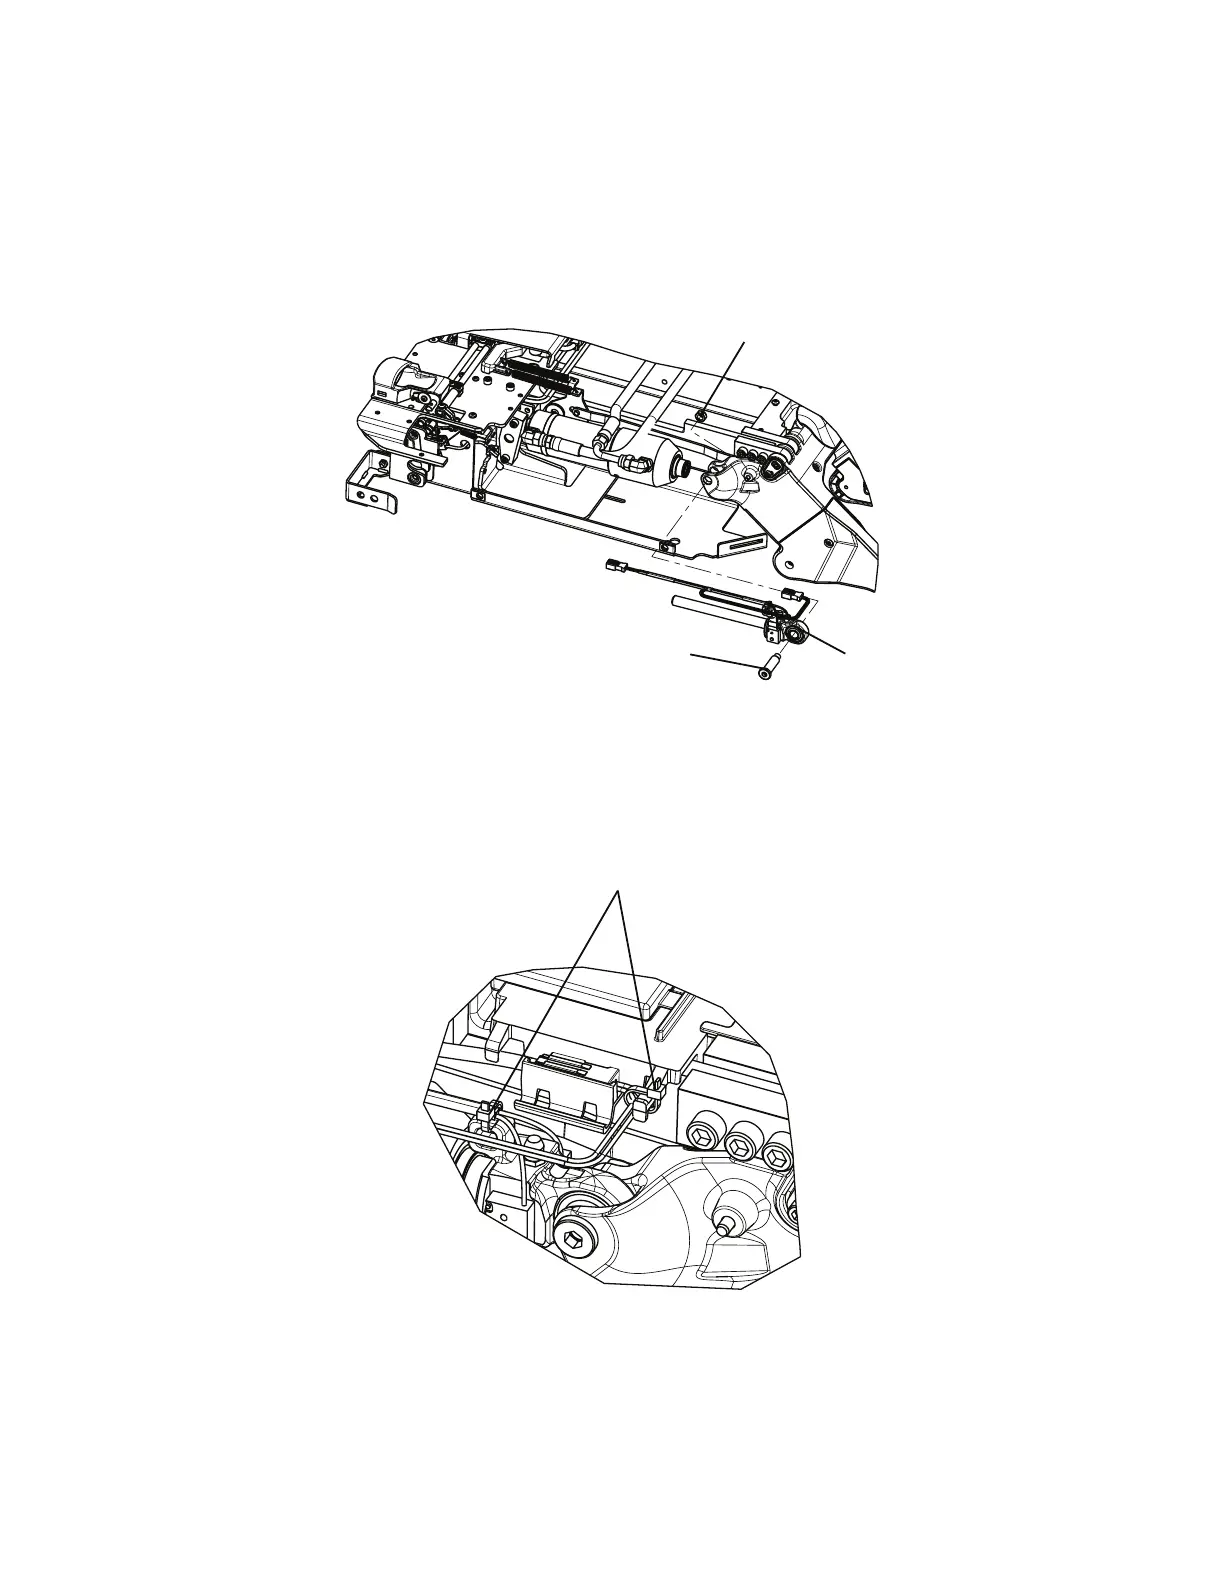
4. Using a 1/4" hex wrench and a 1/2" combination wrench, remove the end cap cylinder pin (A) and nut (B) (Figure 34).
FFiigguurree 3344 –– HHyyddrraauulliicc ccyylliinnddeerr aasssseemmbbllyy
5. Using diagonal pliers, cut the cable ties (D) (Figure 35) that secure the hydraulic cylinder rod end assembly (C) cable to
the plastic cover (Figure 34).
NNoottee -- Pay attention to the location of all the cable ties for reinstallation.
FFiigguurree 3355 –– CCaabbllee ttiieess llooccaattiioonnss
6. While lifting up on the cylinder, remove the hydraulic cylinder rod end assembly (C) (Figure 34). Save the hydraulic
cylinder rod end assembly for reinstallation.
7. Using an 11/16" combination wrench, disconnect both hoses from the cylinder. See
Velocity fuse removal and
replacement
(page 52).
6390-309-002 Rev AB.0 51 EN
 Loading...


