CCoonnttrrooll bbooaarrdd aasssseemmbbllyy rreemmoovvaall aanndd rreeppllaacceemmeenntt
TToooollss rreeqquuiirreedd::
• 3/32'' hex wrench
• ESD
WWAARRNNIINNGG -- Always take ESD precautions when you handle the control board. For more information about ESD
protection, contact Stryker Technical Support at (800) 327-0770.
PPrroocceedduurree::
1. Remove the manual release button assembly. See
Manual release button assembly removal and replacement
(page
37).
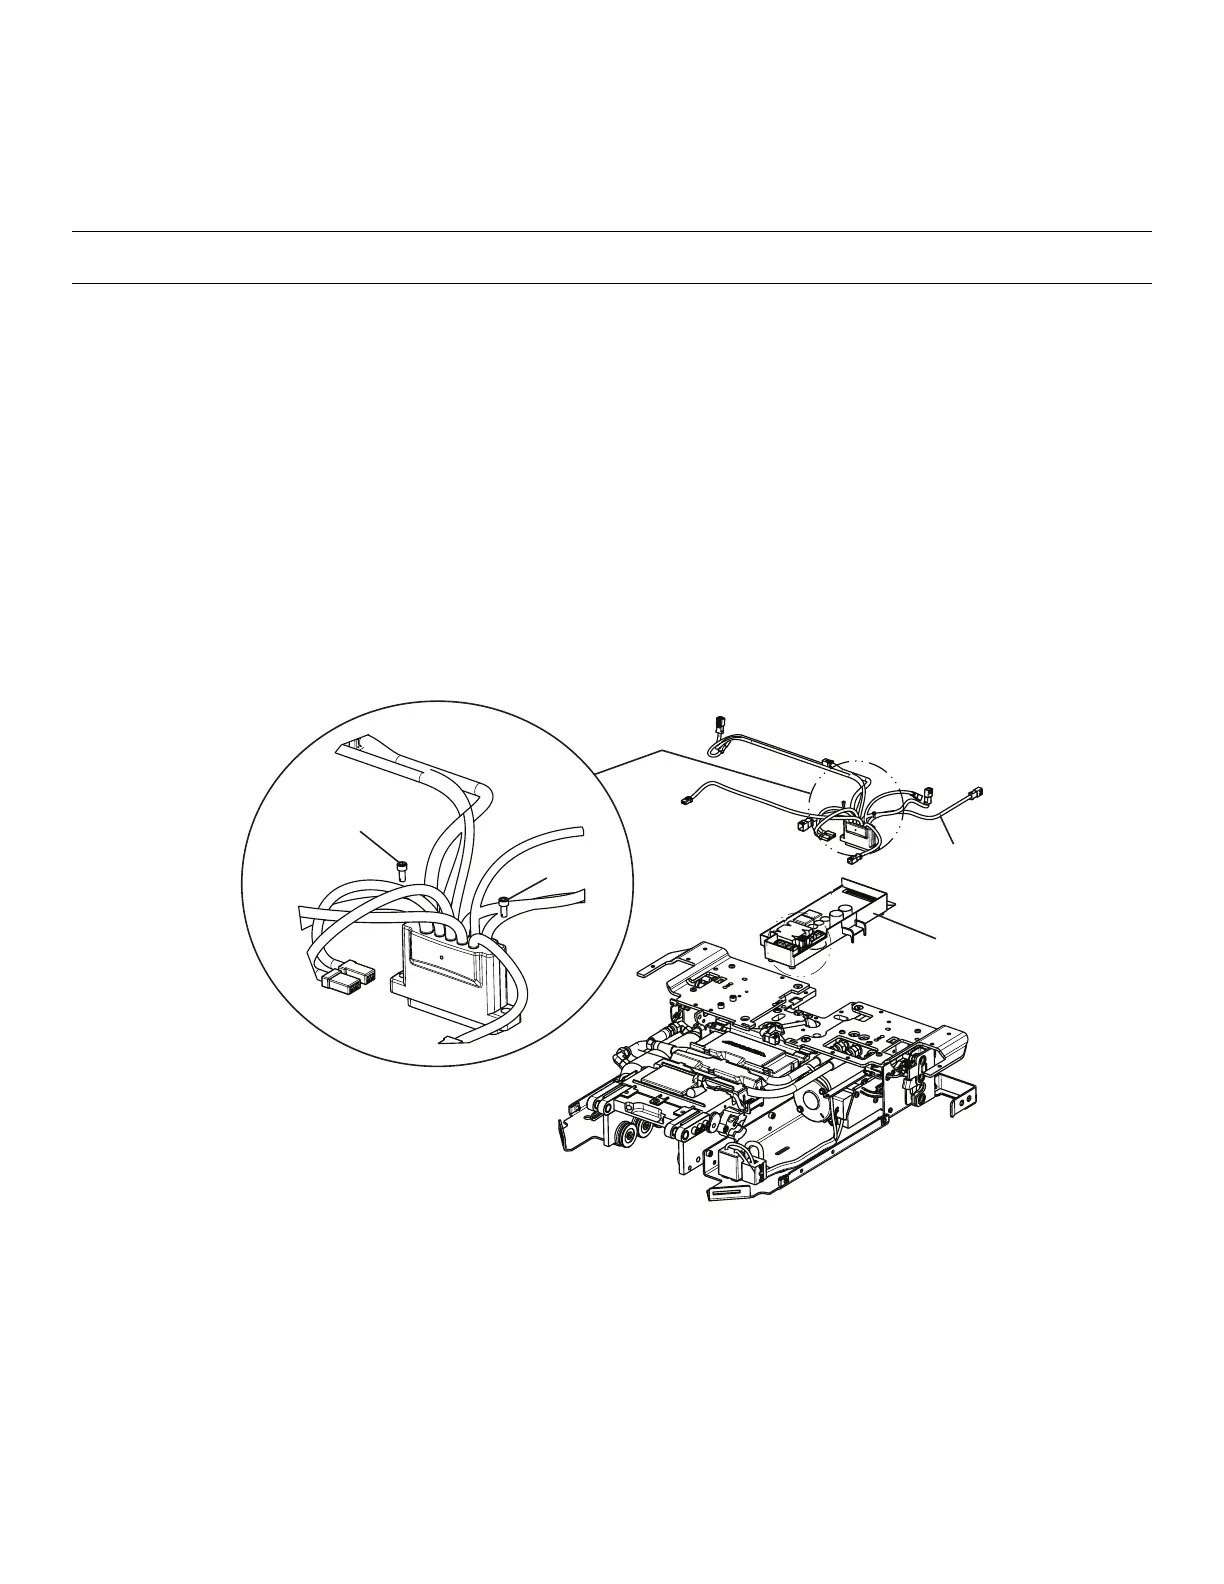
2. Using a 3/32" hex wrench, loosen (do not remove) the two screws (A) that secure the main cable assembly (B) to the
control board assembly (Figure 17).
3. Unplug all of the other cables from the control board assembly (C) and then remove the control board assembly (Figure
17). Discard the control board assembly.
NNoottee -- Do not dispose of as unsorted municipal waste. Refer to your local distributor for return or collection systems
available in your country.
4. Align the control board assembly tabs with the holes in bottom pan, left to install the new control board assembly. Make
sure that all of the cables are routed correctly.
5. Reverse steps to reinstall.
6. Verify proper operation before you return the product to service.
FFiigguurree 1177 –– CCoonnttrrooll bbooaarrdd aasssseemmbbllyy
MMaasstteerr oonn//ooffff sswwiittcchh rreeppllaacceemmeenntt
TToooollss rreeqquuiirreedd::
• 1/32" nut driver
6390-309-002 Rev AB.0 39 EN

 Loading...


