9. Remove the dead stop bumpers. Save the bumpers for reinstallation.
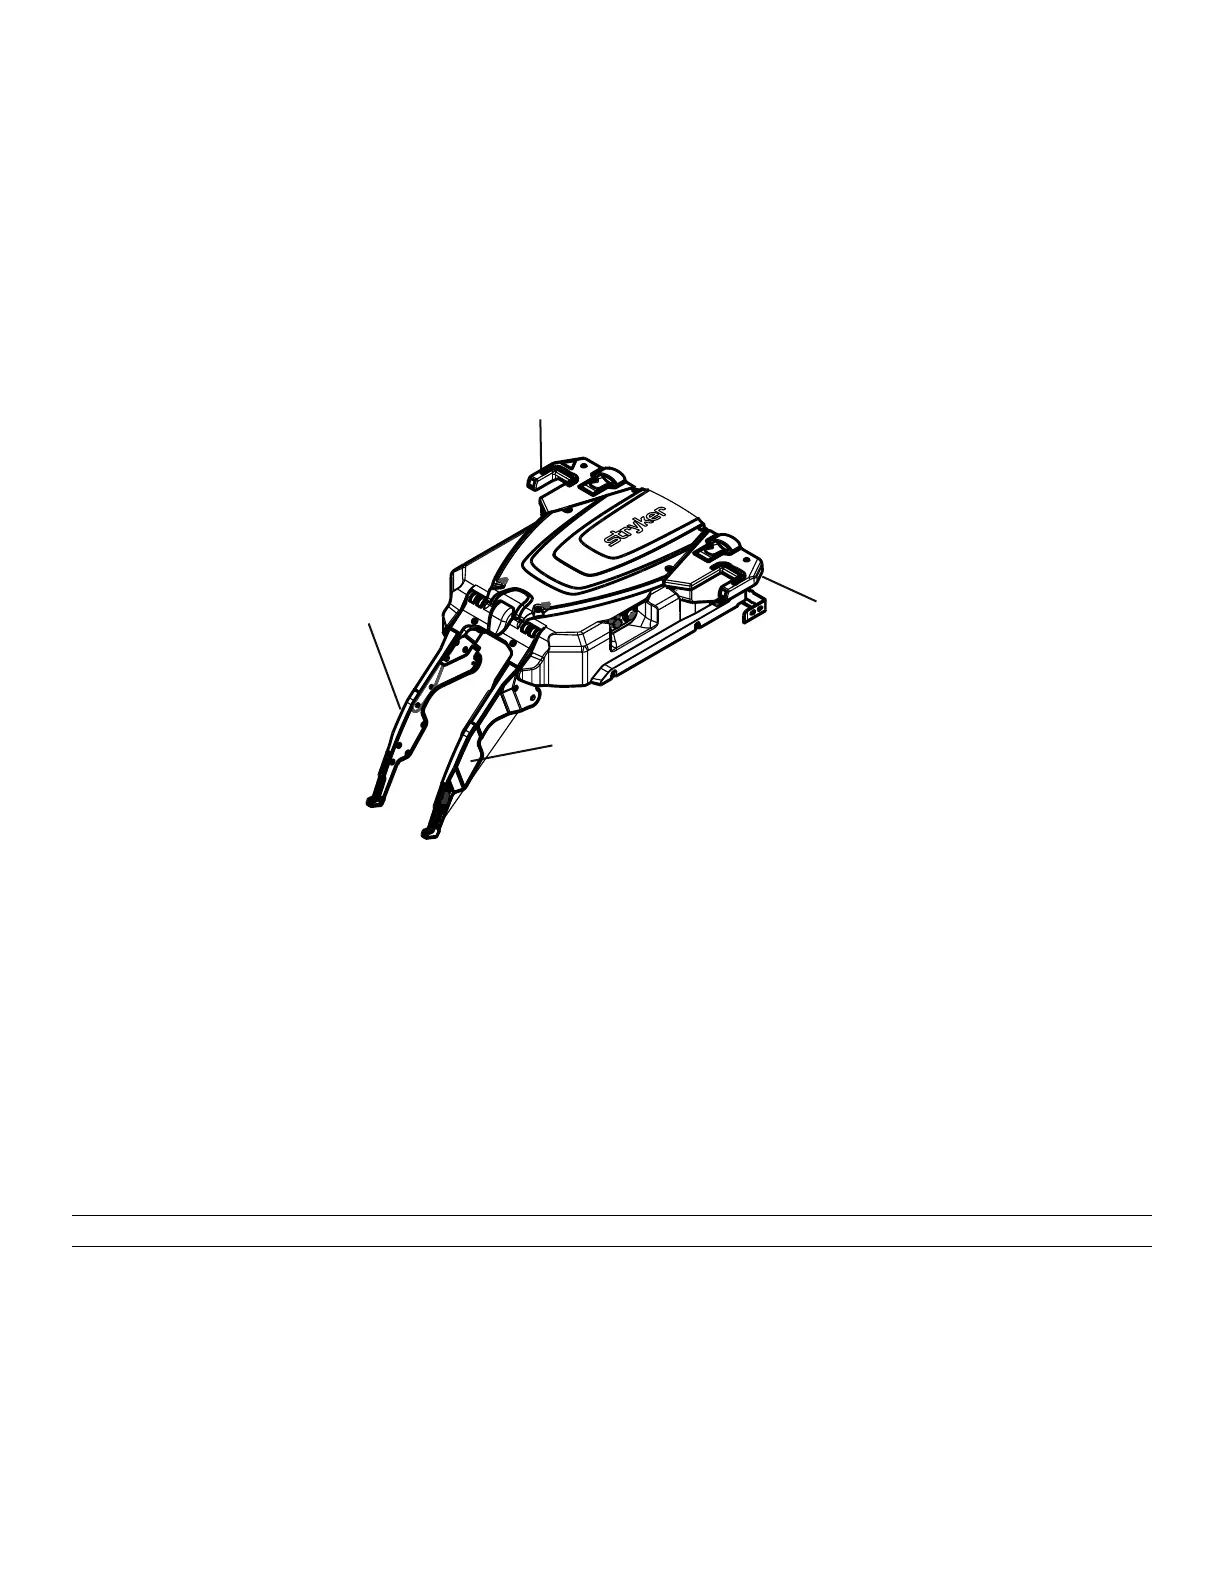
10.Lift the trolley assembly by its arm and wing.
a. Do not lift the trolley by the manual cot release handles.
b. Lift only where indicated.
c. Installer 1, position hands at A1 and A2 (Figure 12).
d. Installer 2, position hands at B1 and B2 (Figure 12).
e. Move the trolley toward the head end until it is off of the transfer.
f. Remove the trolley from the anchor.
g. Place the trolley in a suitable work area.
FFiigguurree 1122 –– TTrroolllleeyy hhaanndd ppoossiittiioonnss
11.Reverse steps to reinstall.
12.Verify proper operation before you return the product to service.
CCoovveerr rreemmoovvaall aanndd rreeppllaacceemmeenntt
TToooollss rreeqquuiirreedd::
• T25 Torx driver
• 5/32" hex wrench
PPrroocceedduurree::
WWAARRNNIINNGG -- Do not pinch the cables while you service or install the covers.
1. Using a T25 Torx driver, remove the six screws (A) that secure the trolley top cover (B) (Figure 13).
6390-309-002 Rev AB.0 35 EN

 Loading...


