FFiigguurree 1100 –– TTrroolllleeyy mmiidd ttrraannssffeerr ppoossiittiioonn
5. Pull the transfer toward the foot end until the transfer stops in the first lock position.
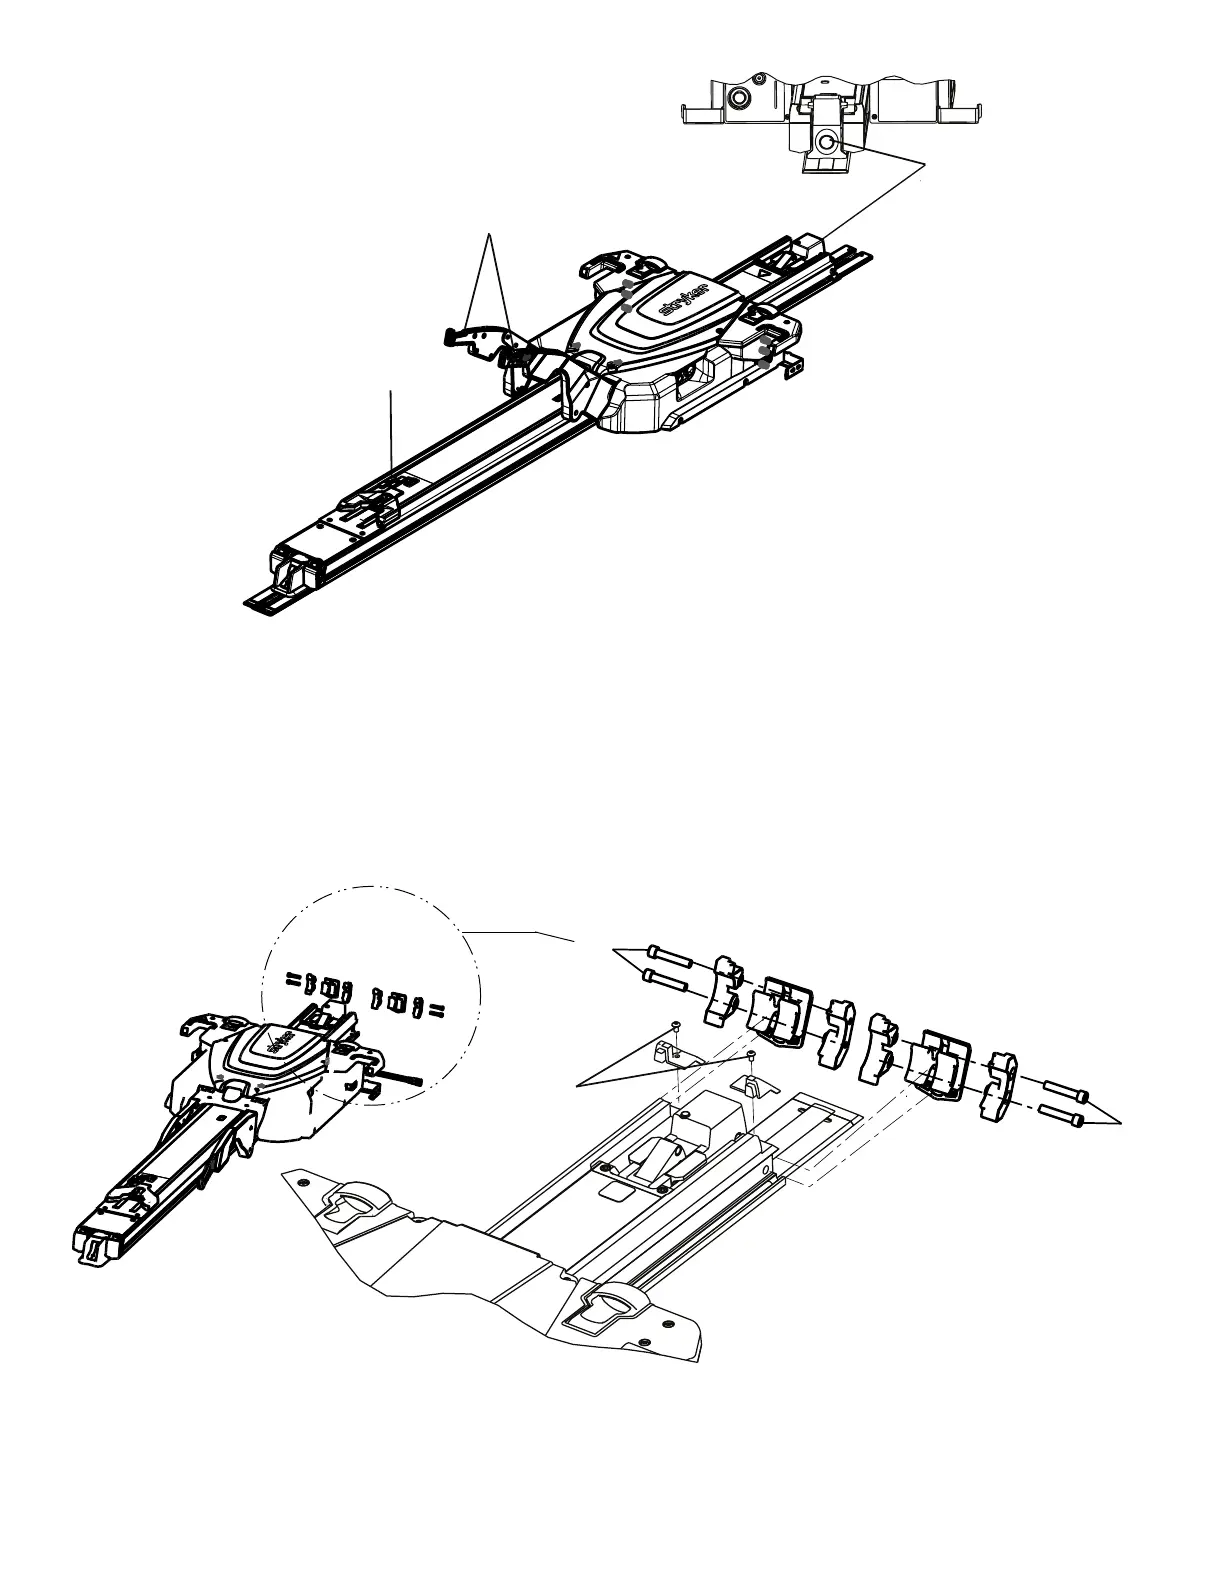
6. Using a T25 Torx driver, remove the two screws that secure the transfer trim (E) (Figure 11).
NNoottee -- The trolley will drop down slightly as you remove it from the transfer. Do not tip the trolley upside down, forward,
or onto its side.
7. Using a 3/16" hex wrench, loosen (do not remove) the four socket head cap screws (two on each side) (D) that secure
the dead stops to the transfer assembly (Figure 11).
FFiigguurree 1111 –– TTrroolllleeyy ssccrreewwss
8. Push on the screws (loosened in step 7) to loosen the dead stops from the transfer.
EN 34 6390-309-002 Rev AB.0
 Loading...


