ME(H4SO)-51
MECHANICAL
Timing Belt Assembly
5) After ensuring that the marks on timing belt and
camshaft sprockets are aligned, remove the stop-
per pin from belt tension adjuster.
6) Install the timing belt guide. (MT model)
(1) Temporarily tighten the timing belt guide
mounting bolts.
(2) Check and adjust the clearance between
timing belt and timing belt guide by using thick-
ness gauge.
Clearance:
1.0
±
±±
±
0.5 mm (0.039
±
±±
±
0.020 in)
(3) Tighten the timing belt guide mounting bolts.
Tightening torque:
10 N·m (1.0 kgf-m, 7.2 ft-lb)
7) Install the timing belt cover. <Ref. to ME(H4SO)-
47, INSTALLATION, Timing Belt Cover.>
8) Install the crankshaft pulley. <Ref. to
ME(H4SO)-45, REMOVAL, Crankshaft Pulley.>
9) Install the V-belt. <Ref. to ME(H4SO)-43, IN-
STALLATION, V-belt.>
C: INSPECTION
1. TIMING BELT
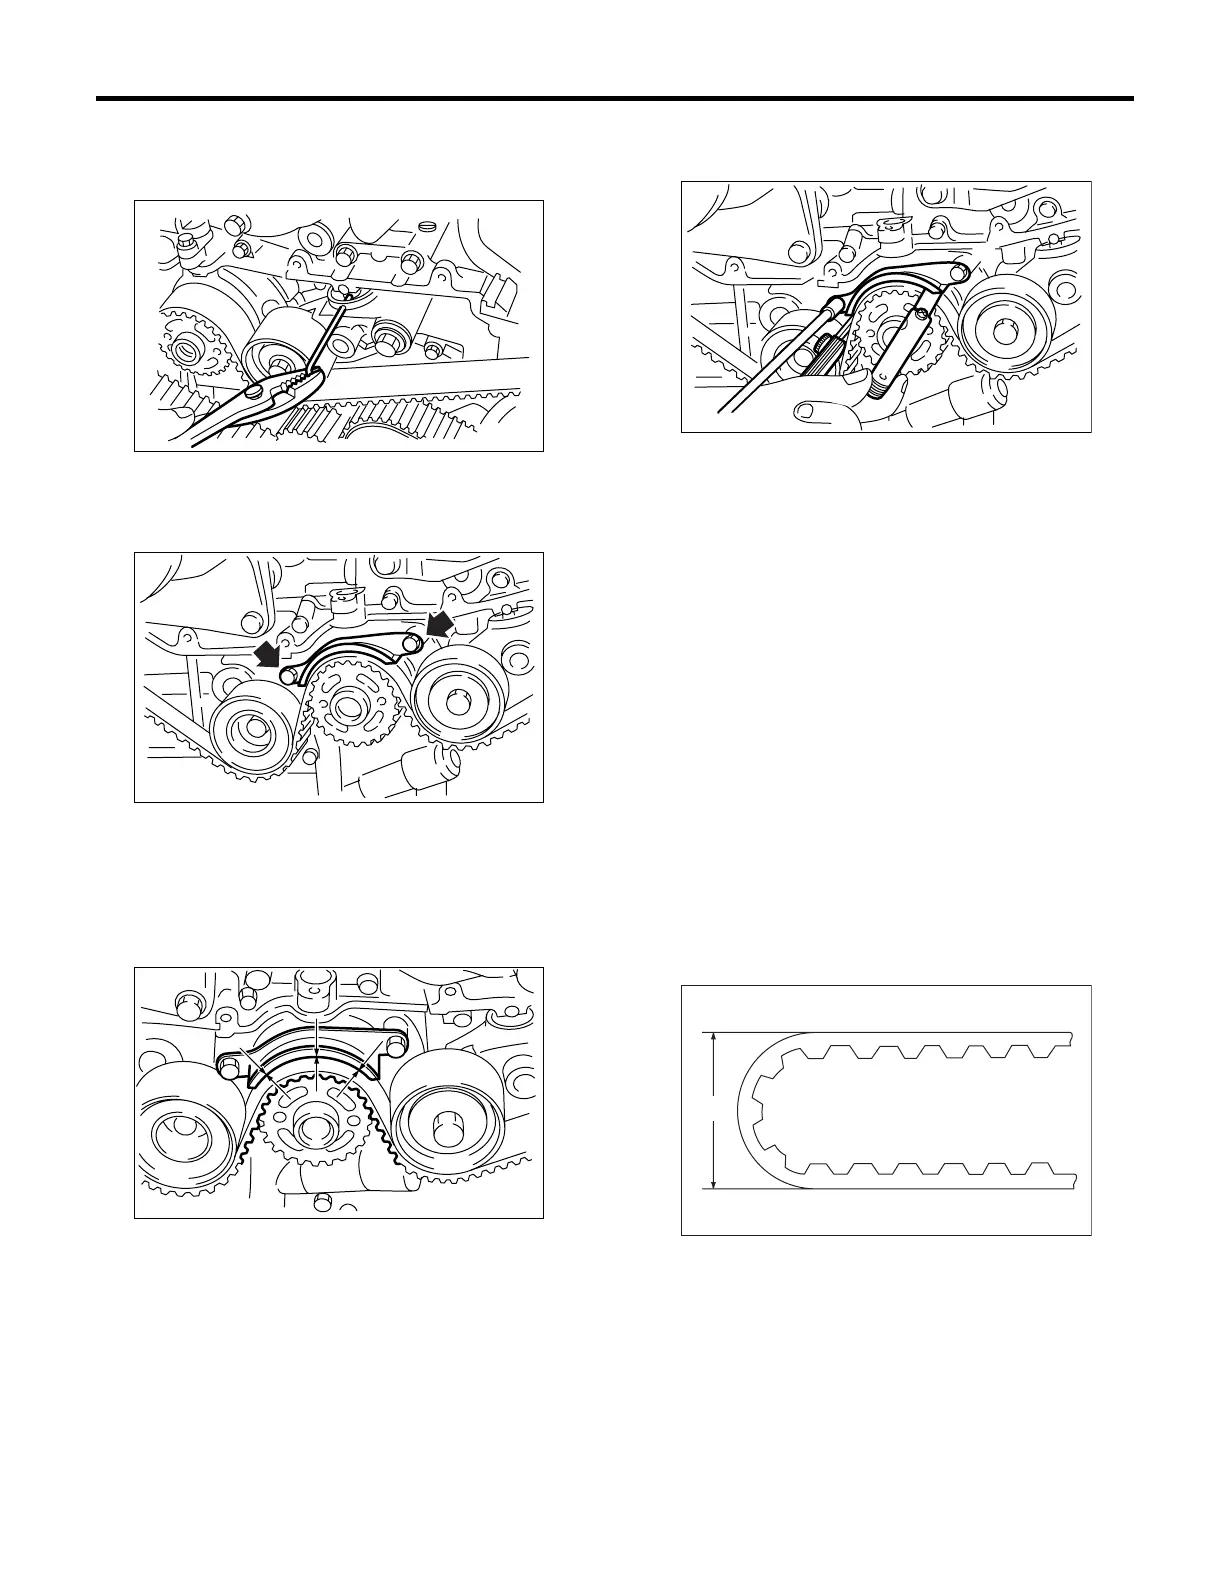
1) Check the timing belt teeth for breaks, cracks,
and wear. If any fault is found, replace the belt.
2) Check the condition of back side of belt; if any
crack is found, replace the belt.
CAUTION:
• Be careful not to let oil, grease or coolant
contact the belt. Remove quickly and thorough-
ly if this happens.
• Do not bend the belt sharply.
Bending radius: h
60 mm (2.36 in) or more
2. AUTOMATIC BELT TENSION ADJUST-
ER
1) Visually check oil seals for leaks, and rod ends
for abnormal wear or scratches. If necessary, re-
place faulty parts.
2) Check that the adjuster rod does not move when
a pressure of 294 N (30 kgf, 66 lb) is applied to it.
This is to check adjuster rod stiffness.
ME-00245
ME-00230
ME-00246
ME-00247
ME-00248
h
 Loading...