2-20
0: Open the heat shrink oven lid and the heat shrink oven clamps.
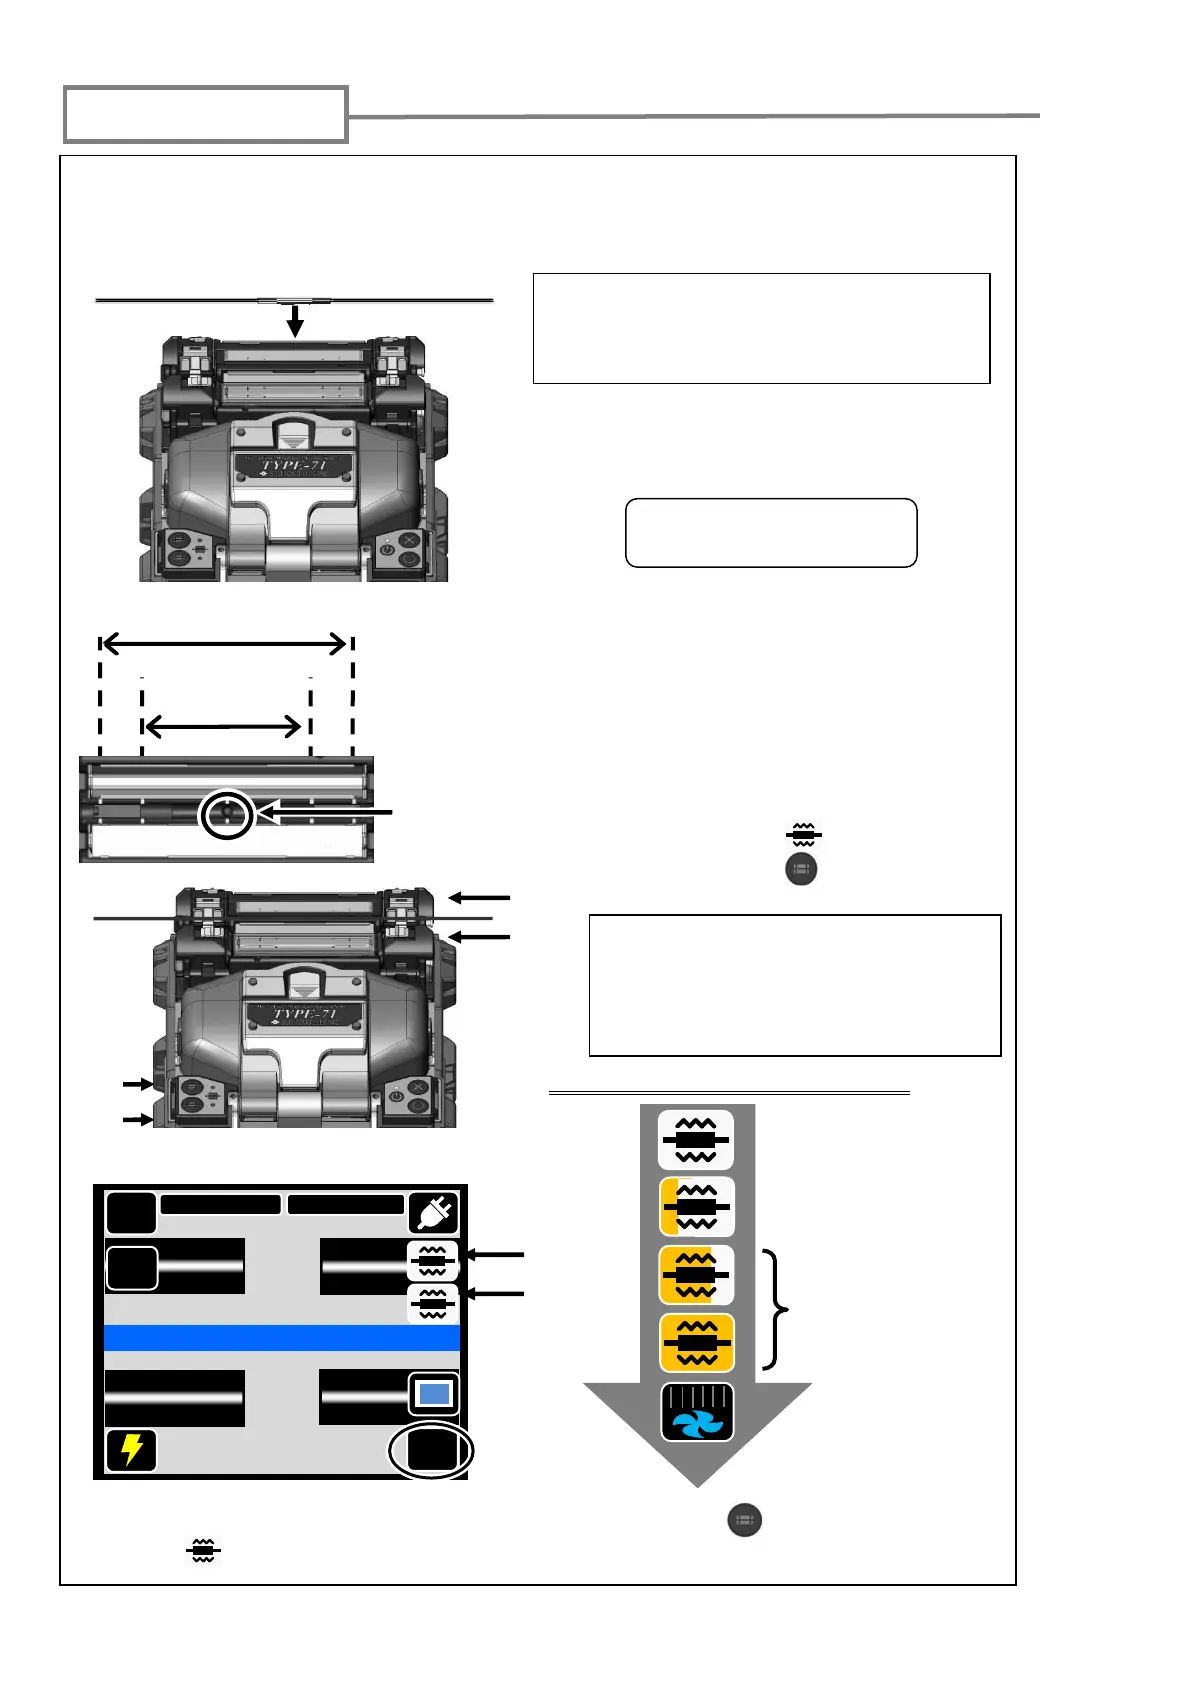
Open the hood and the fiber coating clamps to release the spliced fiber.
1: Make sure that the fiber protection sleeve is centered over the spliced portion of
the fiber.
•Do not twist the fiber.
•Do not flex the fiber.
3: The 2 heat shrink oven clamps and
the heat shrink oven lid are closed.
The applicable fiber protection sleeves
vary depending on the cleave length. For
more information, refer to page 1-4.
Splice protection
When lowering the fiber onto the heat
shrink oven, use the markings on the
heat shrink oven as a reference.
2: While maintaining a slight tension on
the fiber end, lower the fiber onto the
heat shrink oven and push down.
If Auto start heating is set to ON, the
heating operation is automatically
started when the fiber is placed into
the heat shrink oven.
40mm protection
sleeve
Marking for the center of
the heat shrink oven
4: Touch “heat” icon ( ) on the screen
or press heat key ( ).
The heat cycle is started.
Rear
Front
Rear
Front
If you would like to cancel the heating process, press the (HEAT) key or touch
“heat” ( ) again.
Ready
The heat icon changes as follows.
Rear
Front
MENU
SM G652 Std.
60mm 0.25
Start
Ready
X/Y
DISP
Before heating
Heating started
Heating advanced
Cooling
60mm protection sleeve