35
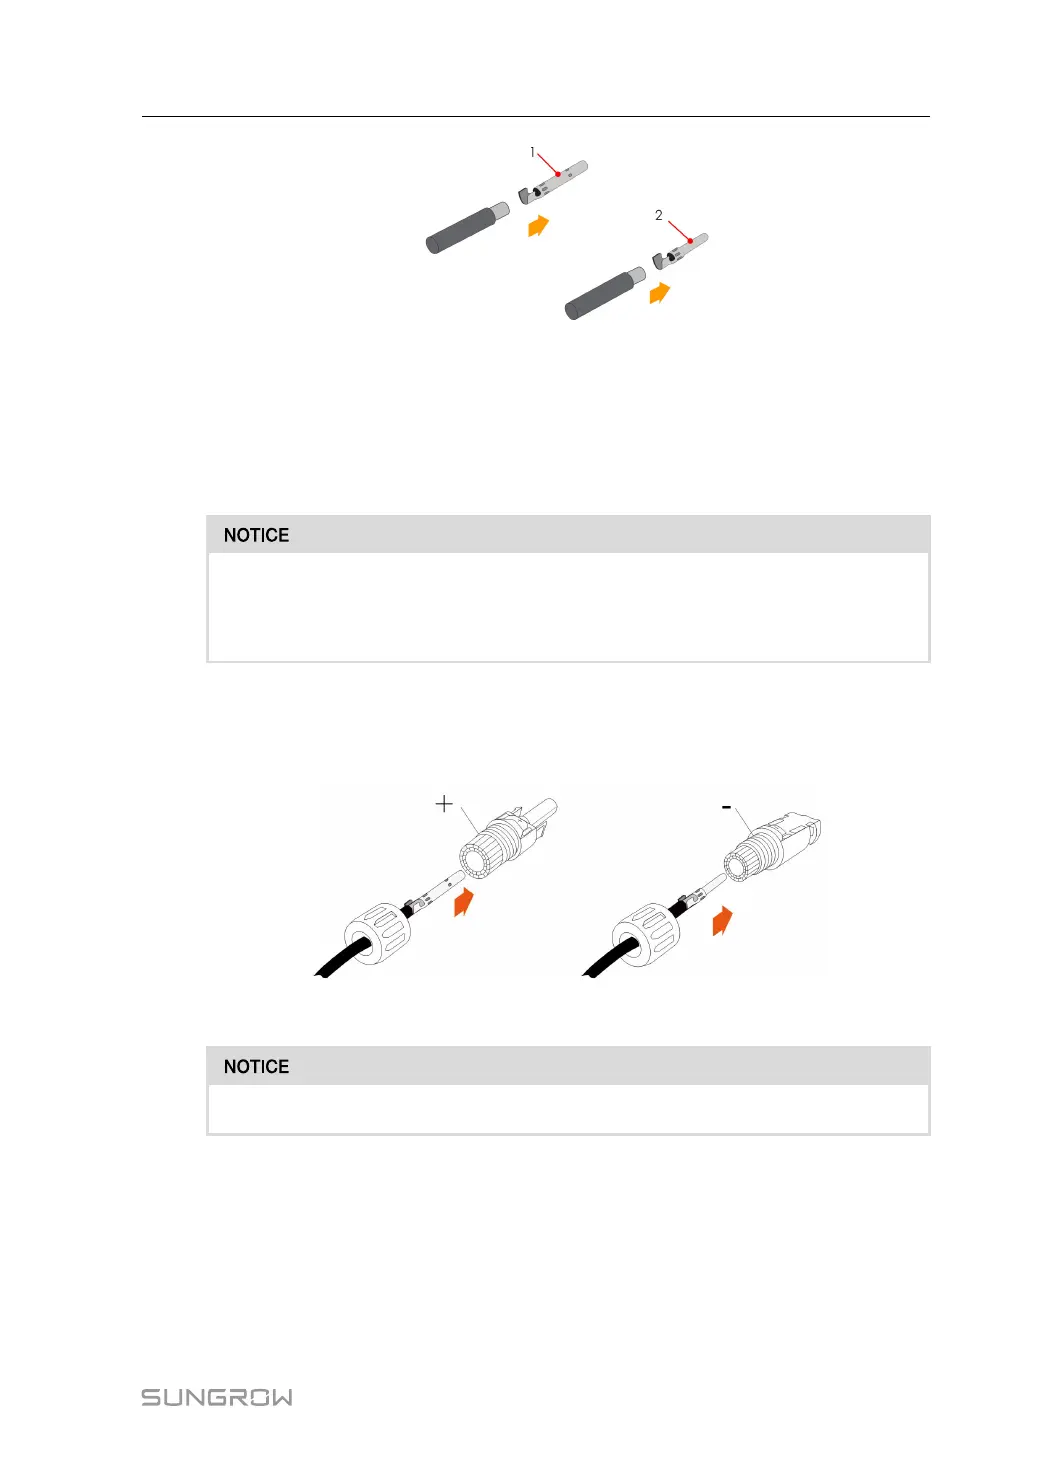
1: Positive crimp contact 2:Negative crimp contact
Step 3 For some countries such as Australia where the DC protection cover delivered
separately need to be installed on site, please firstly lead the PV cables through the
waterproof terminal on the DC protection cover before assembling the connector. See
the guidance with the DC protection cover for details.
PV cables with connectors cannot go through the waterproof terminal on the
DC protection cover. Rework may cause damage to the connectors, which will
not be covered by the warranty.
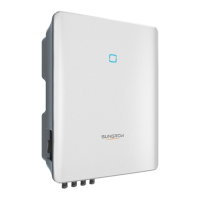
Step 4 Lead the cable through cable gland, and insert into the insulator until it snaps into place.
Gently pull the cable backward to ensure firm connection. Tighten the cable gland and
the insulator (torque 2.5 N.m to 3 N.m).
Step 5 Check for polarity correctness.
The inverter will not function properly if any PV polarity is reversed.
-- -- EEnndd
5.6.3 Installing the PV Connectors
Step 1 Rotate the DC switch to "OFF" position.
User Manual 5 Electrical Connection