23
▶ Method
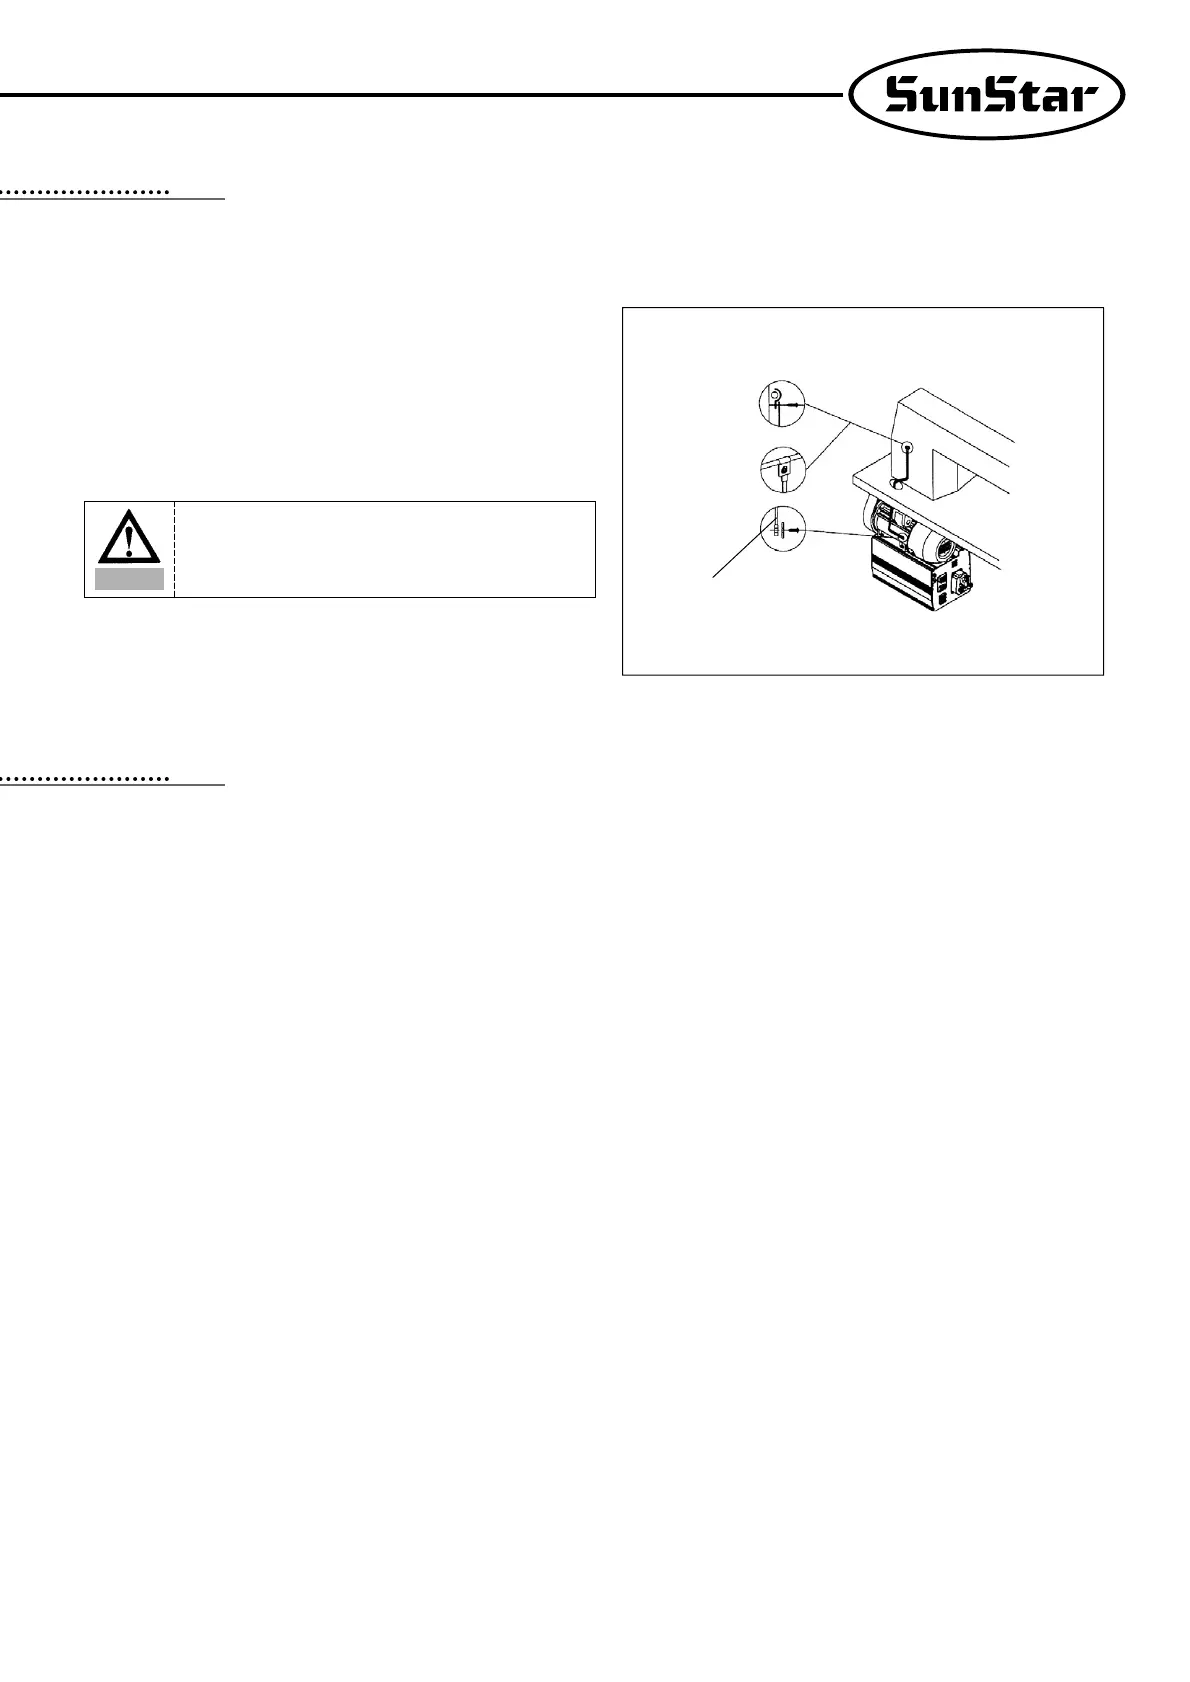
Connect the motor and sewing machine using the ground wire
(green, green/yellow) as shown in the figure. Make sure that the
factory-connected ground wire between the controller box and
motor is securely in place.
CONNECTION THE EARTH WIRE OF THE SEWING MACHINE AND MOTOR
66
1) Before the power is on...
① Make sure that the incoming voltage is in accordance with that shown in the name plate of the Control box.
② Check whether the following connectors are connected.
•Connector for incoming AC power source
•Connector for motor power
•Connector for motor encoder
•Connector for position detector
•Connector for others (option, knee-lift, program unit etc.)
③ Check to see whether the belts are in touch with the wiring.
④ Check the tensile strength of the belts.
⑤ Check to see the fixing nuts for pulley are tightly fastened.
⑥ Check whether the sewing machines are right kinds (Chain Stitch S/M, Lock Stitch S/M)
⑦ Check the rated voltage for Solenoid (Refer to “How to change the electric voltage supplied for Solenoid”))
2) After the power is on...
① Check whether the lamp for the position detector is on. (Except in the case of built-in position detector)
② Check whether the program unit is working.
③ Check the direction of rotation of the Sewing Machine.
•In case the direction of rotation is not right, action shall be taken to change set it right, referring to “the methods of changing the
program and the list of changing functions”(N. 65 in Group “A”)
④ Check to see whether there are abnormal heat, smell or noise nearby.
•In case there are, turn the power off and call our regional office.
THINGS TO BE CHECKED AFTER INSTALLATION
77
Ground Wire(Green)
Caution
Failure to ground the motor can cause abnormal
operations, such as overspeed rotation or unwanted
stitching.