51
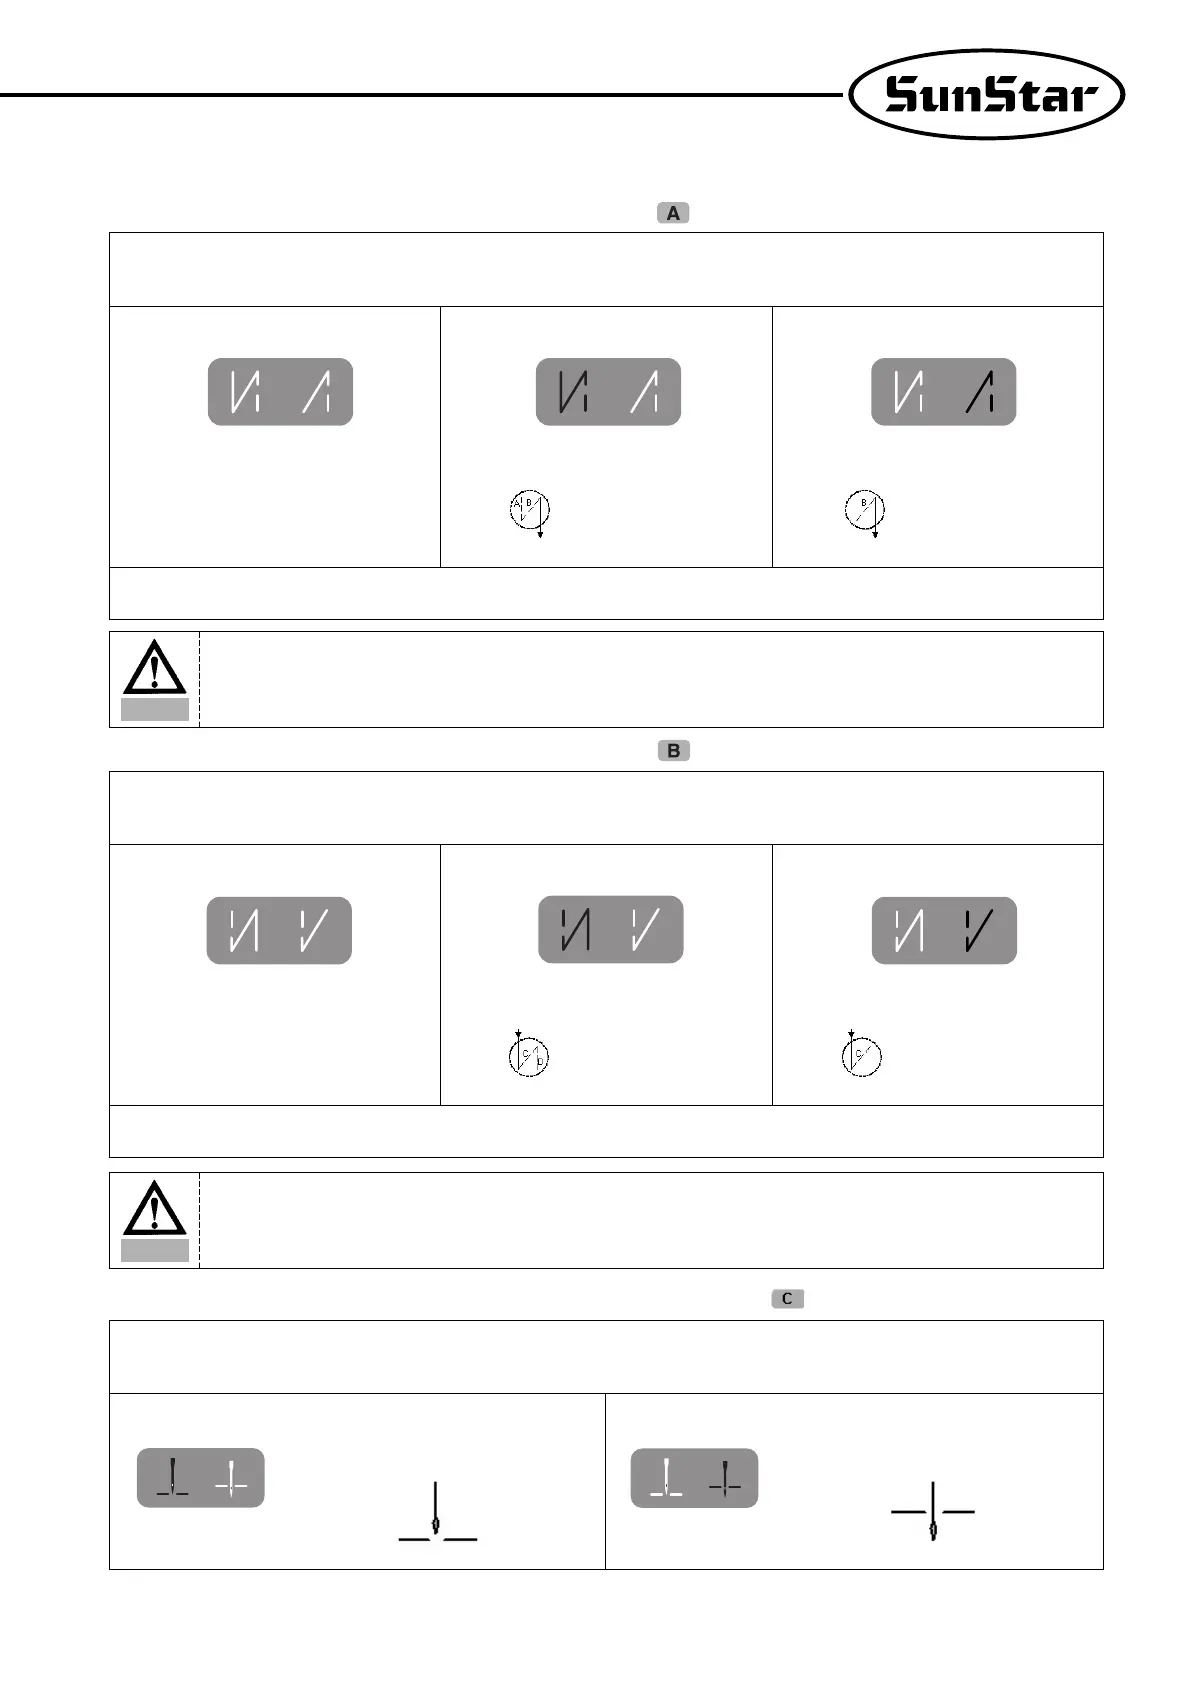
(2) Programming the Start B/T Sewing Conditions with Button
This button is used when the user wants to prevent threads from loosening at the end of the sewing work. If the user presses this button
in sequence, the location on the lights will change as shown in the figures below. This button offers the following three functions.
Use the A, B button to program the number of B/T stitches in the 4-digit displayer.
When sewing starts, B/T sewing does not
operate.
When sewing starts, B/T sewing can be done
with the button.
When sewing starts, B/T sewing can be done
with the button.
(3) Programming the Start B/T Sewing Conditions with Button
This button is used when the user wants to prevent threads from loosening at the end of the sewing work. If the user presses this button
in sequence, the location on the lights will change as shown in the figures below. This button offers the following three functions.
Use the C, D button to program the number of B/T stitches in the 4-digit displayer.
When sewing starts, B/T sewing does not
operate.
(4) Programming the Needle Plate Position when Sewing Stops with Button
When you turn the power on, one of needle plate's up stop and down stop lights in the simple operation unit will always be on. If you
press the button you can select the stopping location.
If the machine stops while sewing, the needle
plate makes an up stop.
If the machine stops while sewing, the needle
plate makes a down stop.
When sewing starts, B/T sewing can be operated
with the button.
When sewing starts, B/T sewing can be operated
with the button.
Caution
Be aware that if the end B/T stitch number is set to '0' in the 4-digit displayer, the user will be unable to operate start
B/T sewing.
Caution
Be aware that if the end B/T stitch number is set to '0' in the 4-digit displayer, the user will be unable to carry out start
B/T sewing.
 Loading...