IntelliShot & FlexoShot: Operations Manual Page 14
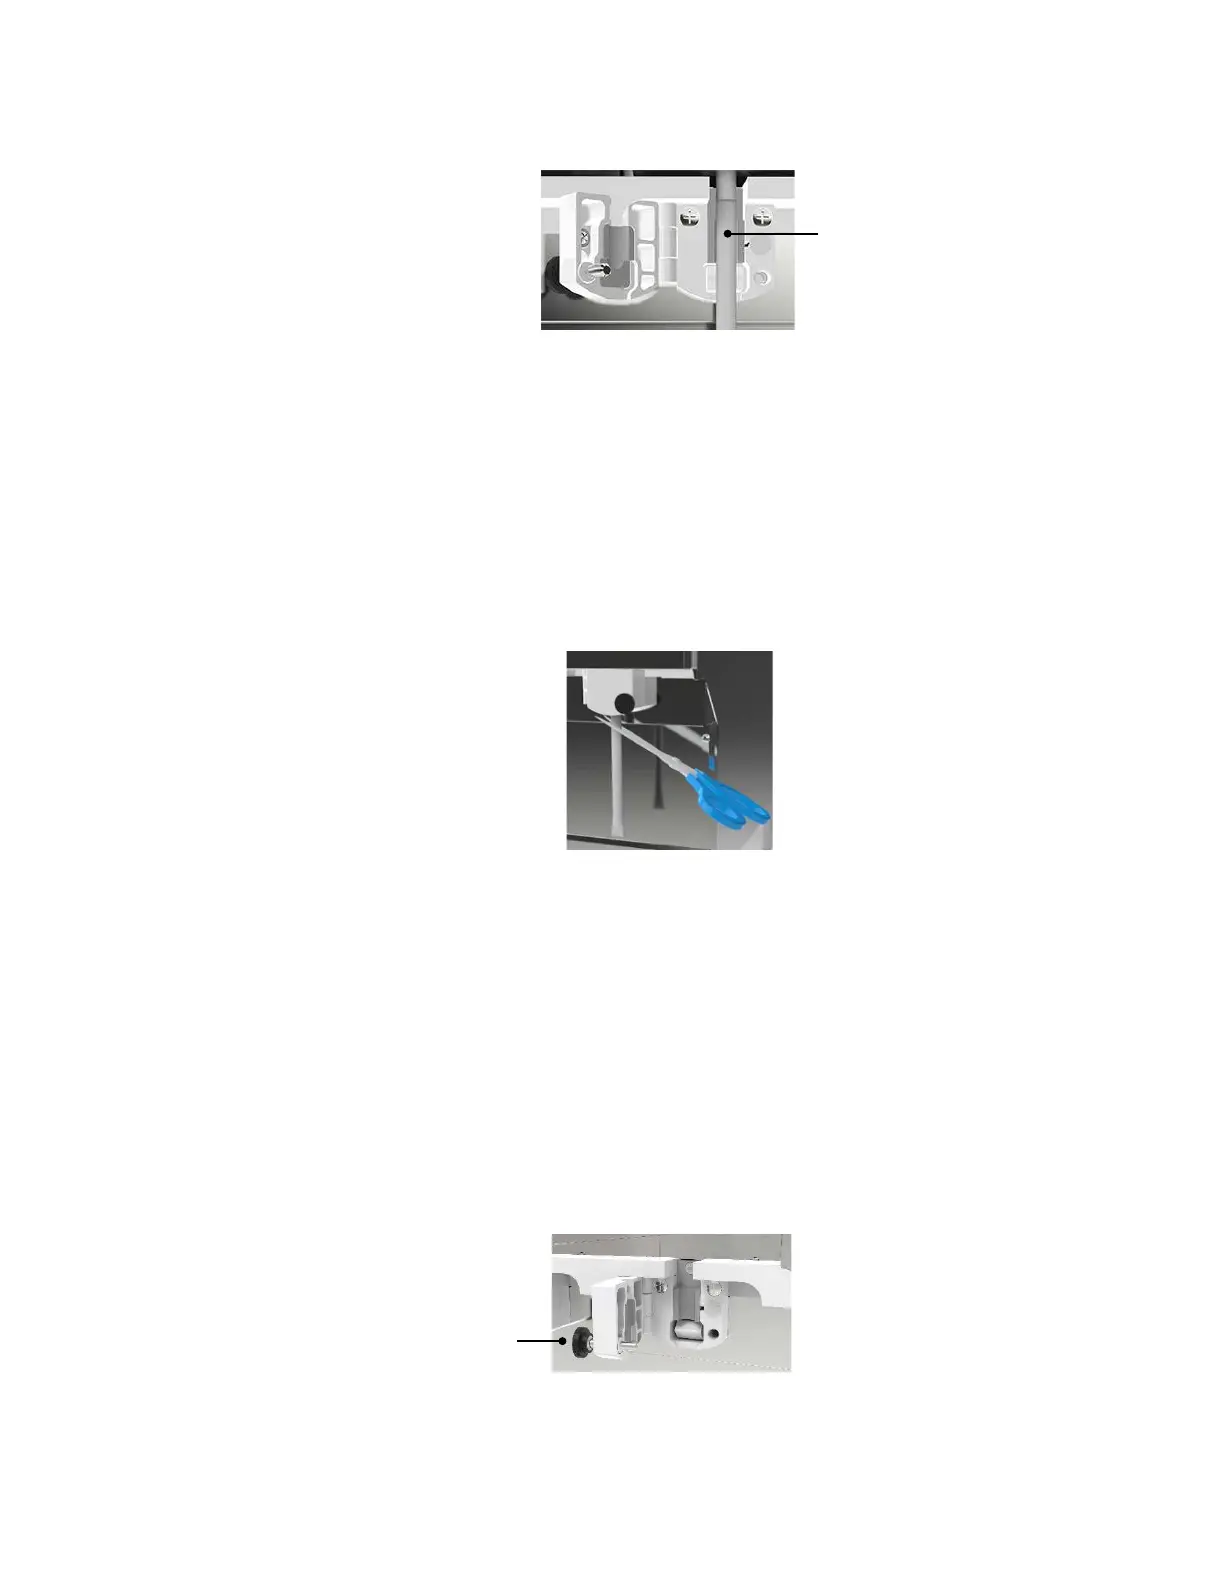
6. Centre the tube in the valve opening. The tube should not be twisted, kinked, or pinched.
If using a 10-inch tube remove and discard the plastic covering if present.
Figure 23: Correct tube placement
7. Close the valve door and turn the thumbscrew clockwise until the valve door is secure. Do
not over-tighten the thumbscrew.
8. Open the product tank flip lid.
9. Fill the tank with prechilled product.
10. Close the product tank flip lid.
11. Close the dispenser flip lid and dispenser door.
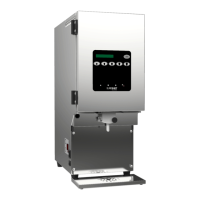
12. If using a 10-inch tube, use sanitized, sharp scissors to carefully cut the tube at a 45-
degree angle to a maximum length of 5/8-inch (1.5 cm) from the bottom of the valve door.
Discard the cut portion of the tube.
Figure 24: Cutting the tube
FLEXOSHOT Non-Portion-Control, Non-Fill-in-Place (without Dispenser Flip Lid)
1. Using sanitized, sharp scissors, cut a SureShot 10-inch (25.4 cm) crimped tube in half
before installing it onto the product tank. There should be no jagged edges. Save the
other half of the tube for another tank.
2. Install the tube onto the spout of a clean, sanitized tank by pushing the end of the tube
fully onto the spout.
3. Open the product tank flip lid.
4. Fill the tank with prechilled product.
5. Close the product tank flip lid.
6. Open the dispenser door.
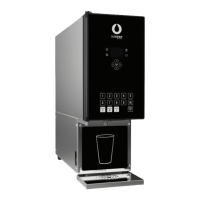
7. Open the valve by turning the thumbscrew counterclockwise.
Figure 25: Open valve door