Email Messaging
July 29, 2002 T-Mobile Sidekick Owner’s Manual 104
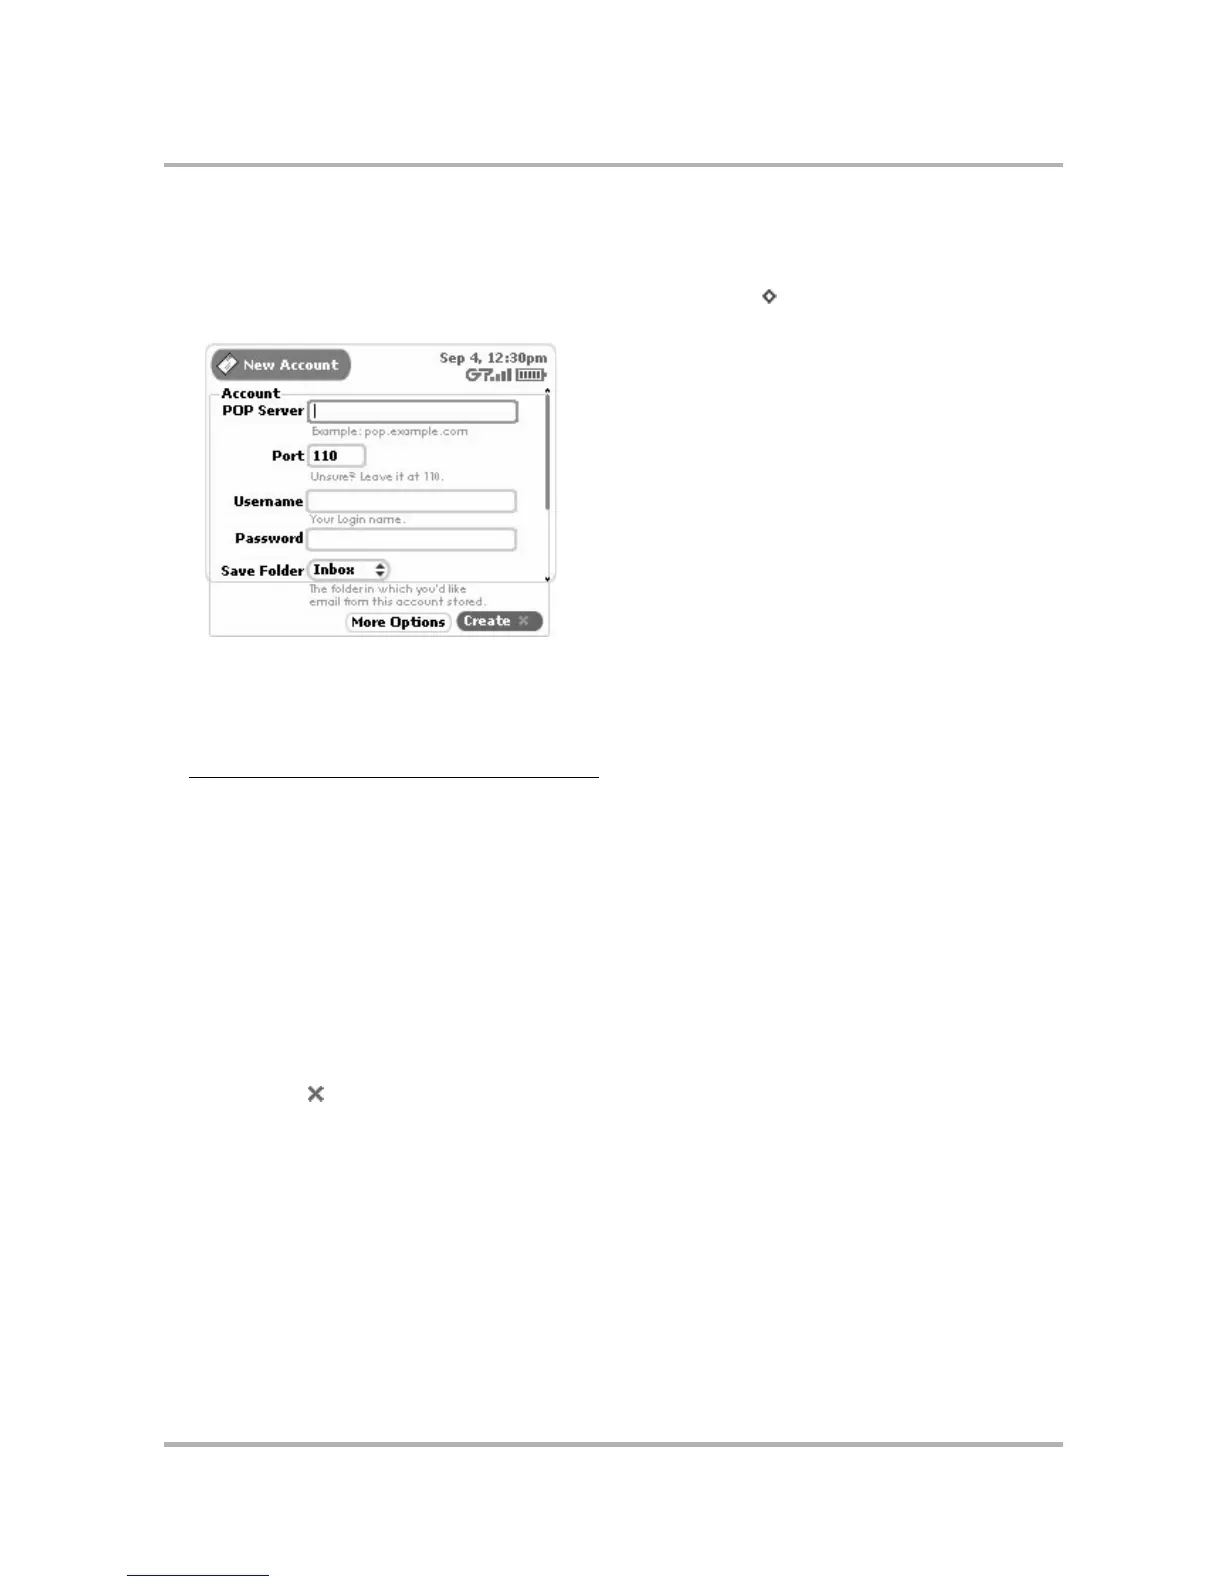
Add a POP3 Account
1 From the Jump screen select Email, then open the menu and select Accounts.
2 From the Accounts screen, open the menu and select New Accounts [ + N]. The New Accounts screen
opens:
3 Complete the POP Server field.
This is the name of your email POP server. If you don’t know the name of your email POP server, your email
provider will be able to tell you, or you can reference the table below for samples. If you have a POP email
account through your ISP, contact them for more assistance.
4 Complete the Port field. Unless your email provider has specified otherwise, leave the port at 110.
5 Complete the Username field. This is the name you use to log in to your POP3 account.
6 Complete the Password field. This is the password you use for your POP3 account.
7 Select a Save Folder. Open the pop-up menu by pressing the wheel, then scroll to highlight the folder in
which you would like all retrieved mail to be placed. Press the wheel to select it.
Tip: You can create a folder specifically for this purpose; read
Manage Email Folders
on page 107 for
instructions on creating email folders. If you do create a new folder for this account later, you can edit this
account and change the Save Folder. Read more in
Edit an Email Account
on page 105.
8 Select Create to have the system set up the POP email account so you can view it on your device and the
Email Desktop Interface.
Select the More Options button to open the Edit Account screen to set options such as:
• Collect/not collect email from the account.
• Remove retrieved email from POP server as it’s fetched to device or Email Web interface.
• From Name/Address
•Reply-To Name/Address
Read about using the setting these options in
Edit an Email Account
on page 105.
Web Email Provider POP Server
Yahoo
®
Mail
pop.mail.yahoo.com
Mail.com pop1.mail.com
Softhome.net mail.SoftHome.net