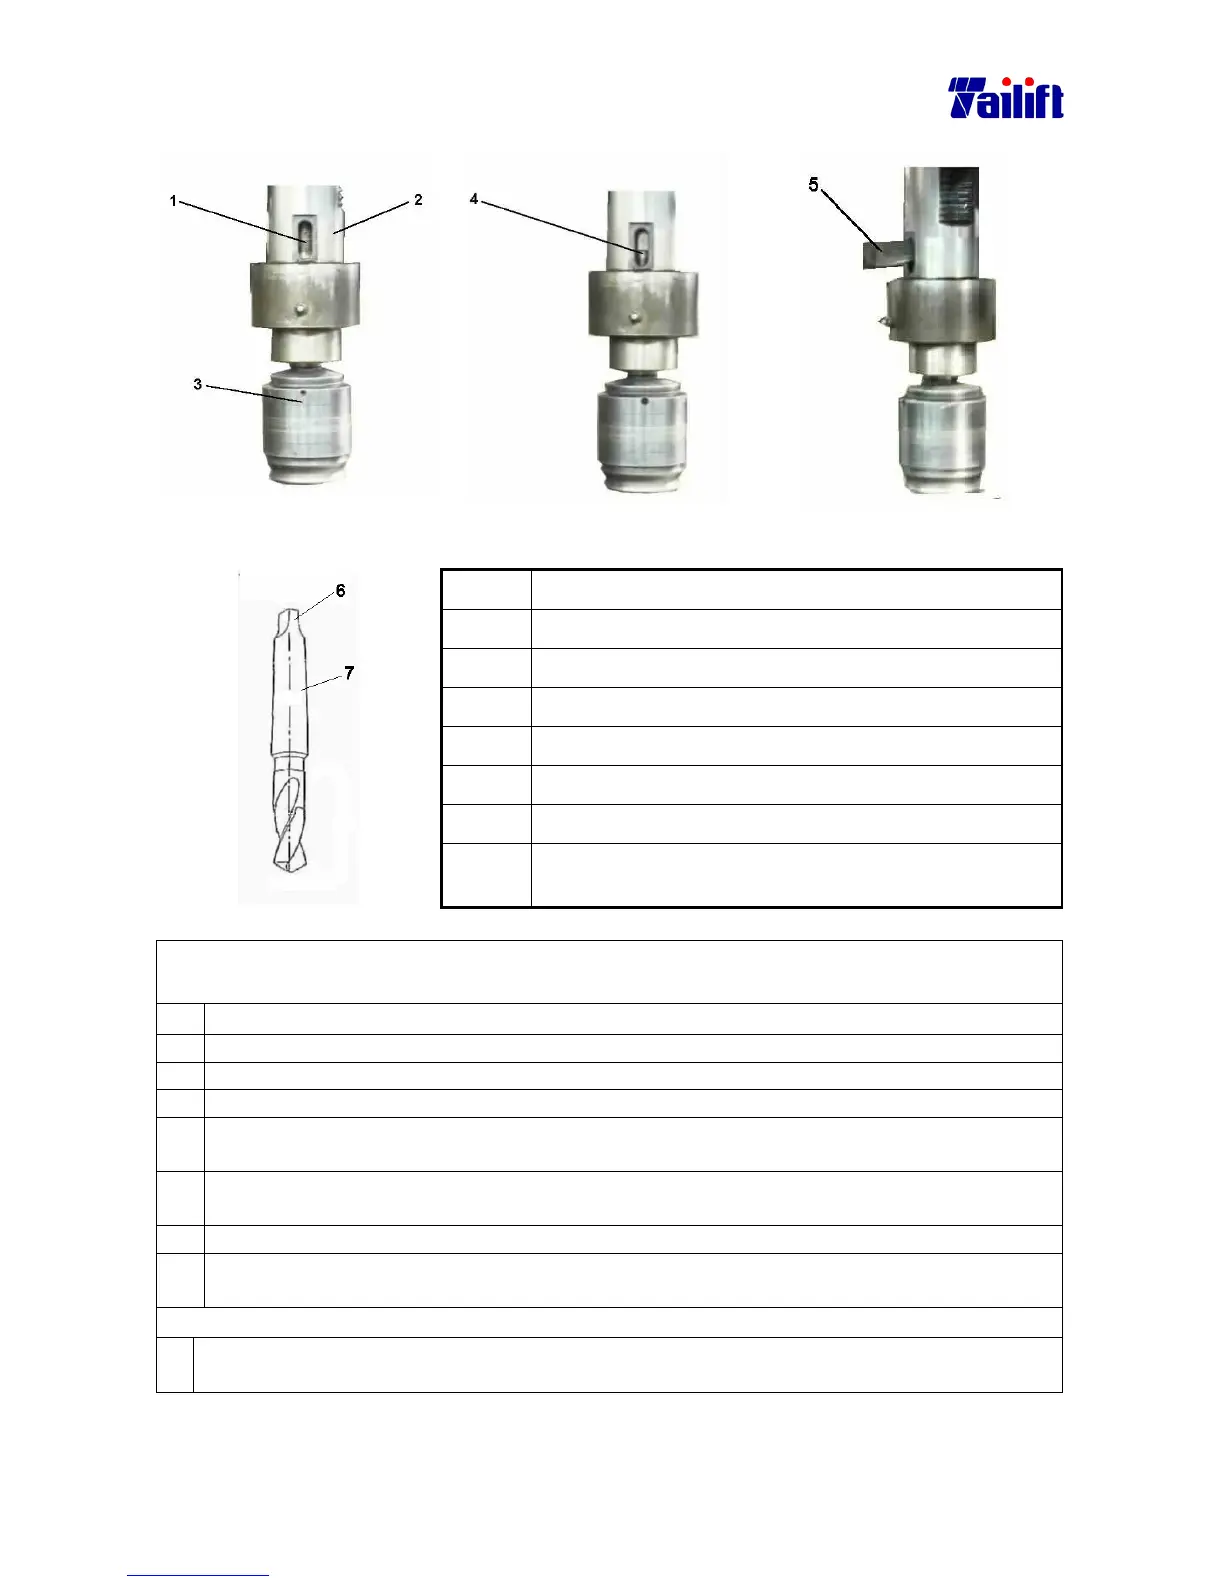
Fig. a. Fig. b. Fig. c.
No. Term
(1) Revolving shaft.
(2) Shaft bushing
(3) Speedy drill bit clamp
(4) The stem for the speedy drill bit clamp
(5) Pin for releasing drill bit
(6) Drill shaft end
(7) Drilling shaft
Fig. d.
Disassemble the tapered handle drill bit and the drill head clamp as the
following way:
a. Move away the drilling bit or lift the gearbox to the utmost point.
b. Power off machine.
c. Put on gloves.
d. Insert a thick wood plate into the underneath of the drill bit and the drill bit head.
e. Rotate the feed trip lever clockwise and have the spindle descend about
150 to 200 mm. As fig. a.
f. Rotate the revolving shaft from the bushing till that the drill shaft end and drill shaft
are visible from the hole of releasing drill bit. as fig. b.
g. Insert the pin for releasing the drill bit into the hole, as fig. c.
h. Hit the end of the pin for releasing drill bit, using plastic hammer or copper bar, till the
drill bit and the drill bit clamp fall onto the wood plate.
Precaution:
::
:
The distance between the thick wood plate, drill bit and the end of the drill bit clamp is
about 30 mm.